10
MOUNT DRAIN
SADDLE AT
EITHER
LOCATION
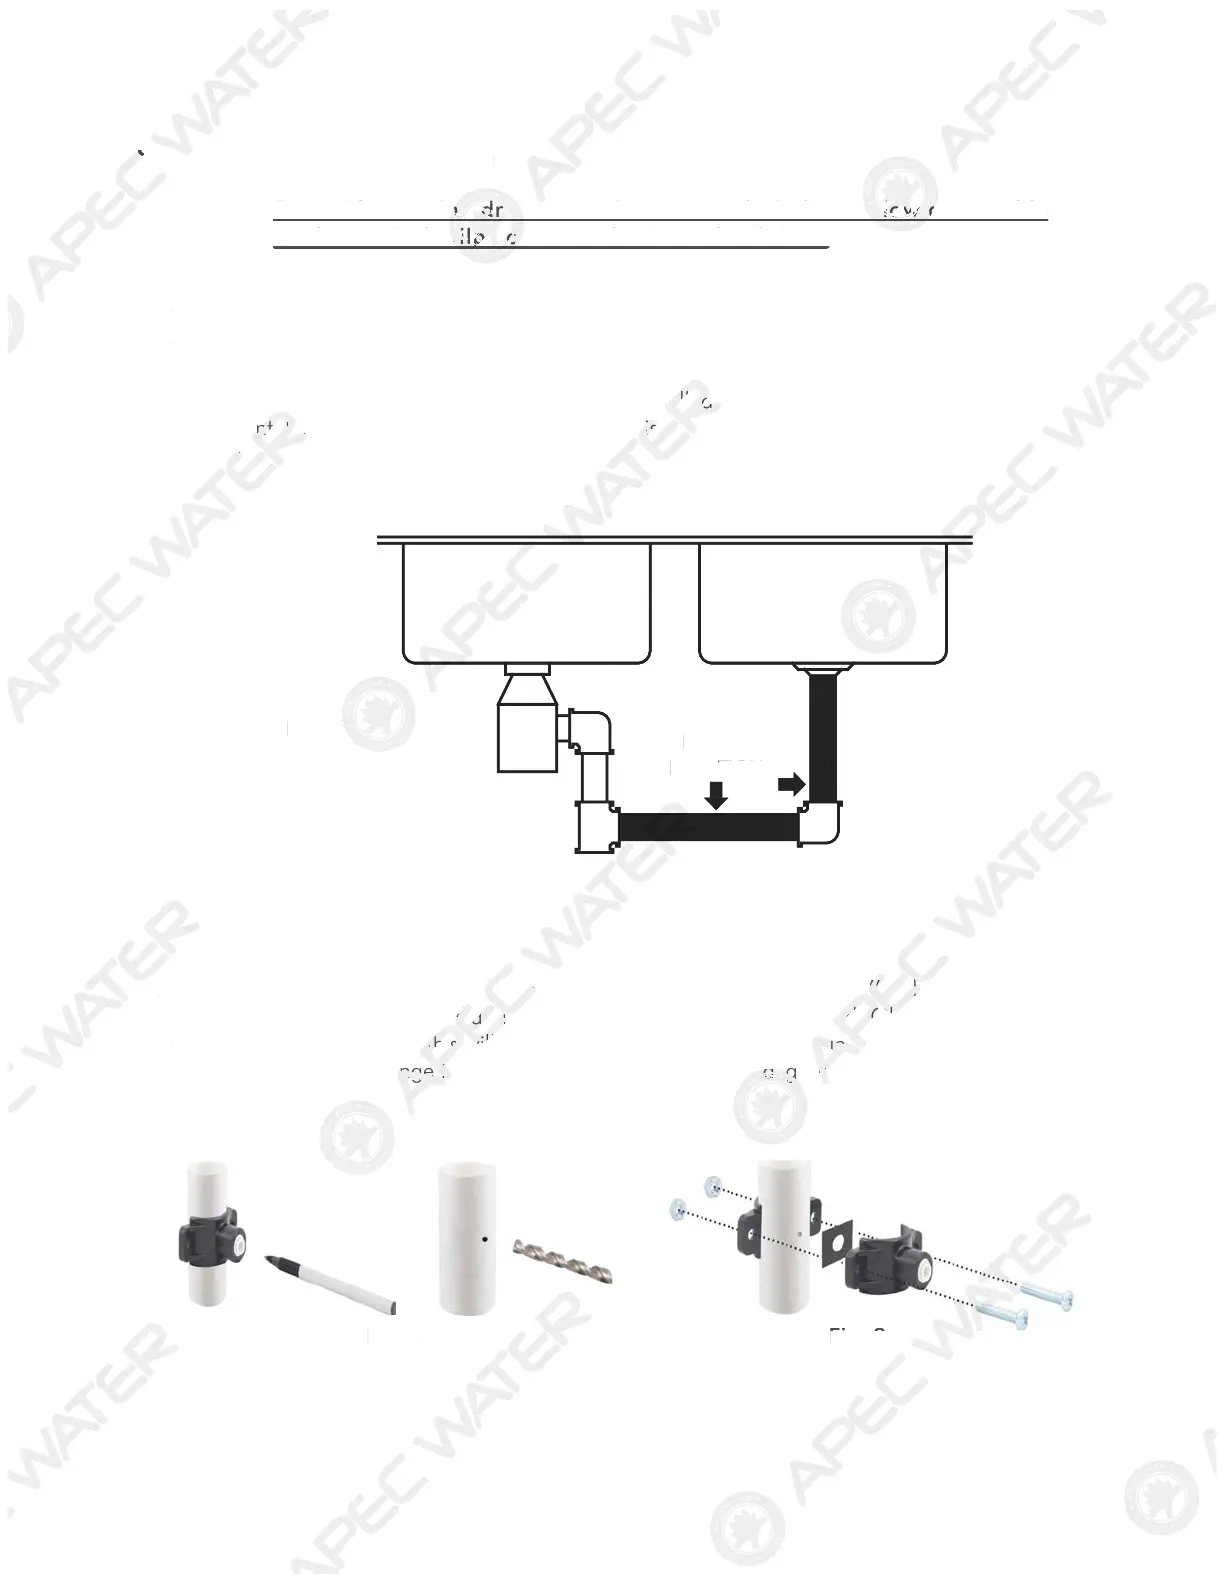
Step 2: Drain Saddle Installation
Note: To avoid annoying drainage noise, mount drain line as low as possible
on the vertical tailpiece, or on horizontal tailpiece.
There is constant water pressure “packed” inside the RO system which blocks the waste water
from backing-up into the system. So the waste water is “forced-drained”, not “gravity-drained”.
1. See Fig.7. The drain saddle assembly should be installed above the trap and on the vertical
or horizontal tailpiece . To reduce the drainage noise, mount the drain line as low as possible
above the trap, or on the horizontal tailpiece.
2. See Fig.8. Mark the position of the hole on the drain pipe and drill a 1/4’’ hole through one
side of the drain pipe . There is a piece of self-adhesive sponge provided. Glue this sponge
to the inside of the saddle, this will cushion any gap between the saddle and the pipe. Make
sure the hole on the sponge is thoroughly punched out, and is aligned to the hole on the
saddle.
Fig. 7
Fig. 8 Fig. 9
1
UNT DRAI
ADDLE A
EITHER
: Drain Saddle Installatio
ote
nage noise, mount drain line a
or on horizontal tailpiece.
There is constant water pressure “packed” inside the RO system which blocks the waste wate
rom backing-up into the system. So the waste water is “
orced-drained”, not “gravity-drained”.
See Fig.7. The drain saddle assembly should be in
ove the trap and on the vertical
r horiz
ilpiece . To reduce the drainage n
unt the drain line as low as possibl
abov
ap, or on the horizontal tailpiece.
.
F
g.8. Mark the position o
le on the drain pipe and drill a 1
through one
ide o
the drain pipe . There
e o
sel
-adhesive sponge prov
.
ue this sponge
to the inside o
the saddle,
cushion any gap between the s
d the pipe. Make
ure the hole on the s
thoroughly punched out, and
to the hole on the
l
.
F
g.
F
g. 8
g.
 Loading...