Do you have a question about the Apollo Ultrasonic Visual and is the answer not in the manual?
Chart for setting receiver switches based on tank height for multi-switch settings.
Match receiver to transmitter for a unique code. Top bar flashes.
Calibrate transmitter for tanks over 1m. Bars increase on screen.
Procedure for overrunning desired height settings during calibration.
Resetting the unit if incorrect bars were reached and separated.
Fitting transmitter into tanks with pre-drilled 30/32mm holes.
Drilling a hole and fitting transmitter into tanks without pre-drilled holes.
Display behavior during power interruption or reconnection.
Standard display indications for tank fill levels.
Indicates no radio signal or incorrect matching procedure.
Indicates no ultrasonic echo from fuel surface.
Indicates low battery warning in the transmitter.
Steps for removing and replacing the transmitter battery.
No need to re-match after power cycle or socket change.
Details on tank depth, communication distance, power supply, and operating temperature.
Contact details and website for product assistance and information.
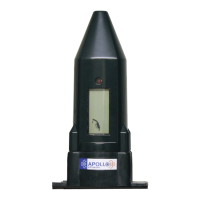
The Apollo Visual Oil Level Monitor is a sophisticated system designed to accurately measure and display the level of oil in storage tanks. It consists of two main components: a receiver, typically located indoors, and a Visual Transmitter, which is fitted to the oil tank itself. This dual display system provides convenience for both the homeowner and the oil delivery person, as the level can be read directly at the tank during refilling.
The primary function of the Apollo Visual is to monitor oil levels in tanks and display this information in 10 graduations of the tank height. The system uses ultrasonic technology to measure the oil level.
First Stage Matching (Receiver to Transmitter):
Second Stage Matching (Calibration for Tanks > 800mm and > 1 Meter): For tanks taller than 1 meter or 800mm, the matching procedure continues to a second stage for calibration.
Second Stage Mismatch Handling: If the desired number of bars is overshot during the second stage matching, the user should continue holding the receiver and transmitter in the matching position until all ten bars flash, the Visual reverts to a blank screen, and then the flashing nozzle icon appears again. The process is then repeated until the desired number of bars is shown. If an incorrect number of bars was reached and the units were separated, the entire matching procedure can be reset by starting from the beginning.
| Brand | Apollo Ultrasonic |
|---|---|
| Model | Visual |
| Category | Test Equipment |
| Language | English |