72
|
Chapter 10
What You’ll Be Using
To set up an Internet connection, you need to use the following:
The Settings app
Setting Up a Wi-Fi Connection
No matter which type of iPad you have, you can always connect to the Internet
through a Wi-Fi connection. Many public places offer free Wi-Fi connections, and
your home or office may have a Wi-Fi network.
To set up a Wi-Fi connection with your iPad, follow these steps:
1. From the Home screen, tap Settings. The Settings screen appears.
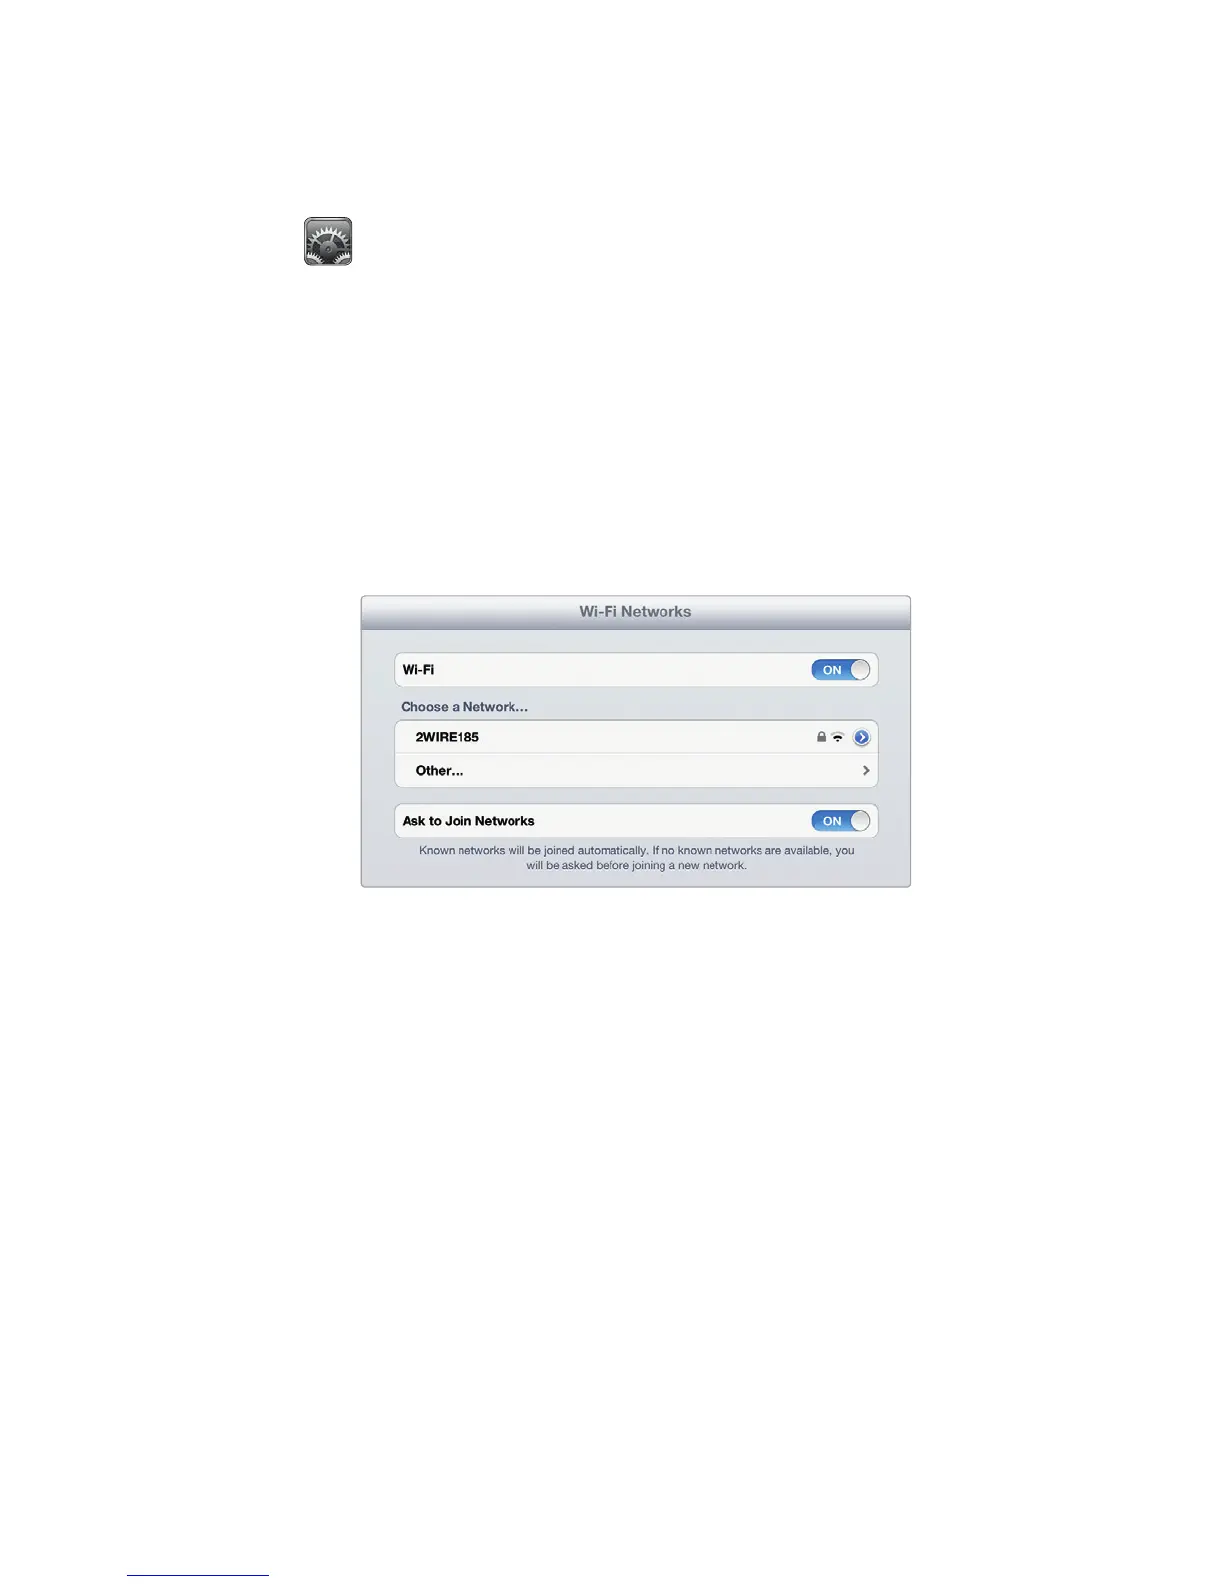
2. Tap Wi-Fi. The Wi-Fi Networks settings screen appears, as shown in
Figure10-1.
3. (Optional) Tap the Ask to Join Networks on/off switch. When turned on,
your iPad always asks for permission before accessing a Wi-Fi network. This
can let you see exactly which Wi-Fi network your iPad may be accessing.
It’s usually a good idea to know exactly what network you’re connecting to,
especially when you’re travelling.
4. Tap the Wi-Fi on/off switch so that the switch reads ON. Your iPad tries to
recognize any Wi-Fi networks. If there are multiple Wi-Fi networks avail-
able, a window lists them all and you can tap the one you want to use. If the
Wi-Fi network is password-protected, a Password screen appears. (If your
iPad can’t recognize a Wi-Fi network that you know exists, you’ll need to tap
Other and type in Wi-Fi settings yourself.)
5. (Optional) Type the password to access the Wi-Fi network and tap the Join key
on the virtual keyboard. Your iPad connects to your chosen Wi-Fi network.
FIGURE 10-1: The Wi-Fi Networks settings screen
lets you define and choose a Wi-Fi network to use.