TABLE OF CONTENTS
SPECIFICATIONS . . . . . . . . . . . . . . . . . . . . . . . . . . . . . . . . . . . . . . . . . . . . . . . . . . . . 2
SAFETY INSTRUCTIONS . . . . . . . . . . . . . . . . . . . . . . . . . . . . . . . . . . . . . . . . . . . . . 3
WHOLE HOME DEHUMIDIFICATION. . . . . . . . . . . . . . . . . . . . . . . . . . . . . . . . . 3
OPERATING THE DEHUMIDIFIER. . . . . . . . . . . . . . . . . . . . . . . . . . . . . . . . . . . . . 4
Energy Savings Tips . . . . . . . . . . . . . . . . . . . . . . . . . . . . . . . . . . . . . . . . . . . . . 4
MAINTENANCE . . . . . . . . . . . . . . . . . . . . . . . . . . . . . . . . . . . . . . . . . . . . . . . . . . . . . . 5
Cleaning the Filter. . . . . . . . . . . . . . . . . . . . . . . . . . . . . . . . . . . . . . . . . . . . . . . 5
Cleaning the Drain . . . . . . . . . . . . . . . . . . . . . . . . . . . . . . . . . . . . . . . . . . . . . . 5
PREPARING THE UNIT FOR INSTALLATION . . . . . . . . . . . . . . . . . . . . . . . . . . 6
Repositioning the User Interface for the Application . . . . . . . . . . 7
Installing the Duct Collars . . . . . . . . . . . . . . . . . . . . . . . . . . . . . . . . . . . . . . 7
INSTALLING THE DEHUMIDIFIER. . . . . . . . . . . . . . . . . . . . . . . . . . . . . . . . . . . . . 8
Dehumidier Location. . . . . . . . . . . . . . . . . . . . . . . . . . . . . . . . . . . . . . . . . . . 8
Leveling and Raising the Dehumidier . . . . . . . . . . . . . . . . . . . . . . . . . 8
Installing a Condensate Pan Under the Dehumidier. . . . . . . . . 8
Installing the Drain . . . . . . . . . . . . . . . . . . . . . . . . . . . . . . . . . . . . . . . . . . . . . . 9
INSTALLING DUCTWORK. . . . . . . . . . . . . . . . . . . . . . . . . . . . . . . . . . . . . . . . . . . . 9
Ducting the Dehumidier Inlet and Outlet
to the HVAC System . . . . . . . . . . . . . . . . . . . . . . . . . . . . . . . . . . . . . . . . . . . . 10
Ducting the Dehumidier Outlet to the HVAC System
with Dedicated Dehumidier Inlet Register . . . . . . . . . . . . . . . . . . . . 11
WIRING. . . . . . . . . . . . . . . . . . . . . . . . . . . . . . . . . . . . . . . . . . . . . . . . . . . . . . . . . . . . . 12
Wiring to the HVAC System . . . . . . . . . . . . . . . . . . . . . . . . . . . . . . . . . . . . 12
Wiring to External or Remote Controls . . . . . . . . . . . . . . . . . . . . . . . . 13
Wiring to a Float Switch . . . . . . . . . . . . . . . . . . . . . . . . . . . . . . . . . . . . . . . . 13
VENTILATION . . . . . . . . . . . . . . . . . . . . . . . . . . . . . . . . . . . . . . . . . . . . . . . . . . . . . . . 14
ZONING THE DEHUMIDIFIER . . . . . . . . . . . . . . . . . . . . . . . . . . . . . . . . . . . . . . . 15
Required Components. . . . . . . . . . . . . . . . . . . . . . . . . . . . . . . . . . . . . . . . . 15
INSTALLER SETUP. . . . . . . . . . . . . . . . . . . . . . . . . . . . . . . . . . . . . . . . . . . . . . . . . . . 16
Setting Up Remote Control –
Crawl Space/Sealed Attic. . . . . . . . . . . . . . . . . . . . . . . . . . . . . . . . . . . . . . .17
Setting up Ventilation . . . . . . . . . . . . . . . . . . . . . . . . . . . . . . . . . . . . . . . . . . .17
Setting up Zoning . . . . . . . . . . . . . . . . . . . . . . . . . . . . . . . . . . . . . . . . . . . . . . .17
Setting up External Control . . . . . . . . . . . . . . . . . . . . . . . . . . . . . . . . . . . . .17
Enabling DEH w/AC . . . . . . . . . . . . . . . . . . . . . . . . . . . . . . . . . . . . . . . . . . . . . .17
Applying an RH Offset. . . . . . . . . . . . . . . . . . . . . . . . . . . . . . . . . . . . . . . . . . .17
INSTALLER TEST MODE . . . . . . . . . . . . . . . . . . . . . . . . . . . . . . . . . . . . . . . . . . . . . 18
Dehumidication Only . . . . . . . . . . . . . . . . . . . . . . . . . . . . . . . . . . . . . . . . . 18
Zoning and/or Ventilation. . . . . . . . . . . . . . . . . . . . . . . . . . . . . . . . . . . . . . 18
STARTING UP THE UNIT AND SEQUENCE OF OPERATION. . . . . . . . . . 19
Using the Dehumidier Control Only . . . . . . . . . . . . . . . . . . . . . . . . . . 19
Using a Model 76 as a Remote Control . . . . . . . . . . . . . . . . . . . . . . . 19
Using an External Control . . . . . . . . . . . . . . . . . . . . . . . . . . . . . . . . . . . . . . 19
Two-Zone Operation . . . . . . . . . . . . . . . . . . . . . . . . . . . . . . . . . . . . . . . . . . . 19
TROUBLESHOOTING . . . . . . . . . . . . . . . . . . . . . . . . . . . . . . . . . . . . . . . . . . . . . . .20
SERVICE PARTS . . . . . . . . . . . . . . . . . . . . . . . . . . . . . . . . . . . . . . . . . . . . . . . . . . . .23
LIMITED WARRANTY . . . . . . . . . . . . . . . . . . . . . . . . . . . . . . . . . . . . . . . . . . . . . . .24
Warranty Registration. . . . . . . . . . . . . . . . . . . . . . . . . . . . . . . . . . . . . . . . . .24
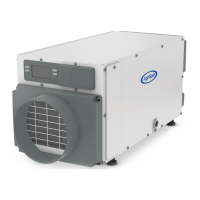
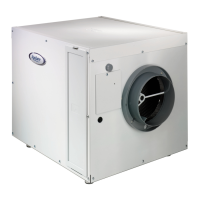
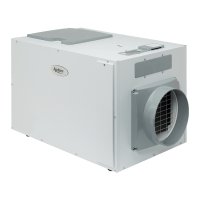
SPECIFICATIONS
Model E080 and E080H Model E100, E100C, and E100H
Unit Weight 63 lbs. 64 lbs.
Capacity
80°F, 60% RH Conditions
80 pints per day @ 185 CFM 100 pints per day @ 280 CFM
Power
115 VAC, Single Phase, 60 Hz
5.1 A operating current 6.9 A operating current
Dehumidier Inlet Air Conditions
Dehumidication: 50°F–104°F, 40°F dew point minimum
Ventilation: 40°F–140°F, 0% RH–99% RH (non-condensing)
Filter MERV 8, washable
Airow
External Static
Pressure (”w.c.) Airow (CFM)
External Static
Pressure (”w.c.) Airow (CFM)
0.0 185 0.0 280
0.2 135 0.2 245
0.4 85 0.4 210
Installation not advised 0.6 175
NOTE: Rated capacity and current draw measured at 80°F/60% RH inlet conditions at 0.0 external static pressure.
2
 Loading...