11
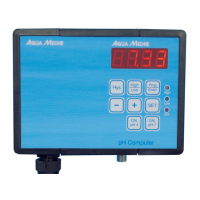
pH 4.00
1. Clean the pH probe in distilled water.
2. Place the probe in the pH 4 calibrating fluid.
3. Press the Prog/Enter button and Cal 4 button simultaneously – the display is flashing and is
set to pH 4.00.
4. After 30 seconds, the calibration is completed and the indicator stops flashing. The pH-value of
the calibration fluid is shown.
Note: Pay attention to the temperature. If necessary, measure the temperature of the calibration
fluid.
For continuous measurement, the pH-probe must be securely placed 5 cm below the surface of the
water and the shaft has to be kept dry (we recommend the Aqua Medic electrode holder).
The unit is now ready for use. As soon as the pH-value exceeds the desired adjusted value, the unit
activates the power plug.
9. Probe
The Aqua Medic probe is specifically designed to determine the pH-value in fluid based solubles. It
can be used in the chemical industry, medical areas and in research laboratories.
9.1. Technical Data
Measurement range: pH 0 - 14
Sample temperature: 5 - 60°C, short-term
Connection: BNC-plug
Material: Plastic shaft, Polysulfon
9.2. Measurement/Maintenance
- The tip of the probe must continuously be submerged in the solution while measuring.
- A new probe or one which has been dry for a longer period must lay in water for at least 24
hours.
10. Malfunctions
- The unit indicates incorrect values --> calibrate the probe.
- The probe cannot be calibrated:
--> check glass probe for damage
--> check the content of electrolytes on the refillable probe
--> replace the probe (average probe lifespan is 1 - 3 years).
11. Set up of a complete pH-control system at the aquarium
With the pH-computer, a complete pH-control can be realized at the aquarium. For this, you need
in addition to the pH-computer an Aqua Medic solenoid valve and CO
2
complet. This contains the
steel bottle for CO
2
, the pressure regulator regular, the bubble counter and the CO
2
reactor to get
CO
2
into the aquarium
.
The CO
2
unit is mounted following the instructions. Between the CO
2
bottle and the bubble counter,
the solenoid valve is mounted close to the pressure regulator. The solenoid valve is inserted into
the connection plug of the pH-computer. The computer is programmed and calibrated, following
the instructions. The pH-probe is fixed in the aquarium at a dark and good circulated place. As
soon as the pH in the aquarium raises above the adjusted set point, the computer opens the
solenoid valve and CO
2
is injected into the aquarium via the CO
2
reactor.
If the adjusted set point is reached, the solenoid valve closes and the CO
2
addition stops. The
adjustment of the needle valve at the pressure regulator should not be at a too high bubble count.
It should be adjusted in a way that even if the solenoid valve fails (e .g. due to clogging by dirt)
the pH-value in the aquarium does not decrease to critical values.
 Loading...