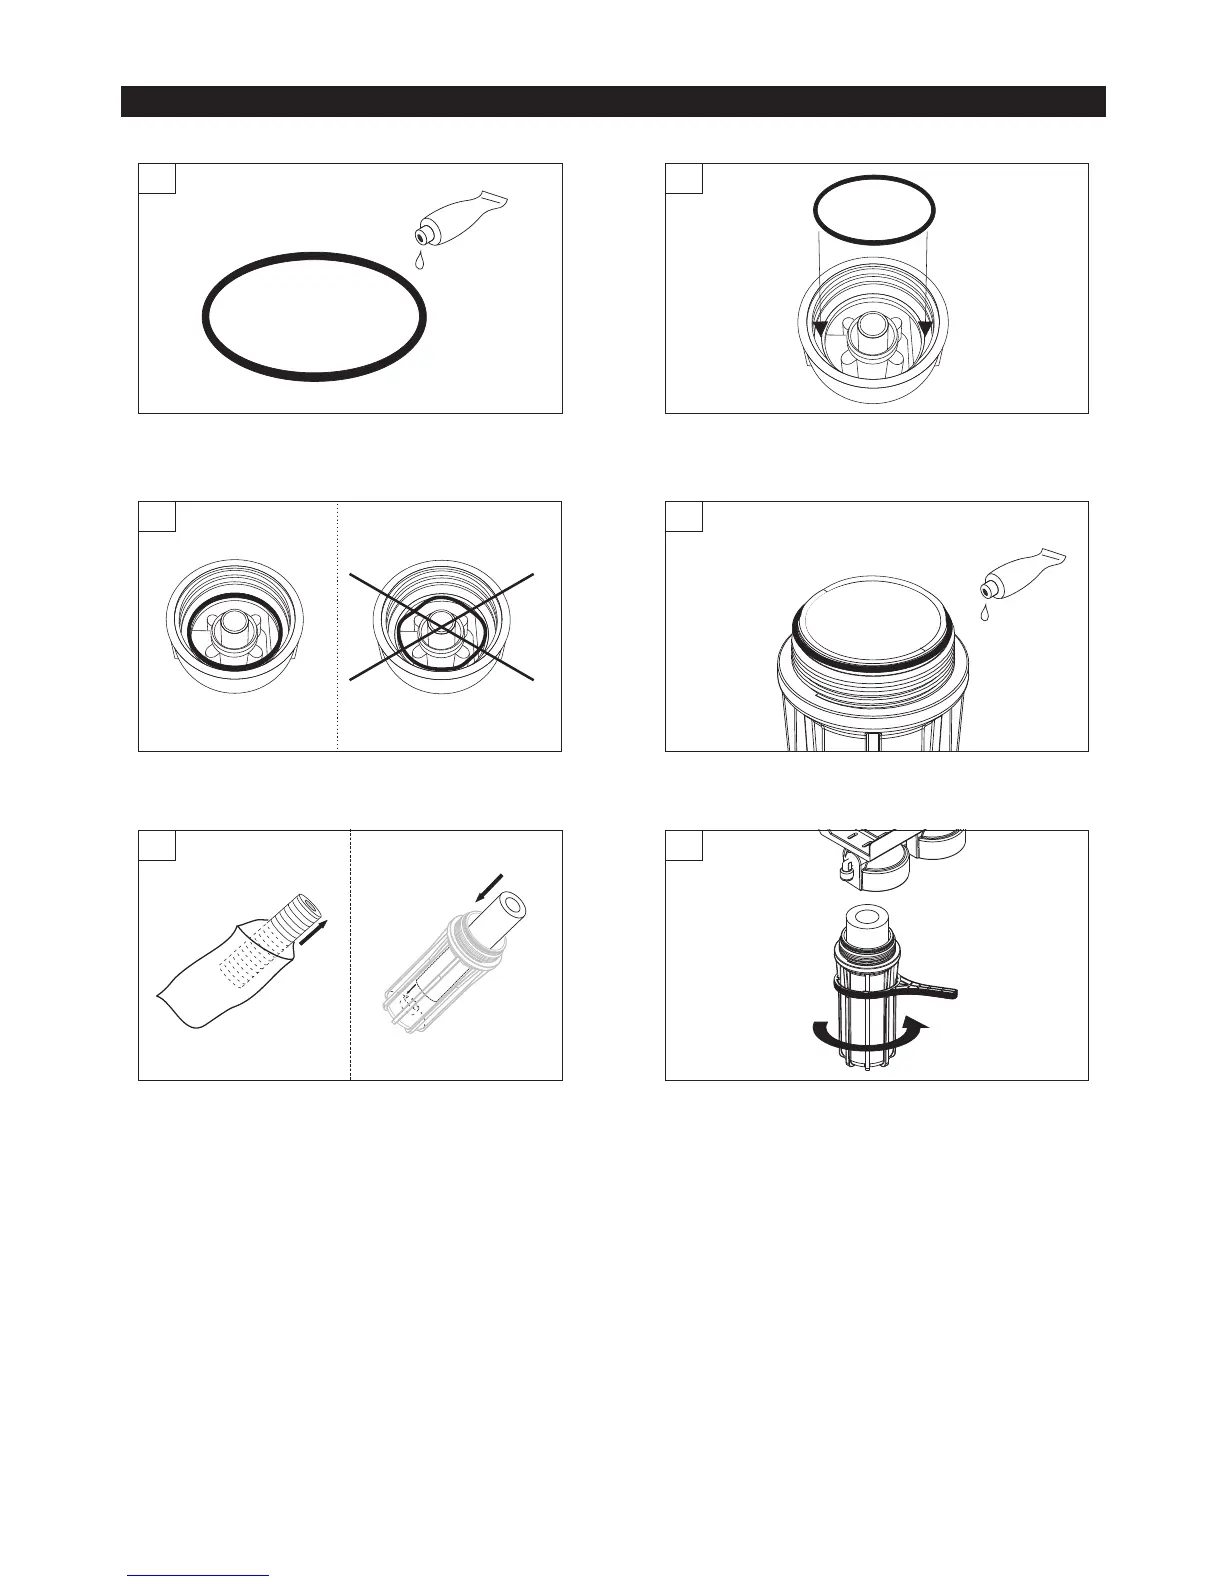
5. Preparing systems FP3-2, FP3-K1, FP3-HJ-K1, FP2, FP3-3, FP3-4, FP3-5 for installation
Spread white cosmetic Vaseline (not included in the set) on
to O-rings (3 pieces) placed inside filter housing rims.
4
6
Screw in filter housing cap to filter housing sump and tighten
it with wrench (remember to use the wrench perpendicularly
to the filter housing). Use the same procedures for the
installation of remaining filter cartridges. ATTENTION! If
you cannot tightly screw the filter cap with filter housing
sump check if all o-rings and cartridge are position
correctly.
5
Unpack new cartridge out of plastic foil.
Place filter cartridge
inside filter housing sump (pressing against the top of plastic
stem to ensure its central location).
Remember to install the cartridges in the correct
order:
WARNING! During cartridge installation, follow proper
configuration as shown in Table 1 and pay close
attention to labels with numeric values placed on the
installation plates of each system.
(a) sediment (in case of sediment cartridges, first install
cartridge with largest micron size, e.g. in case of
FCPS20 and FCPS5 cartridges, the FCPS20 should
be installed first).
(b) specialty (in case of specialty cartridges, install them
with the gasket facing up).
(c) carbon (in case of carbon cartridges, install them with
the gasket facing up).
Cartridge configuration for individual systems - refer to Table 1.
2
Position the O-ring into the socket of filter head. Stretch
o-ring properly and carefully arrange it in the socket
head.
1
Before placing the O-ring inside filter head, apply white
cosmetic Vaseline to it.
3
Correctly and incorrectly placed o-ring.
6
 Loading...