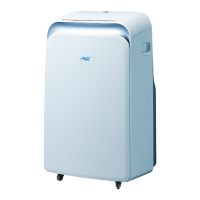
INSTALLATION INSTRUCTIONS
Water drainage:
- During dehumidifying modes, remove the upper
drain plug from the back of the unit, install the drain
connector(5/8 universal female mender) with
3 4 hose(locally purchased). For the models
without drain connector, just attach the drain
hose to the hole. Place the open end of the hose
adaptor directly over the drain area in your
basement floor. Please refer to Fig.20a.
NOTE: For the double-duct design, the water drainage
is not needed during cooling operation. If performing
above water drainage during cooling operation, the
cooling efficiency will be reduced.
- During heating pump mode, remove the lower drain
plug from the back of the unit, install the drain
connector(5/8 universal female mender) with
3/4 hose(locally purchased). For the models
without drain connector, just attach the drain
hose to the hole. Place the open end of the hose
adaptor directly over the drain area in your
basement floor. Please refer to Fig.20b.
- When the water level of the bottom tray reaches
a predetermined level,
Carefully move the unit to a drain location,
remove the bottom drain plug and let the
water drain away(Fig.22). Reinstall the bottom
drain plug and restart the machine until the "P1"
symbol disappears. If the error repeats, call for
service.
the unit beeps 8 times,
the digital display area shows "P1" . At this time
the air conditioning/dehumidification process will
immediately stop. However, the fan motor will
continue to operate(this is normal).
Remove the
upper drain plug
Continuous
drain hose
Fig.20a
Fig.20b
13
Fig.22
NOTE: Be sure to reinstall the bottom drain plug
before using the unit.
Remove the
upper drain plug
Continuous
drain hose
drain hose
adaptor
drain hose
adaptor
NOTE:
Make sure the hose is secure so there are
no leaks.Direct the hose toward the drain,making
sure that there are no kinks that will stop the warter
flowing.Place the end of the hose into the drain and
make sure the end of the hose is down tolet the
water flow smoothly.(See Fig.20a,20b,21a).Do
never let it up.(See Fig.21b).
Fig.21b
Fig.21a
√
×
√
√
 Loading...