461307409 (RS-000)
25
S
Q
A
T
P
1
2
17
18
GB
ELECTRICAL CONNECTIONS
Connection to mains electricity must be made in
compliance with applicable legislation.
Before connecting, ensure that:
• The electrical power rating of your home’s electrical
system and sockets is adequate for the oven
specifi cations indicated on the identifi cation label
located on the side of the appliance and in the
manual.
N.B.: If the output of the electric mains system is
over 3kW, it is possible to increase the power rating
for the sole function 6 COOKING BREAD PIZZA,
from 2100 W to 3100 W, using the connector of
the electronic card. In this case, it is necessary to
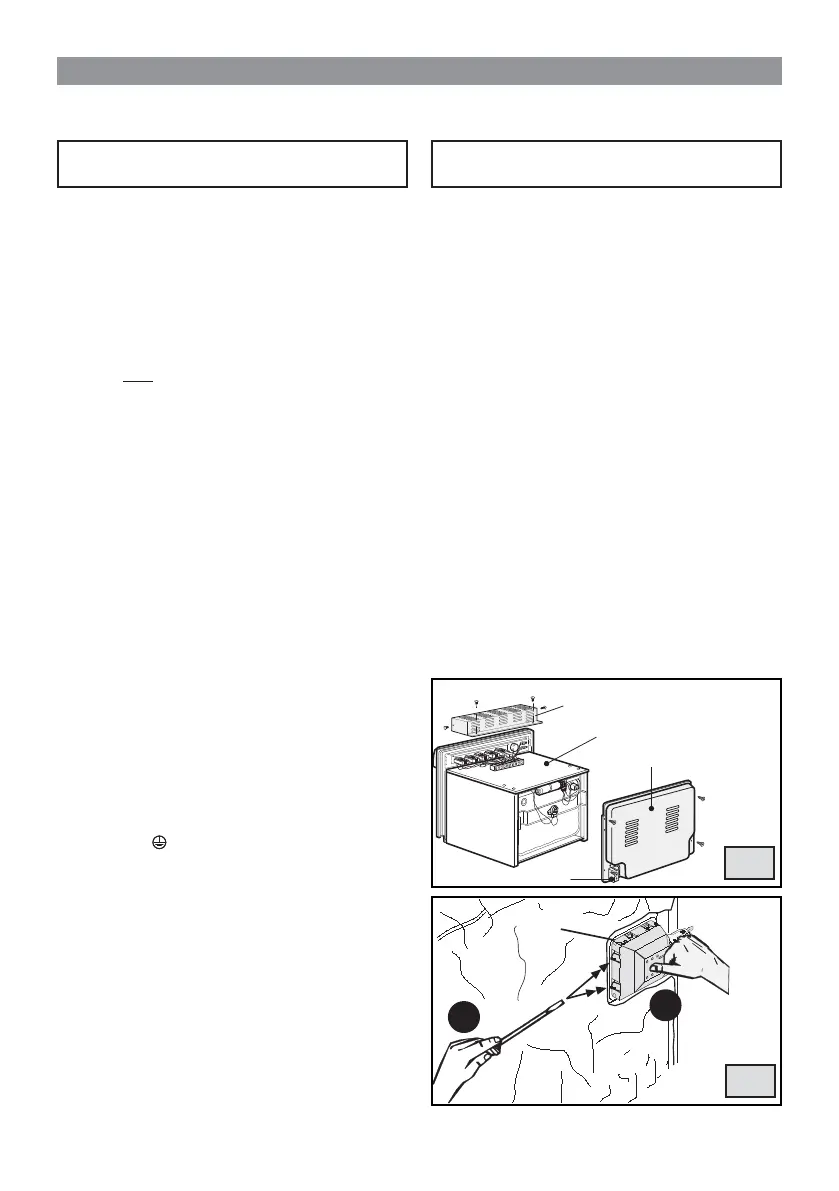
remove the protection box (S) (fi g. 17) and insert
the connector in the plug of the card, marked with
“CNB – 1 and 2” (see instructions enclosed in the
kit supplied with the appliance).
• The mains socket or electrical system is equipped
with an earth line compliant with applicable
legislation. The manufacturer cannot be held
responsible for injury or damage caused by failure
to comply with the above.
• The omnipolar socket or switch used must be easily
accessible with the oven installed.
With mains connections via a wall socket:
• If not already present, fi t a normalised plug onto
the mains lead that is suitable for the load indicated
on the identifi cation label. Connect the wires as
follows, and leave the earth wire a little longer
than the others:
letter
L
(phase) = brown wire
letter
N
(neutral) = blue wire
symbol
(earth) = green/yellow wire
• The power cable must be routed so that no point
along its length is ever exposed to a temperature of
75 °C.
• Never use adaptors or multiple plugs as these can
lead to short circuiting and dangerous overheating.
With the appliance wired directly to the mains:
• Install an omnpipolar power switch between the
appliance and the mains grid of adequate power
rating and with a minimum contact gap of 3 mm.
Remember that no switch must be installed along
the earth line.
MAINTENANCE
Always disconnect the appliance from the mains
before replacing any part.
REPLACING ELECTRICAL COMPONENTS
• To replace the oven lamp bulb, see the instructions
on page 22.
• To access all other electrical components, the oven
must be removed from the unit by unscrewing
the screws (V) (fi g. 16). Once the oven has been
removed, the terminal board is easily accessible for
maintenance work (fi g. 17).
• When replacing the power cable, remember
that the earth wires must be left longer than the
other wires and follow the instructions given in
the section “ELECTRICAL CONNECTIONS”.
• Remove the rear cover (Q) to access the ratio motor,
the elements and the temperature limiter (fi g. 17).
• To replace the lamp mounting (P), remove the cover
(A) and side plate, then lever off the two securing
tabs with a screwdriver (see fi g. 18) and pull the
lamp mounting out.
• To replace the thermostat, the switch and the
electronic board, remove the cover box (S) (fi g. 17).
Then remove the screws underneath to release the
components to be replaced.
INSTRUCTIONS FOR THE INSTALLER
 Loading...