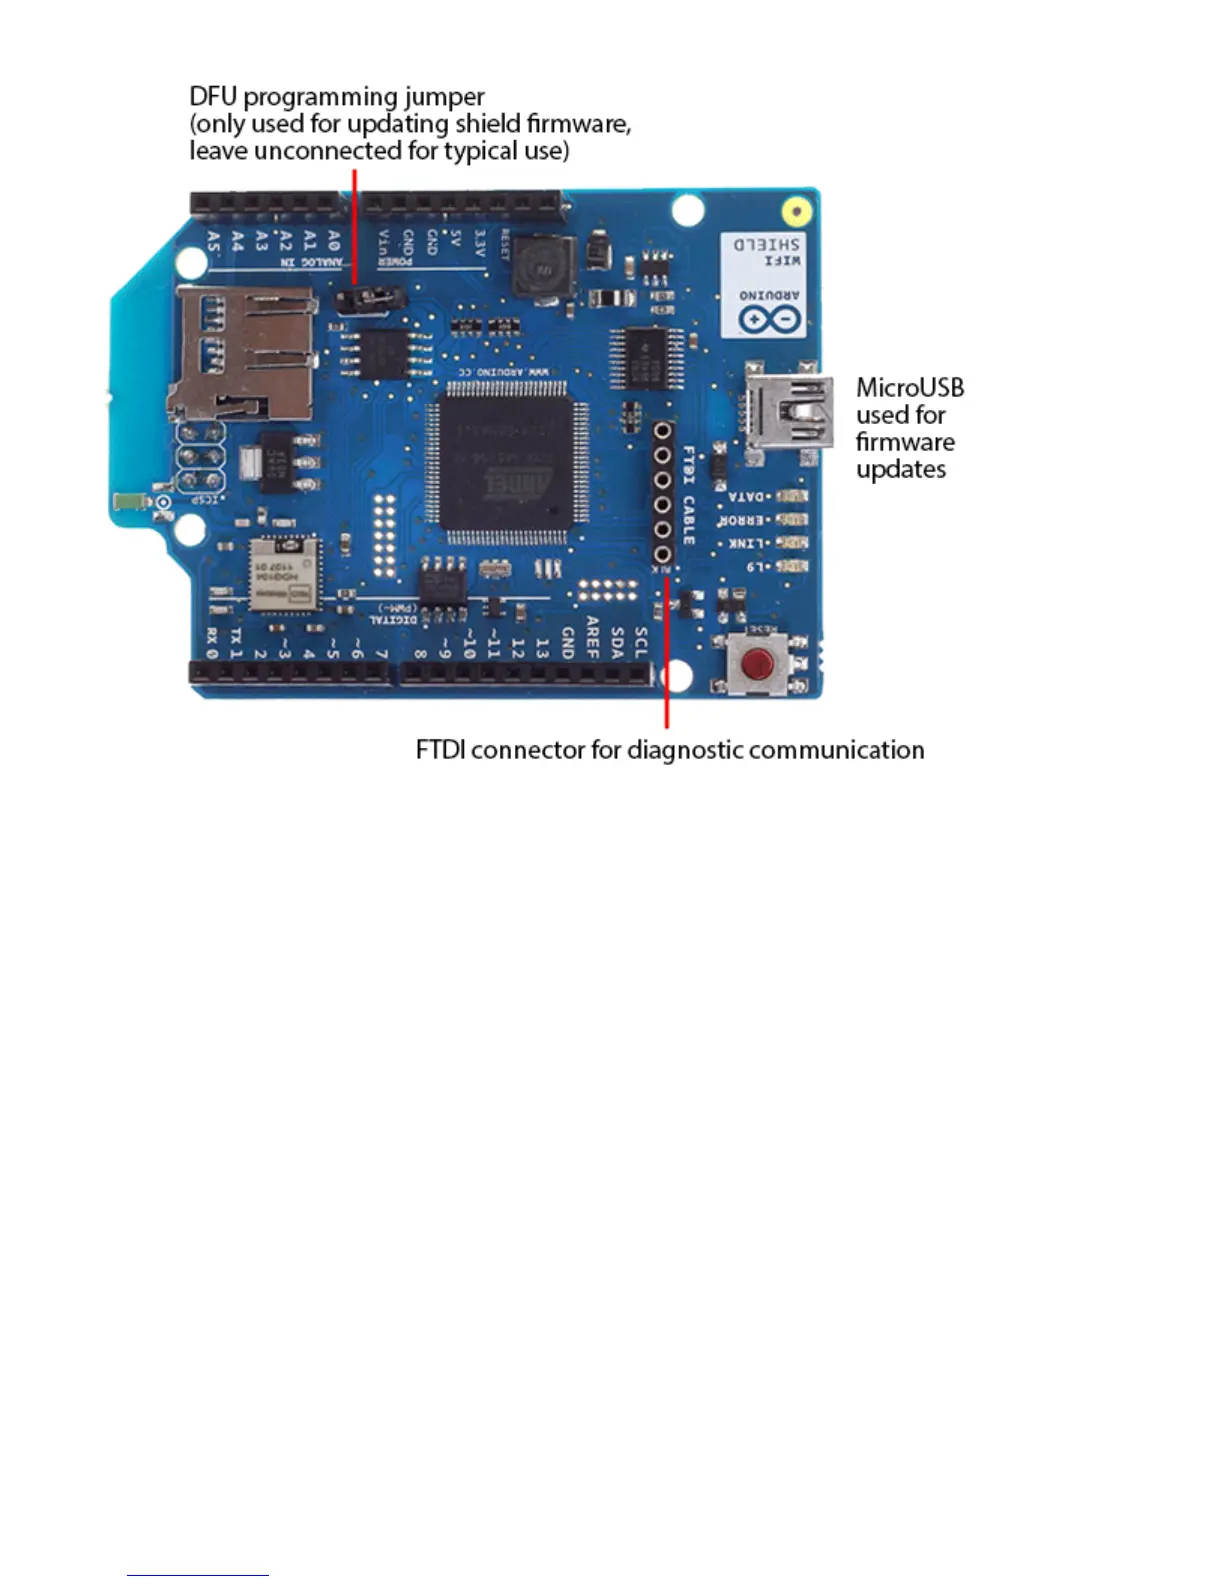
There is an onboard micro-USB connector. This is not for programming an attached Arduino, it is for
updating the Atmega 32UC3 using the Atmel DFU protocol. The programming jumper adjacent to the
power bus and analog inputs should be left unconnected for typical use. It is only used for DFU
programming mode.
A FTDI connection enables serial communication with the 32UC3 for debugging purposes. A list of
available commands can be found here.
Network Settings
The shield will connect to open networks, as well as those using WEP and WPA2 Personal
encryption. The shield will not connect to networks using WPA2 Enterprise encryption.
The SSID (network name) must be broadcast for the shield to connect.
Depending on your wireless router configuration, you need different information.
For an open (unencrypted) network, you need the SSID.
For networks using WPA/WPA2 Personal encryption, you need the SSID and password.
-
-
 Loading...