OPERATION
1. Changing the nosepiece using the provided service wrench
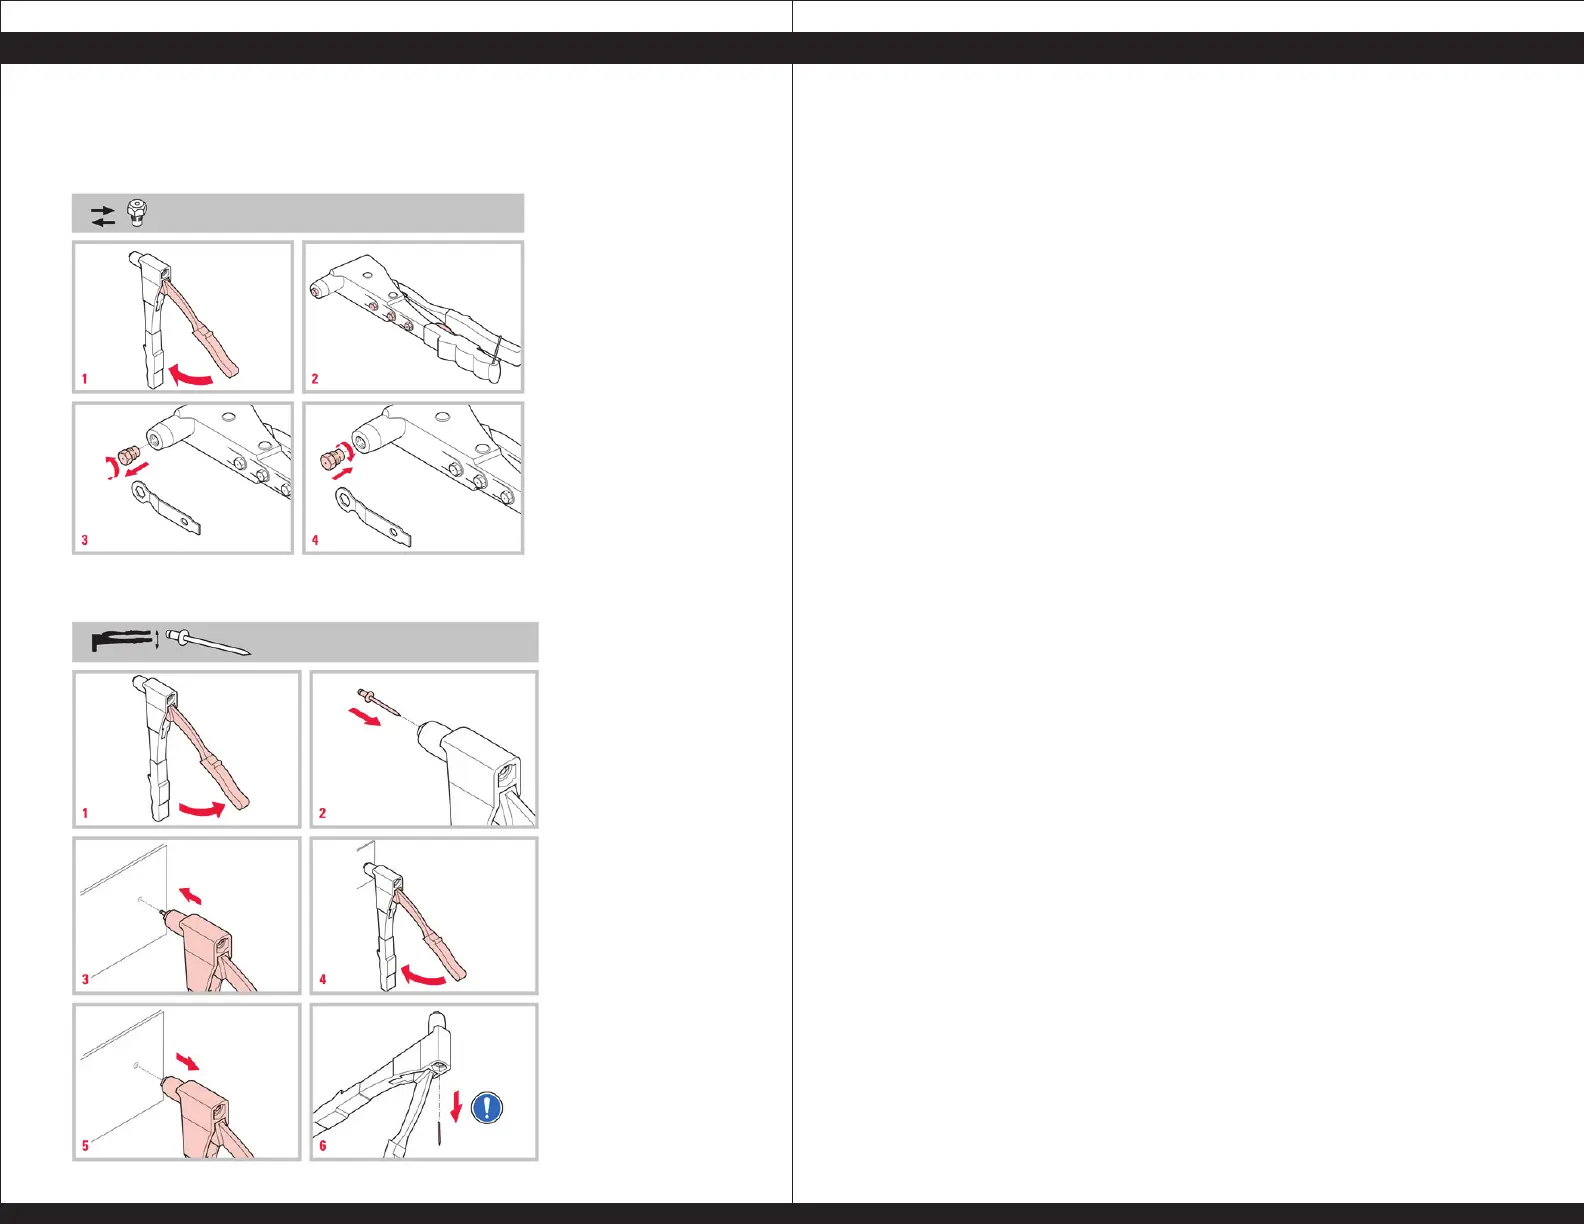
1. After you have installed the correct tip for the pop rivet size that you have
chosen. Open the pop rivet gun until the handles are spread as far apart as
possible.
2. Insert the stem of the pop rivet into the nosepiece as seen in diagram two.
If the pop rivet you have chosen won’t fit into the hole you will need to
change the nosepiece to the size that will accept the chosen rivet.
3. When you are ready to install the rivet, push the blunt end of the rivet firmly
against the surface of the object that you intend to install the rivet on and
squeeze the handle closed.
4. You should hear a small pop and the stem of the rivet will discharge through
the back of the gun as seen in diagram 6.
5. The rivet should now be placed into the desired position.
MAINTENANCE
1. Remove dust, moisture and other contaminants with a clean brush, or soft,
lint free cloth.
2. Do not use any abrasive materials that could damage the tool.
3. When the tool is not in use store the tool with the handles clasped together
in a clean dry area.
HOW TO REMOVE A RIVET
1. Drill out the core of the rivet. It's not easy to determine the size of drill-bit
needed just by looking at the rivet head, so drill it out with a smaller drill bit
than you think necessary, then look into the hole to see if you need a wider
bit to drill the remainder.
2. Another method is to grind off the head of the rivet and punch the core
through.
JAMMING ISSUES
1. In the off chance that the gun should jam after the rivet has been set in
place one solution is to push a nail into the nosepiece to force the stem of
the rivet out of the back of the gun.
2. Operating the pop rivet gun
 Loading...