Do you have a question about the Argos Home 615/1795 and is the answer not in the manual?
Follow assembly instructions, keep children and pets away from the work area, and ensure sufficient space for parts.
Clean with a damp cloth and mild detergent. Periodically check for loose screws and fittings.
Assemble parts loosely first, then tighten fully upon completion. Consider assembling with a partner.
Check all listed panels including top, side, back, bottom, front panels, legs, and rods.
Verify all fittings are present: cam pillars, cam nuts, dowels, screws, and hinges.
Attach left and right side panels to the back panel using cam pillars, cam nuts, and dowels.
Turn the assembly from Step 1 upside down to prepare for the subsequent assembly stage.
Attach the bottom panel to the side panels using the provided screws.
Fasten cam pillars and insert dowels into the front panel as illustrated.
Attach the front panel to the main compartment and secure with cam nuts.
Connect upper rods and lower rod to the left leg using screws.
Attach the assembly from Step 6 to the right leg using screws.
Fix the storage compartment to the metal frame using screws from underneath.
Fasten hinges to the top panel using screws.
Attach the prepared top panel to the main compartment using screws.
Attach the sprung hinge to the compartment and top panel, then attach felt pads.
Complete assembly by re-checking and fully tightening all fixing screws.
| Model Number | 615/1795 |
|---|---|
| Brand | Argos Home |
| Handle Material | Metal |
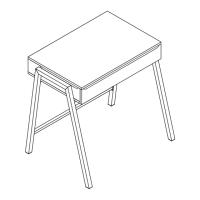
| Type | Bedside Table |
| Assembly | Self-assembly required |