is possible to recover the material used to make it, meaning a significant saving in
terms of energy and resources. To point out the obligation for separate disposal of
electrical appliances the product has the crossed-out wheeled bin symbol. Never
throw batteries into fire.
Do not threaten the safety of the appliance by using parts that are not original or •
which have not been approved by the manufacturer.
Unplug the appliance by gripping the plug firmly and pulling it out of the power •
socket; never unplug the appliance by pulling on the power cord.
Any changes to this product not expressly authorised by the manufacturer may •
make safety devices inoperative and will also render the user’s warranty null and
void.
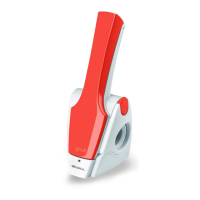
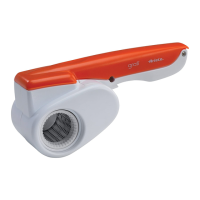
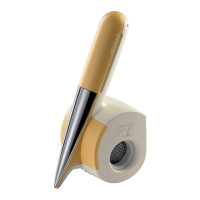
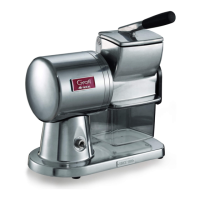
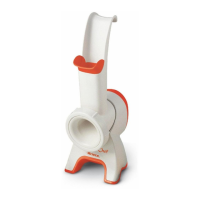
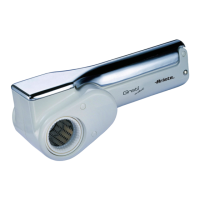
DESCRIPTION OF THE APPLIANCE
Ref. Description Ref. Description
A
Hopper
F
Charging unit
B
Press
G
Start button
C
Charging contact
H
Appliance body
D
Charging light
I
Fine-grained roller
E
Feeder for charging unit
L
Coarse-grained roller
CHARGING THE BATTERIES
WARNING: Always charge the battery completely before using the appliance.
IMPORTANT: Always charge the battery for 24 hours to activate it before using it for
the first time, after which time, the time needed to charge it fully will be approximately
15 hours.
IMPORTANT: Make sure not to start the appliance while it is charging.
Connect the plug from the charging unit (F); the operating light (D) switches on to show that the •
mains power is connected. This light will switch off once the power cord is removed from the
mains socket;
insert the appliance body (H) into the charging unit (F). After approximately 15 hours, the appli-•
ance will be charged and the ready for use.
WARNING: We recommend using up the full battery charge before charging it again.
Charging unit
The charging unit serves to charge the batteries inside the appliance handle and it has the additional
bonus of serving to put away the appliance when it is not being used; therefore, it needs to be placed
near to a mains power socket.