IMPORTANT SAFEGUARDS
600mm recomme nded
Fig.3
5. The minimum distances must be observed as shown in the
figure below.
6. For installation of the appliance, care must be taken not to
damage concealed cables. Please be careful while drilling
the holes.
7. This appliance is designed to be permanently fixed to a wall
at a minimum height of 300mm. The wall bracket must be
fitted horizontally and the cable routed to the bottom right
of the heater.
8. A height of 60 0mm from bottom of heater to floor is
recommended for optimum viewing of fuel bed. See the figure 3
below for the recommended fixing dimensions.
9. Take into consideration the minimum clearance requirements as
shown below and choose a position for the heater. Mark the
wall mounting bracket mounting holes and drill holes. Fix the
wall bracket using the plug and screws provided. See figure 4
USER MANUAL
1. Do not operate the appliance until properly fixed to the wall and
the instruction manual is read fully.
2. Two people are recommended for installation of this electric
fireplace heater.
3. Peel off the removable label and the protective sheet at tached
to the front tempered glass.
4. To place the decorative pebbles and cr ystals follow the steps
as given below
a. To place the pebbles and crystals, the front glass is required
to be removed from the heater panel body. Unscrew the top
screws which hold the glass as shown below. Fig.1
b. Once the screws are out the top metal bracket will come loose,
place the bracket away. Make sure the glass is suppor ted while
doing this. Lift the glass up and out from the heater body.
c. Place the crystals and pebbles along the light unit in desired
position. Fig.2
d. Put the front glass back and place the metal bracket on top of
the glass so that the bracket secures it. Put the fasten screws
back. Make sure the screws are tight and the glass is secured
before continuing with the installation.
A. Main Power
ON /OFF Switch
B. Heat Adjustment but ton –
2000W/1000W/AUTO
C. Flame brightness
adjustment but ton
D. Heat Setting indicator LED
E. Power on indicator LED
INSTALLATION
POWER CONTROL
PANEL
1 2
2000W
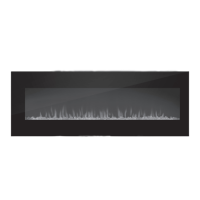
FIREPLACE HEATER
wall mountable wItH
flat tempered glass panel
Magnus
1. Slide the rear bat tery cover from the
remote and fit 2 x AA A size batteries,
alkaline recommended.
2. Refit rear cover.
REMOTE CONTROL
3
• Please retain all packaging until you have
checked and counted all the par ts and the
contents of the fixing pack against the parts list.
Read all instructions before using this heater.
1. This heater is hot when in use. To avoid burns,
do not let bare skin touch hot surfaces.
Keep combustible material such as drapery
and other furnishings, at least 1 metre from
the heater. When in use keep the mains cord
of the heater from touching the heater body.
Do not drape the cord over the heater while
hot. Ex treme caution is necessar y when any
heater is used by or near children or invalids
and whenever the heater is left operating
unattended.
2. Always unplug heater when not in use.
3. Do not operate any heater with a damaged
cord or plug or after the heater malfunctions,
has been dropped or damaged in any manner.
Return heater to suitably qualified facilit y
for examination, electrical or mechanical
adjustment or repair.
4. Do not use outdoors, the product is designed
only for household use.
5. Never locate heater where it may fall into a
bathtub or other water container.
6. Do not run cord under carpeting. Do not cover
cord with throw rugs runners, or the like. Keep
cord away from traf fic areas to avoid tripping
over.
7. To disconnect heater, turn controls to of f, then
remove plug from outlet.
8. Connect to properly earthed socket-outlet of
the appropriate voltage.
9. Do not insert or allow foreign objects to enter
any ventilation or exhaust opening as this may
cause an electric shock or fire, or damage the
heater.
10. To prevent a possible fire, do not block the
grilles in any manner.
11. Do not use in areas where petrol, paint, or
flammable liquids are used or stored.
12. Use the heater only as described in this
manual. Any other use not recommended by
the manufacturer may cause fire, electric
shock, or injur y.
13. Do not connect via double adapters or power
boards. Avoid the use of an extension cord
because the extension cord may overheat and
cause risk of fire. However, if this heater is
used with an ex tension cord, use as short a
cord as practical.
14. Do not use this appliance with a programmable
timer or any other device that switches the
heater on automatically, since a fire risk
exists if the appliance is covered or positioned
incorrectly.
15. In order to avoid overheating, do not cover the
heater.
16. To eliminate a choking hazard for young
children, remove and safely discard the
protective cover fi tted to the power plug of
this heater along with all packaging material
and promotional labels.
17. Fully unwind the cord before first time use
18. There are no user serviceable par ts in this
heater; any maintenance other than cleaning
should be performed by an authorised service
representative.
19. The installation of a residual current device
(safety switch) is recommended to provide
additional safety protection using electrical
appliances. It is advisable that a safety switch
with a rated residual operating current not
exceeding 3 0mA be installed in the electrical
circuit supplying power to the appliance. See
your electrician for professional advice.
20. Keep these instructions handy for future
reference.
WARNING
This heater is for wall mounting only, not to be
used as free standing.
This appliance is not intended for use by persons
(including children) with reduced physical,
sensor y or mental capabilities, or lack of
experience and knowledge unless they have been
given supervision or instructions concerning the
use of the appliance by a person responsible for
their safet y
Young Children should be super vised to
ensure that they do not play with the appliance.
The heater must not be located immediately
below or in front of a power outlet.
Do not use this heater in the immediate
surroundings of a bath, shower or swimming pool.
CONTENTS
• Heater.
• Wall xing bracket.
• Fixing screws and wall plugs.
• Remote control.
• 1 Instruction Manual.
CPIN002614/3
Fig .1
A
B C D E
Fig.4
Floor Level
600mm recomme nded
300mm minimum
Keep min 9 00mm
from adjacent
walls or f urnishing s
320mm
495mm
HELPFUL ADVICE BEFORE FITTING
• Please retain all packaging until you have checked and counted all
the parts and the contents of the fixing pack against the parts list.
• The xing pack contains small items which should be kept away
from young children.
• We sugges t that you open the xing pack and place all the
contents into a container, therefore reducing the risk of losing any
small pieces.
CONTENTS
• Heater • Wall xing bracket • Fixing screws and wall plugs
• Remote control • 1 Instruction Manual
10. Carefully lif t the heater up ensuring that the
top rear edge of heater engages the wall
bracket and is sit ting centrally. Two people
will make this operation easier
11. Gently bring the heater level with the wall
and hang the heater to the heater bracket.
Ensure the heater body is locked in with the
wall bracket.
12. Attach the bot tom bracket to the heater
panel body and mark the mounting hole;
remove the heater.
13. Drill the bracket mounting hole and fit the
wall plug.
14. Refit the heater to the wall and secure the
bottom bracket using the screws provided to
permanently fix the heater in place. Ensure
the heater body is engaged with the wall
bracket at the top. The heater is now ready
for use.
Fig.2
BEFORE FIRST USE
Remove any promotional material any packaging from the heater.
Unwind the cord to its full length and place the heater on a firm level
surface in a stable, upright position. Visually inspect the air inlets
and outlets to ensure that there are no blockages.
To avoid overheating do a circuit do not plug the heater into
a circuit that already has other appliance working.
CAUTION : There may be some odour coming from the heater for the very
first time you use it. This is normal during the break-in period or after
long term storage. Make sure the heater is in well ventilated
area and continue running it until the smell goes away.
 Loading...