9
WARNING:MOVINGPARTSKeepngers,hairandclothingaway.
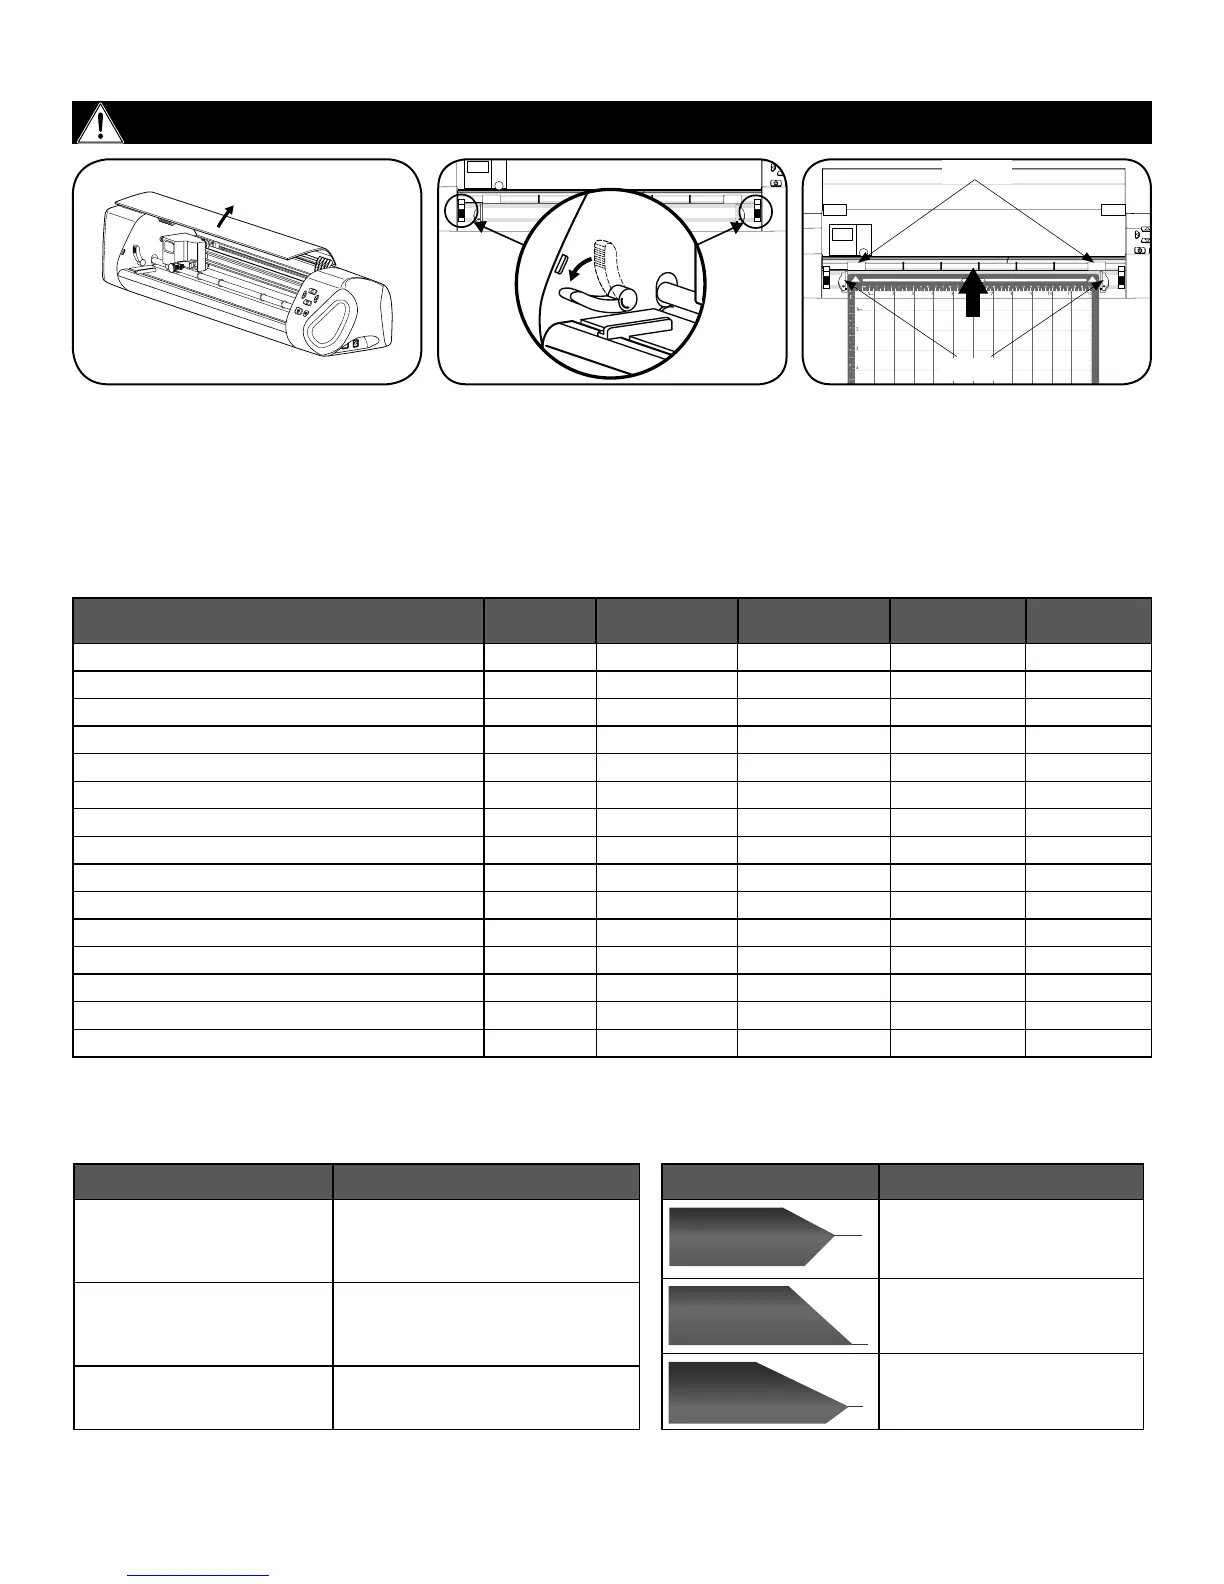
Rollers
Guides
Loading cutting mat into machine
1. Open the front cover by lifting it up
to expose the carriage and rollers.
2. Lower both levers to lift the feed
roller.
3. Place cutting mat between guides
on the Edge machine and insert
until the leading edge touches to
the rollers. Raise the levers to lock
the mat in place. Use jog dials on
machine for further adjustments.
Trial Cut Results Recommended Adjustments
Material did not cut all
the way through.
The blade is not out far enough.
Turn the blade holder half a
mark to the right.
Part of the material
remains on the mat.
The blade is not out far enough.
Turn the blade holder half a
mark to the right.
Material cut all the way
through to the mat.
The blade is out too far. Turn the
blade holder a mark to the left.
How to Read the Result of a Trial cut
Recommended Settings by Material
Blade Shape Blade Description
Red Cap Blade for thinner
materials
Yellow Cap Blade for
fabric
Blue Cap Blade for thick
materials
Cutting Blade Shapes
MATERIAL BLADE PRESSURE
BLADE
DEPTH
PASSES SPEED
Vinyl
Red 20 2 1 50
Fabric with Terial Magic
Yellow 75 4 1 50
Fabric backed with Fusible Webbing
Yellow 75 4 1 50
Felt backed with Freezer Paper
Yellow 100 8 1 50
Naugahyde/Pleather (medium weight)
Blue 100 8 2 50
Leather (lightweight, Kid)
Blue 100 4 1 50
Paper 20 lbs. +
Red 20 2 1 50
Card Stock (medium weight) 60 lbs. +
Red 50 3 1 50
Heavyweight Card Stock/Cardboard
Blue 100 6 1 50
Contact Paper
Red 20 2 1 50
Crystal Template Material - Smooth
Blue 60 5 1 50
Crystal Template Material - Flocked
Blue 70 6 1 50
Stencil Plastic
Blue 100 10 2 50
Plastic
Red 70 5 1 50
Paint/Draw
None 20 None 1 100


 To Next Page