P/N PM000156A • Rev. 2 • ISS 19JUN2018
3 of 3
3. Press the module firmly against the adapter so that the
module’s bottom fasteners snap closed on the adapter.
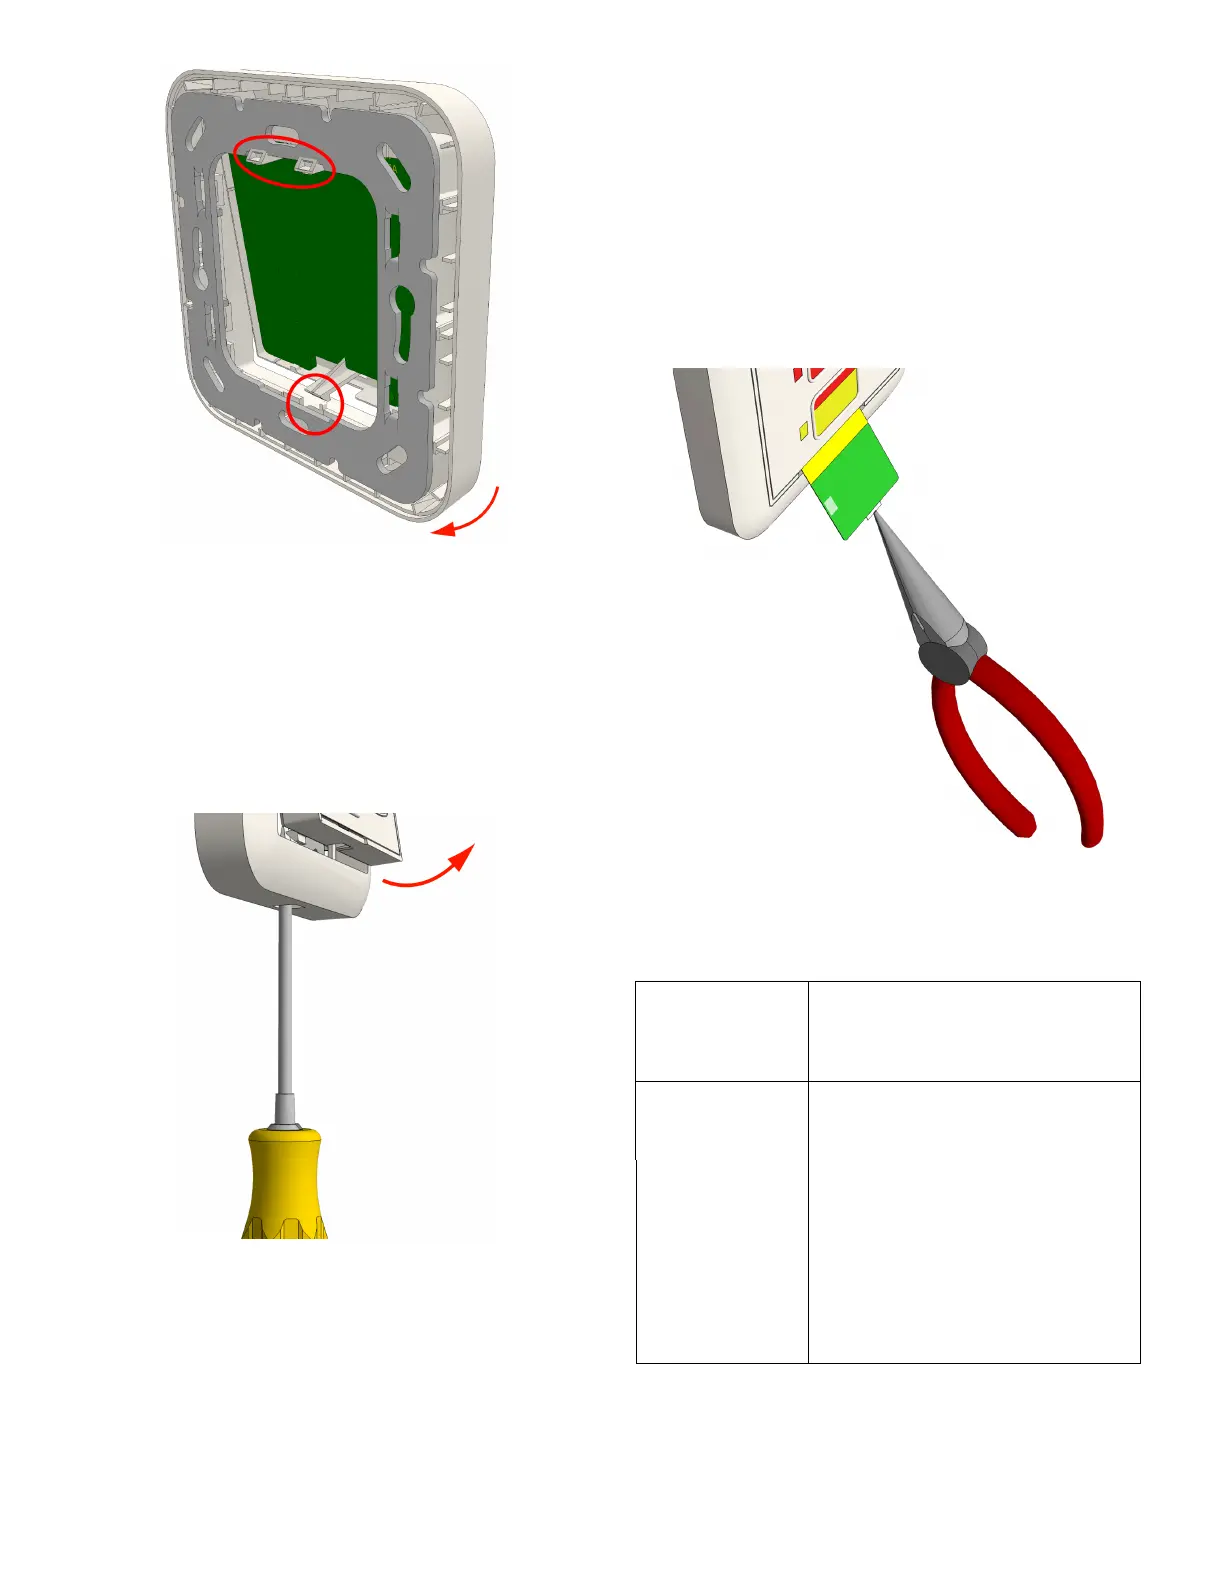
Removal
When separating the module from an adapter or spacer, use
a screwdriver with a blade that is approximately 6mm wide.
To remove the module from a backbox or spacer:
1. Insert the screwdriver blade into the slot at the bottom of
the module between the faceplate and the adapter.
Caution: Do not insert the screwdriver into the bottom
corner of the frame, as this may damage the frame or
module.
2. Gently push the screwdriver blade until the module
releases from the adapter.
3. Remove the module from the adapter.
4. Disconnect RJ-45 connectors.
Inserting Customized Button Labels
Accessories for the module include Customizable Button
Insert Kits (P/N NUCBK-HE and NUCBK-HK). Each kit contains
a variety of color strips that easily insert into the module’s
faceplate to cover the buttons and LEDs for a custom look.
The kits include strips for one, two, or three button
configurations. Kits are sold separately.
To insert the button labels:
1. Using small needle-nose pliers, grasp the edge of the
existing button label and pull it out of the button label
channel.
2. Slide your new custom button label into the button label
channel.
Specifications
Wire/terminations Cat 5/5e/6/7 U/UTP with RJ-45
connectors.
Note: Cat 6/7 cables may be too stiff
for some back boxes.
Compatible
electrical boxes
(metal or plastic)
European Union EU box (or equivalent)
Single backbox with mounting holes
60mm (2.36in.)
United Kingdom MK Honeywell models (or equivalent)
1-gang: 861ZIC, 866ZIC, 877ZIC
Note: UK backboxes require single
(NUMP86-HK) or dual (NUMPD86-HK)
mounting plates.
 Loading...