2. Power Mode
A. Installation
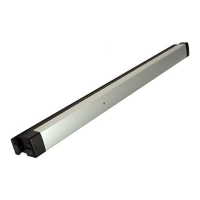
Figure 11 - DIP Switch Setting for Power
Mode Installation
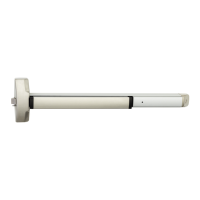
Figure 10 - Power Mode Installation
4. Feed the 3” harness through the 1” hole in the door and secure
the pushbar to the door using the mounting bracket and two (2)
supplied screws (Figure 10).
NOTE:
Do not install the end cap until electrical operation is verified in order
to confirm LED signaling.
Do not discard the end cap and hardware.
5. Ensure DIP switch (position 3) enables Power Mode (Figure 11)
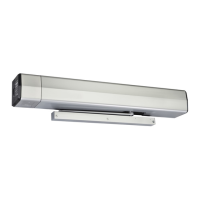
6. Connect the ElectroLynx harness to the hinge and secure the hinge
to the door.
NOTE:
Make sure no wires are pinched or damaged in the process.
Refer to detailed wiring instructions under Power Mode wiring.
7. Apply a 24V source which complies with the Content Ratings table
MELR contact ratings. Confirm the LED is blinking, the system fully
unlocks and all bolts clear the strikes. Troubleshoot the device
if issues are observed using the steps outlined at the end of this
section.
8. Store excess wiring under end cap and assemble with provided
screws. Avoid pinching wires.
NOTE:
Earth Ground is required for Electrostatic Discharge (ESD) protection
unless the metal door and frame are already earth grounded; otherwise,
earth ground wiring is required at pin 4. See Figure 9.
6000 Series Rail with "S" and
MELR option using 8-pin
Connector
Exit Device
Mounting Bracket
Screw Location
1" Diameter
Hole in Door
McKinney QC8
Electric Hinge (with
8-pin connector)
A 3" ElectroLynx
harness is required
to connect the
pushbar to the
ElectroLynx Hinge
NOTE: Specified
and ordered
separately
1-855-577-5078 Ext. 2 • www.accentra-assaabloy.com
6000 Series MELR
Exit Devices
Installation Instructions
10
80-8150-0077-000 04/24
Copyright © 2017, 2023, 2024, ASSA ABLOY ACCENTRA™ Access and Egress Hardware Group, Inc. All rights reserved. Reproduction
in whole or in part without the express written permission of ASSA ABLOY Access and Egress Hardware Group, Inc. is prohibited.
 Loading...