5200 Series Programming Instructions
4
80-9352-0022-020 Rev 2 06/23
Copyright © 2023, ASSA ABLOY Accessories and Door Controls Group, Inc. All rights reserved. Reproduction in whole or in
part without the express written permission of ASSA ABLOY Accessories and Door Controls Group, Inc. is prohibited.
B. Set the door open and close positions:
NOTE: Once this operation is complete, any hardware added
that increases the weight of the door will require this process be
repeated. The open and close positions will need to be adjusted
to accommodate the weight difference.
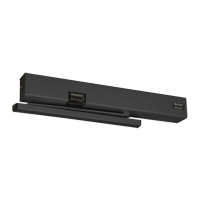
To set closed position:
1. Fully close door.
2. Press and release the CLOSE button on the control board.
‒ The orange CLOSE LED will change from flashing to solid.
(Figure 7)
NOTE: When the door is in the closed position, the orange
LED will illuminate solid.
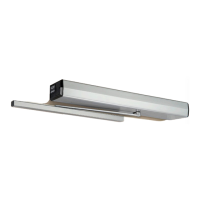
To set the open position:
1. Manually open door.
‒ The green OPEN LED will begin flashing.
NOTE: If there is a wall or door stop at the fully open position,
hold the door slightly away from wall or stop.
2. With the door in the open position, press and release the
OPEN button on the control board.
‒ The flashing green OPEN LED will turn solid. (Figure 8)
NOTE: If the open position is not set within 30 seconds of
setting the closed position, the closed position must be set
again.
3. Manually close the door. Once fully closed, confirm there are
no obstructions that could prevent the door from opening.
‒ The LEARN LED will flash, indicating the operator is ready
to set up door parameters.
4. Confirm that the latching hardware doesn’t prevent the door
from opening. Press and release the LEARN button on the
control board.
‒ The blue LEARN LED will illuminate solid and the door will
open in small increments.
Allow door to open and close without interference. (Figure 9)
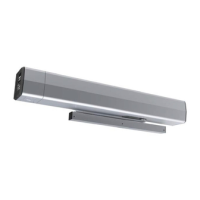
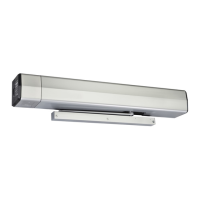
A. Select the arm mode:
1. To select the operator’s arm mode, move the
toggle switch of the PUSH/PULL setup button on
the control board to the left for PUSH (Figure 5) or
right for PULL (Figure 6).
Figure 5
Figure 6
Figure 7
Figure 9
Figure 8
Operator Setup via the Control Board
After the operator has been successfully installed and power has
been applied (refer to “Initial Operator Setup” on page 3), follow
these steps to program the operator via the control board.
PUSH PULL
Opening Closing
 Loading...