September 2003
INSTALLATION INSTRUCTIONS
Page 23
5300LN Series Parts & Service Manual
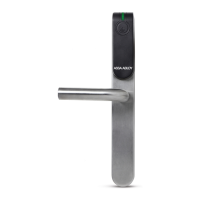
5428LN & 5329LN Functions Only
Turn Blank Rose until "A" dimension is achieved for
door thickness. (See table).
Studs should be aligned with through-bolt holes in
door.
Adjust for DoorThickness
Secure the Rose Support assembly to the door using screws
and washers provided and install the rose scalp and inside
lever.
Dummy Trim Installation
497
202
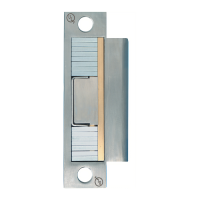
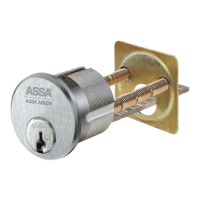
Optional Strike Box
#
495
14-5301-1033-048
Standard Strike Box
Attaching Screws
#12-12-24x1”
81-2012-0620-FINISH
Attaching Screws
81-2012-0416-FINISH
#8-8-32x3/4”
STRIKES
A. Close door and mark a horizontal line from the center of
the template to the frame of the door.
B. Measure half the thickness of the door; mark this same
distance with a vertical line starting from the stop side of
the frame and where both lines cross make a 1" (26mm)
diameter hole and 1/2" (13mm) in depth.
C. Align the holes of the strike with the vertical line, trace
the outline of the strike and mortise to 1/16" (1.6mm)
depth. Attach the strike with two screws (provided).
8. Strike Installation (Wood Frames Only)
TEST THE OPERATION OF THE LOCKSET
Cycle the lock in both the locked and
unlocked positions. If lock functions smoothly
when door is open, but binds when closed,
check door and frame alignment. If problems
are found see troubleshooting below
.
STOP
1. Check door.
2. Check hinges.They should not be loose or have excessive
wear on knuckles.
3. Latchbolt will not deadlock.
Either strike is out of line or gap between door and jamb is
too great. Realign strike or shim strike out towards flat
area of latchbolt.
4. Latchbolt does not retract or extend properly.
Latchbolt tail and retractor not properly positioned.
A. Remove lockset. Look through 2-1/8" hole and verify
latchbolt tail centered between top and bottom of hole.
B. Remove latchbolt and insert lockset, look through latch
hole and verify retractor mouth centered in hole. Adjust
outside rose plate if not (See #5 on Page 21).
C. Rebore holes if necessary to line up retractor and tail.
Troubleshooting
Door Must Not Bind
Door Must Not Sag
Door Must Swing Freely
Door Must Not Warp
"A"
Door
Thickness
"A"
1/4"
7/16"
9/16"
11/16"
1-3/8"
1-3/4"
2"
2-1/4"
Optional
Std.
Lock
Rose Scalp
Inside Leve
r
Inside Rose
Support Assembl
y
Through Bolts
Washers
 Loading...