SCIENTIFICSONLINE.COM | 1.800.728.6999
SCIENTIFICSONLINE.COM | 1.800.728.6999
4
LAUNCH YOUR
ASTROSCAN
®
MILLENNIUM
EXPERIENCE
Your ASTROSCAN
®
Millennium portable
reflector comes preassembled in the box.
All you have to do is install the red dot
finderscope and the eyepiece tray and
you’re ready to observe.
INSTALLING THE RED DOT FINDERSCOPE
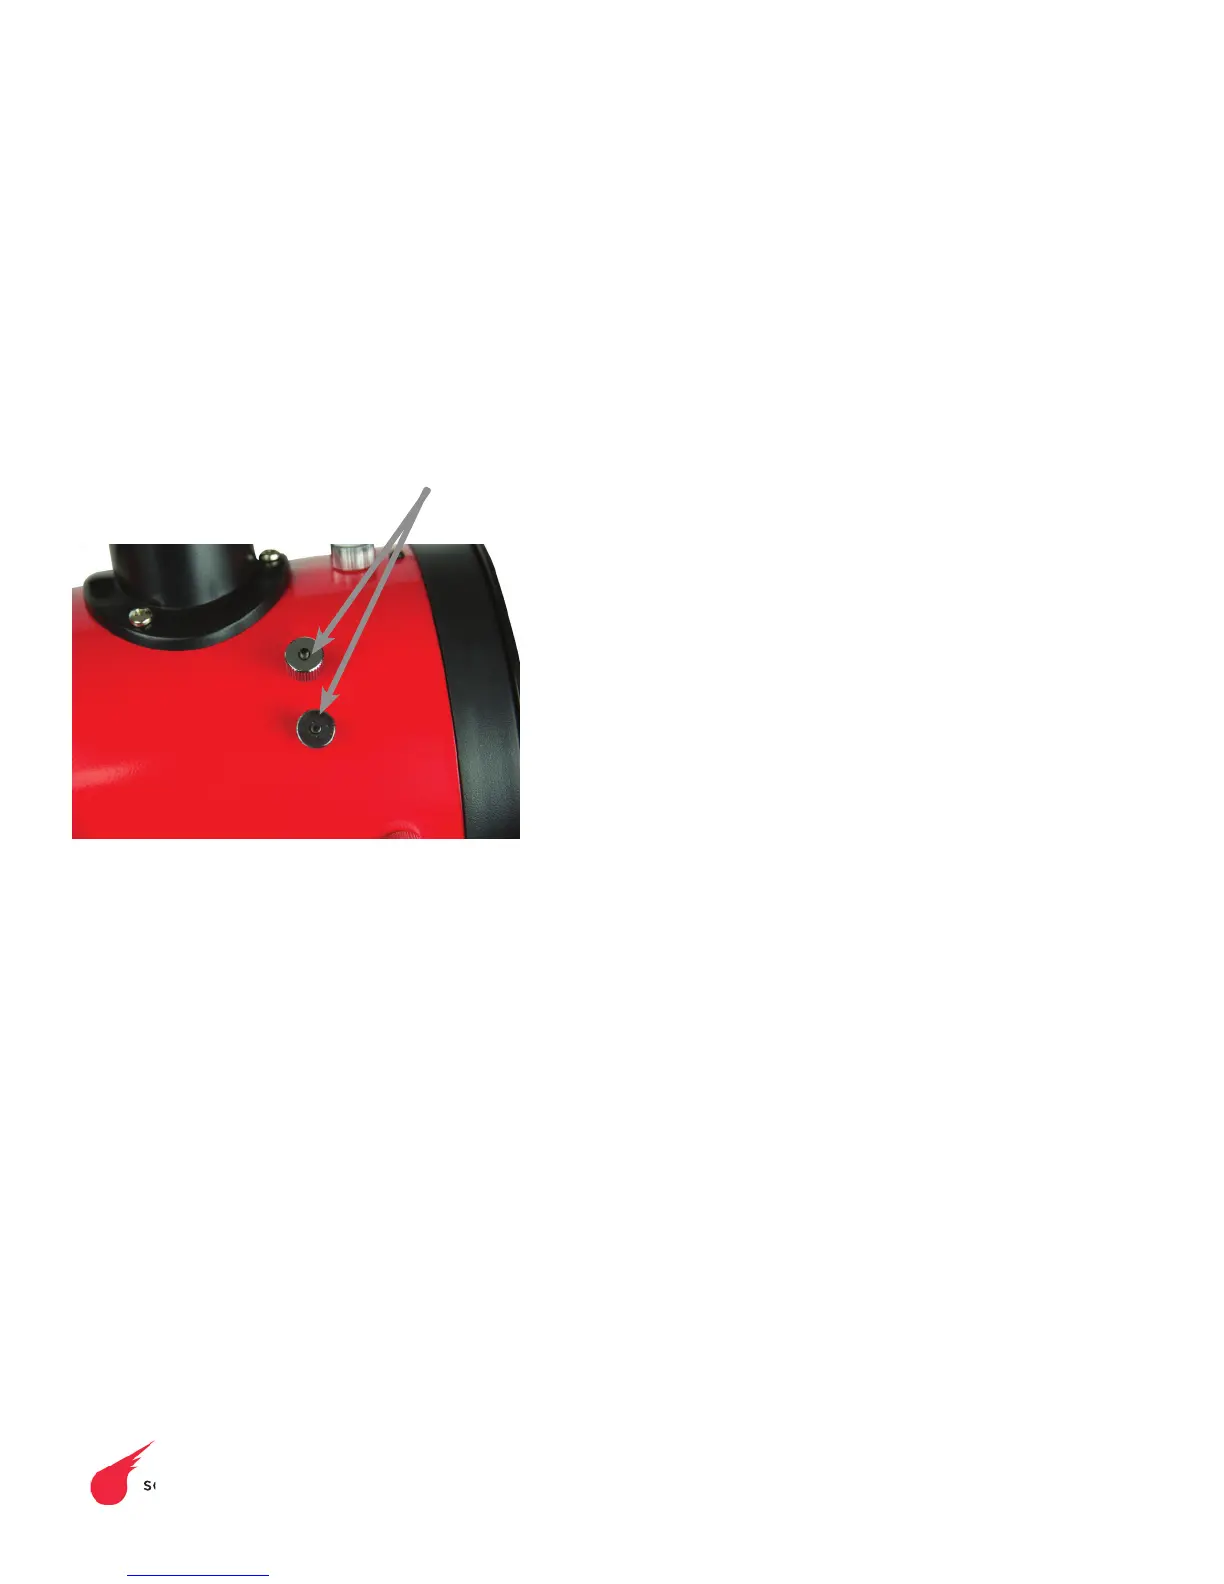
1. Remove the thumb nuts (shown in
Figure 1) from the top of the optical
tube assembly, just above the focuser.
2. Place the finderscope (shown as A on
page 3) over the threaded rods on the
tube.
3. Reinstall the thumb nuts.
4. See page 6 for operating directions.
EYEPIECE TRAY INSTALLATION
1. Using a Phillips head screwdriver,
loosen the two black screws located on
the side of the base. Do not remove the
screws, just loosen them about 1 turn.
2. Place the eyepiece tray (I) over the
screws with the mounting holes facing
downward.
3. Gently push the tray downward so the
screws align with the narrow portion of
the mounting holes.
4. Retighten the 2 screws. Do not over
tighten; they should only be snug
enough to hold the eyepiece tray.
TUBE ORIENTATION
The ASTROSCAN
®
Millennium has a tube
clamp to allow the eyepiece to be positioned
at the most comfortable viewing angle
1. To rotate the tube, loosen the
thumbscrew on the tube clamp slightly.
2. Rotate the optical tube so the
finderscope is at the top of the tube
and the eyepiece is positioned around a
45º angle from the ground. This can be
adjusted to best suit your preference.
3. Make sure the optical tube is forward
enough in the tube rings so that you can
point the telescope straight overhead
without bumping into the base.
ASTROSCAN
®
BASICS
USING 1.25” EYEPIECES
1. The 1.25” is the most commonly used
eyepiece format. The measurement
of 1.25 inches is the diameter of the
eyepiece barrel.
2. The eyepiece holder and focuser (B)
come already attached to the optical
tube, next to where the finderscope (A)
is mounted.
3. Remove the plastic dust cover from the
eyepiece holder.
4. Loosen the silver thumbscrews (L) on
the focuser drawtube.
5. Take out your 17mm eyepiece (K).
Remove the plastic covers.
6. Slide the chrome end of the eyepiece
into the eyepiece holder.
7. Tighten the bottom thumbscrew (L) to
hold eyepiece in place.
8. View through the eyepiece and focus as
needed (See focusing section).
9. To remove the eyepiece, loosen the
silver thumbscrew. To remove, loosen
the thumbscrew and pull the eyepiece
out of the focuser.
10. Use the plastic dust covers to protect the
eyepiece and focuser during storage.
Figure 1
 Loading...