Do you have a question about the Asus Chromebox 5 and is the answer not in the manual?
Explains the RMA shim flow's purpose for reinstalling firmware after component replacement.
Lists required items: computer with internet and an 8GB USB flash drive.
Guides on downloading the Chromebook Recovery Utility and the RMA shim image.
Instructions to remove cover, find pin, and short it to disable hardware write protection.
Steps to connect power, press buttons, and respond to prompts to start developer mode.
Details the warning about data erasure and the prompt to confirm developer mode.
Enter credentials and run commands to enable USB boot and initiate reboot.
Instructions to tap Ctrl+U during reboot to start the installation process.
Steps for installing the shim, removing the USB, and disconnecting power.
Boot to factory mode, update serial number, and select region.
Instructions for auto-updating firmware and performing auto HWID checking.
Includes auto TPM check and system reboot for data writing.
The system initiates wiping, shuts down, and boots to Out-of-Box Experience.
This document outlines the RMA (Return Merchandise Authorization) Shim Flow for self-repair of the ASUS Chromebox 5 / CN67. The primary function of this process is to reinstall the necessary firmware, software, and device information after internal components such as the motherboard, memory, or Wi-Fi module have been replaced. This ensures that the Chromebox operates correctly and securely following a self-repair.
The usage features of this RMA shim flow are designed to guide a user through a series of steps to prepare the Chromebox for new component integration and software configuration. The initial setup involves creating a bootable USB drive with the RMA shim image. This requires a computer with internet access and a USB flash drive of at least 8GB capacity. The process begins by downloading the Chromebook Recovery Utility, which is available as a Chrome extension. Users will add this extension to their browser, then use it to create the recovery media. This involves selecting the "Use local image" option within the utility and navigating to the downloaded .bin file, which contains the RMA shim image. Once the image is selected, the utility will write it to the USB drive, effectively making it bootable. A crucial warning is provided during this step: all data and partitions on the USB drive will be erased, so users must ensure they are using a drive they don't mind formatting. After the recovery media is successfully created, the USB drive is ready for use with the Chromebox.
Before proceeding with the software installation, a critical maintenance feature involves disabling the Hardware Write Protection (HWID) on the Chromebox. This step is essential because the RMA shim needs to write new firmware and device information, which is typically protected. The device must be powered off and unplugged from AC power before attempting this. Users are instructed to remove the bottom cover of the Chromebox to locate a specific "Write Protection Pin." This pin then needs to be "shorted" using a tool like tweezers, a jumper, or even a paper clip. This physical manipulation temporarily disables the hardware write protection, allowing the subsequent software steps to proceed without interference.
Once HWID is disabled, the Chromebox needs to be put into Developer Mode (DEV Mode). This is achieved by connecting the device to AC power, then simultaneously pressing and holding the "Recovery Button" (often accessed with a paper clip) and the "Power Button." This action initiates a recovery process. When a message appears on the screen, users are prompted to press Ctrl + D. This sequence triggers the system to enter Developer Mode. A warning message will appear, indicating that enabling developer mode will erase all data on the device and make it insecure. Users must confirm this action by pressing the "Recovery Button" again, which will cause the system to reboot automatically into Developer Mode.
After entering Developer Mode, the next usage feature is to enable USB Boot and install the RMA Shim. The system will reboot, and users will see messages indicating the transition to Developer Mode, data clearing, and a warning about modifications not being supported by Google. Once the Out-of-Box Experience (OOBE) screen appears, users need to press Ctrl + Alt + F2 to access the VT2 (Developer Console). In this console, users log in with the username root and password test0000. The first command to enter is crossystem dev_boot_usb=1, which enables booting from a USB drive. After entering this command, the previously prepared RMA shim bootable USB drive is plugged into the Chromebox. Then, the command reboot is entered. During the subsequent reboot, users must continuously tap Ctrl + U (or long-press Ctrl and tap U) to initiate the installation process from the USB drive.
The installation process itself is a key usage feature. After pressing Ctrl + U, the system will display a "CrOS Factory Shim" screen. Users need to press any key, then select "I" for "Install" and press Enter. The RMA shim will then install automatically. Once "OK" appears on the screen, indicating successful recovery media creation, users press Enter again. The device will then reboot into Factory Test Mode automatically.
The final maintenance features involve finalizing device information and restoring the device to a secure state. In Factory Test Mode, users will navigate through a menu. They will select "Update Device Data," enter the device's serial number, and press Enter. Next, they will select the appropriate "Region" for the device and press Enter. The system will then auto-reboot. Following this, the system will perform an "Auto update firmware" and "Auto HWID checking." These steps ensure that the device has the latest firmware and that its hardware identification is correctly configured. Another auto-reboot will occur for "data writing and system finalizing." During this phase, the system will perform an "Auto TPM check," which verifies the Trusted Platform Module. Finally, the Chromebox will start a "Factory Wiping In Progress" process, which erases all data and then shuts down the system. To complete the process, users press the "Power Button" to boot the system into the Out-of-Box Experience (OOBE), ready for initial setup as a new device. After all these steps, the tweezers, jumper, or paper clip used to short the Hardware Write Protection pin must be removed, and the bottom cover of the Chromebox should be reinstalled, restoring the device to its normal, secure operating condition.
| Operating System | Chrome OS |
|---|---|
| Bluetooth | Bluetooth 5.2 |
| Power Supply | 65W Power Adapter |
| Graphics | Intel UHD Graphics |
| Memory | 8GB or 16GB DDR4 |
| Storage | 128GB, 256GB NVMe SSD |
| Wireless | Wi-Fi 6E (802.11ax) |
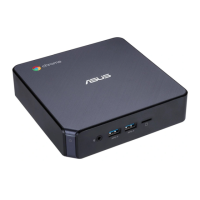
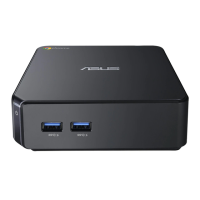
| Front I/O | USB 3.2 Gen 2 Type-C, USB 3.2 Gen 2 Type-A |
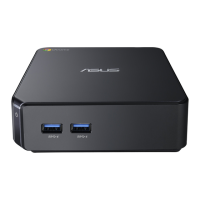
| Rear I/O | 2 x USB 3.2 Gen 2 Type-A |
| Connectivity | Wi-Fi 6E, Bluetooth 5.2, Ethernet |
| Ports | USB Type-C, USB Type-A, HDMI, RJ45 |
| CPU | Intel Core i3-1215U / Intel Core i5-1235U |
| Weight | 1.1 lbs |