Do you have a question about the Asus PRO H310M-R R2.0 WI-FI and is the answer not in the manual?
| Processor socket | LGA 1151 (Socket H4) |
|---|---|
| Processor manufacturer | Intel |
| Compatible processor series | Intel Celeron, Intel Core i3, Intel Core i5, Intel Core i7, Intel Pentium |
| Maximum number of SMP processors | 1 |
| Non-ECC | Yes |
| Memory channels | Dual-channel |
| Memory slots type | DIMM |
| Number of memory slots | 2 |
| Supported memory types | DDR4-SDRAM |
| Maximum internal memory | 32 GB |
| Supported memory clock speeds | 2666, 2400, 2133 MHz |
| LAN controller | Realtek RTL8111H |
| Wi-Fi standards | 802.11a, 802.11b, 802.11g, Wi-Fi 4 (802.11n), Wi-Fi 5 (802.11ac) |
| Bluetooth version | 5.0 |
| Ethernet interface type | Gigabit Ethernet |
| Supported storage drive interfaces | SATA |
| Parallel processing technology support | Not supported |
| Number of SATA II connectors | 0 |
| Number of SATA III connectors | 4 |
| BIOS type | UEFI AMI |
| BIOS memory size | 128 Mbit |
| Desktop Management Interface (DMI) version | 2.0 |
| USB 2.0 ports quantity | USB 2.0 ports have a data transmission speed of 480 Mbps, and are backwards compatible with USB 1.1 ports. You can connect all kinds of peripheral devices to them. |
| Audio chip | Realtek ALC887 |
| Component for | PC |
| Motherboard chipset | Intel® H310 |
| Audio output channels | 7.1 channels |
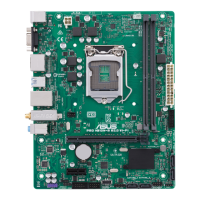
| Motherboard form factor | micro ATX |
| Windows operating systems supported | Windows 10 |
| Depth | 226 mm |
|---|---|
| Width | 180.3 mm |
To prevent electrical shock hazards, disconnect the power cable from the electrical outlet before relocating the system.
Before installing the motherboard and adding components, carefully read all the manuals that came with the package.
This guide contains the following parts: Chapter 1: Product introduction, Chapter 2: BIOS information.
This section describes the features of the motherboard and the new technology it supports.
Instructions for installing the CPU into the LGA1151 socket, including precautions.
This motherboard comes with two Double Data Rate 4 (DDR4) Dual Inline Memory Module (DIMM) sockets.
Illustrates the recommended configuration for installing DDR4 DIMMs into the dual-channel sockets.
Use the BIOS Setup program to update the BIOS or configure its parameters.
Press <Delete> or <F2> during the Power-On Self Test (POST) to enter BIOS Setup.
Press <Ctrl>+<Alt>+<Del> simultaneously or use the reset button to enter BIOS Setup.
Contains FCC Compliance Information, RF exposure warning, and other regulatory statements.