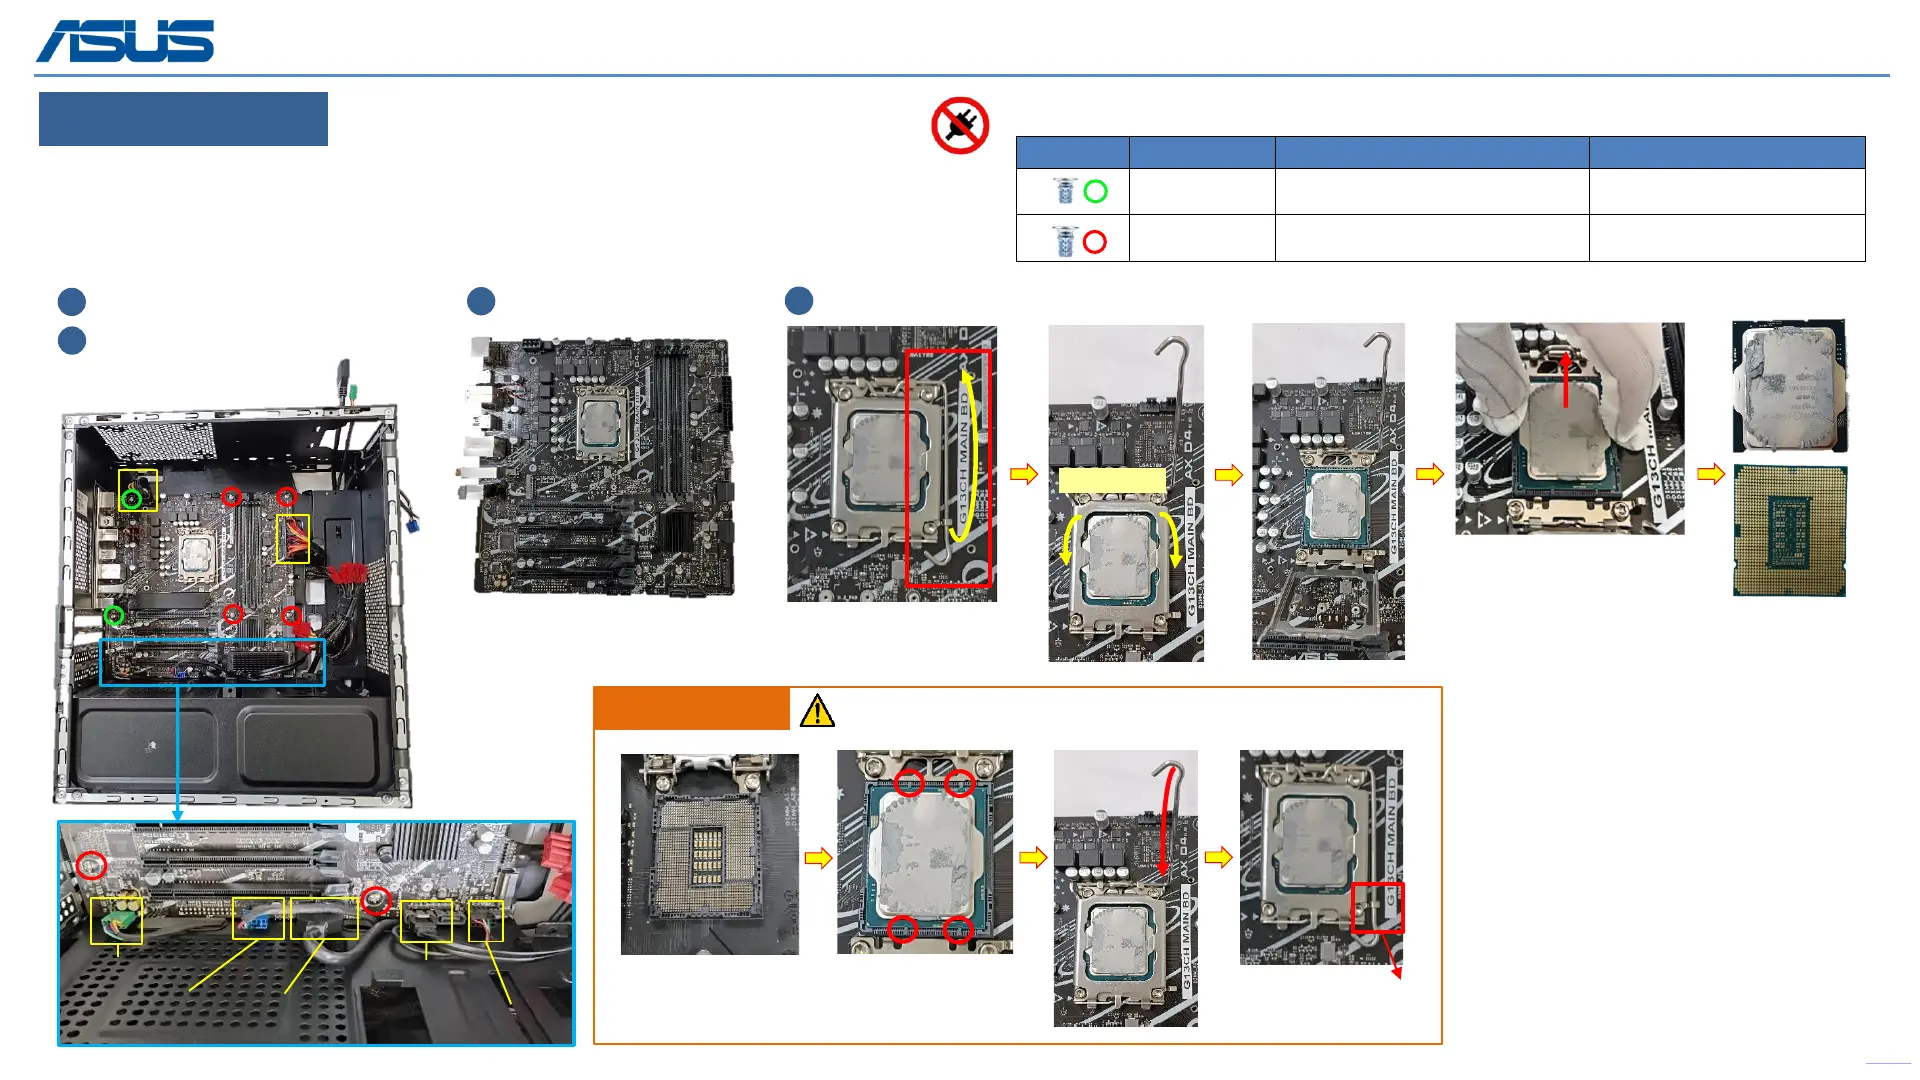
Screws QTY Spec Torque (kgf-cm)
2 M3*4L (6.3,2.05) (B) #2 8.0
±
0.5
6 #6-32*6L(7.1,2.3) (B) #2 8.0
±
0.5
MAIN BOARD & CPU
Step 1 : Disconnect (yellow mark) connectors *6pcs.
Step 2 : Remove screws *8pcs (Red and green mark).
Step 3 : Take out the Main Board.
Step 4 : Release and remove the CPU.
Disassembly Notice
Please be sure to pull out AC POWER CORD.
Disconnect (yellow mark)
1
Unscrew (Red and Green mark)
2
Take out Main Board
3
Release and remove the CPU4
Back
25
Assembly Notice
d
Please follow the instructions to assemble the CPU.
CPU triangle must be
aligned to MB triangle.
Lock
POWER SW CABLE
HDD SATA CABLE
AUDIO CABLE
FIO USB CABLE
(USB3.0)
CABLE USB2.0
CRB TO MB
lift the cover
 Loading...