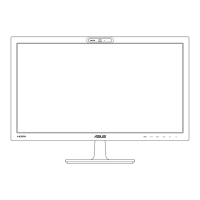
Rear connectors
1. AC-IN port. This port connects the power cord.
2. HDMI port. This port is for connection with an HDMI compatible device.
3. DVI port. This 24-pin port is for PC (Personal Computer) DVI-D digital signal
connection.
4. VGA port. This 15-pin port is for PC VGA connection.
5. Earphone jack. This port is only available when an HDMI cable is
connected.
6. Kensington lock slot.
2.1 Assembling the monitor arm/base
To assemble the monitor base:
1. Have the front of the monitor face down on a table.
2. Attach the base into the arm, making sure the tab on the arm fi ts into the groove on the base.
3. Fix the base to the arm by fastening the bundled screw.
Note: We recommend that you cover the table surface with soft cloth to prevent
damage to the monitor.
2.2 Adjusting the monitor
• For optimal viewing, we recommend that you look at the full face of the
monitor, then adjust the monitor to the angle that is most comfortable for you.
• Hold the stand to prevent the monitor from falling when you change its angle.
• The recommended adjusting angle is +20° to -5°.
2.3 Detaching the arm/base (for VESA wall mount)
The detachable arm/base of this monitor is specially designed for VESA wall mount.
To detach the arm/base:
1. Have the front of the monitor face down on a table.
 Loading...