ASUS Z170-P
1-1
Product introduction
1
1.1 Before you proceed
Take note of the following precautions before you install motherboard components or change
any motherboard settings.
Unplugthepowercordfromthewallsocketbeforetouchinganycomponent.
Beforehandlingcomponents,useagroundedwriststraportouchasafelygrounded
objectorametalobject,suchasthepowersupplycase,toavoiddamagingthemdue
to static electricity.
HoldcomponentsbytheedgestoavoidtouchingtheICsonthem.
Wheneveryouuninstallanycomponent,placeitonagroundedantistaticpadorinthe
bag that came with the component.
Beforeyouinstallorremoveanycomponent,ensurethattheATXpowersupplyis
switched off or the power cord is detached from the power supply. Failure to do so
maycauseseveredamagetothemotherboard,peripherals,orcomponents.
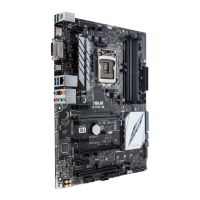
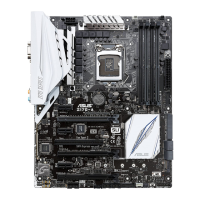
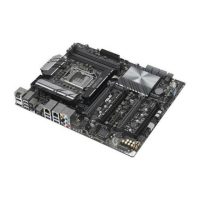
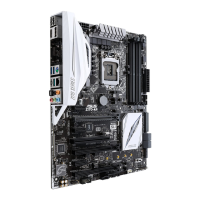
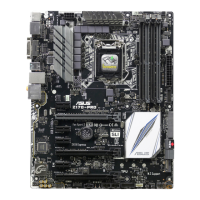
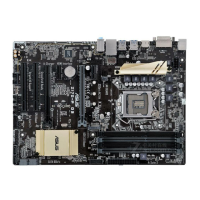
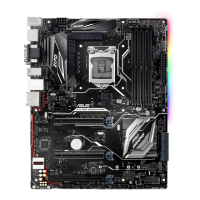
1.2 Motherboard overview
Beforeyouinstallthemotherboard,studythecongurationofyourchassistoensurethatthe
motherboardts.
Unplugthepowercordbeforeinstallingorremovingthemotherboard.Failuretodosocan
cause you physical injury and damage to motherboard components.
1.2.1 Placement direction
Wheninstallingthemotherboard,placeitintothechassisinthecorrectorientation.Theedge
with external ports goes to the rear part of the chassis as indicated in the image.
1.2.2 Screw holes
Place six screws into the holes indicated by circles to secure the motherboard to the chassis.
Donotovertightenthescrews!Doingsocandamagethemotherboard.
 Loading...