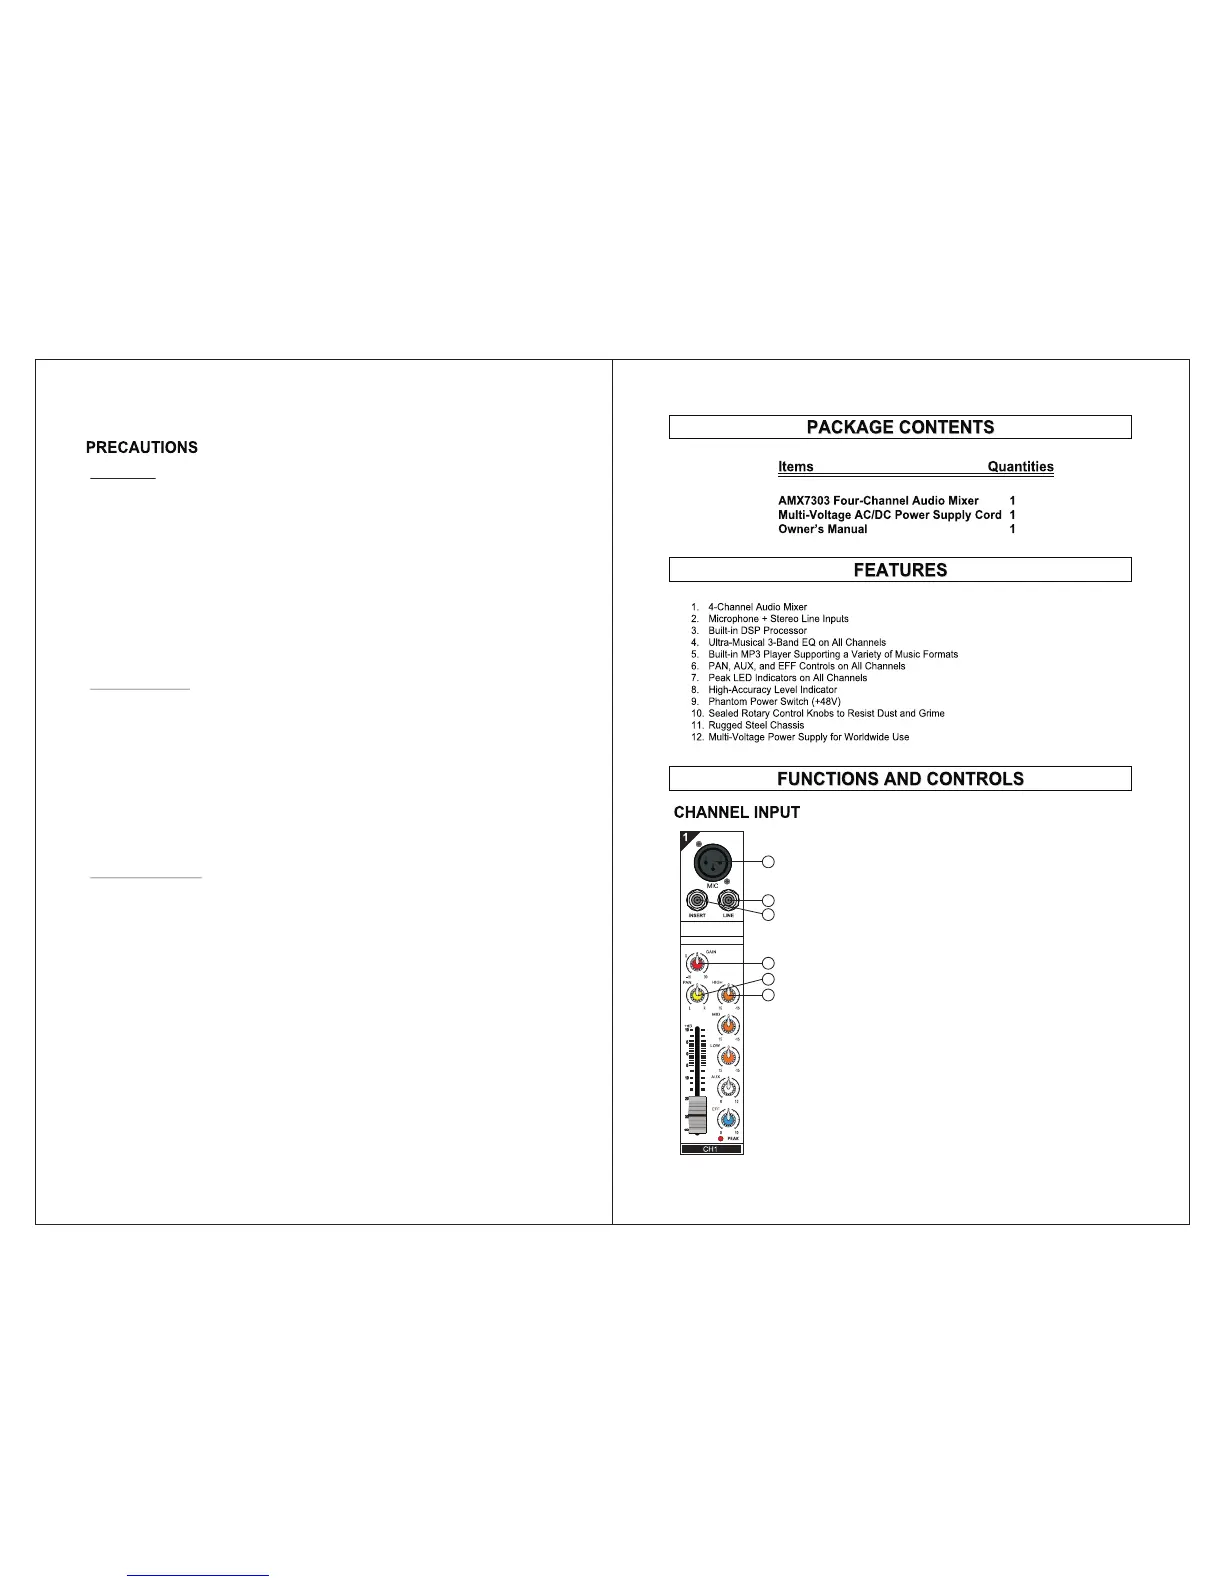
1. [MIC] Input Jack --- This is a balanced XLR microphone input jack.
This XLR input jack is to be connected to a microphone through
a balanced microphone cable with a male XLR plug.
2. [LINE] Input Jack --- This is an unbalanced 1/4” input jack. This 1/4”
input jack is to be connected to a microphone, a musical
instrument, or an audio device (such as CD player) through an
unbalanced cable with a 1/4” TS plug.
3. [INSERT] Jack --- This is a 1/4” TRS phone jack allowing you to
insert external line devices (such as gating, compressing,
equalizing, and /or reverb effects) into the signal path. This
insert jack is configured with “TIP” send and “RING” return.
4. [GAIN] Control Knob --- This knob is used to raise or lower the gain
level of the input signal. When the audio level is higher than a
predetermined threshold, the [PEAK] LED indicator (refer to
numeral 11) will keep blinking until the audio level goes below
the threshold.
5. [PAN] Control --- This control determines how much of the input
signal is sent to the left and right channels. When the knob is
centered at 12 O’clock, the input signal is sent equally to the
left channel and the right channel with a -3dB attenuation.
Turn this control fully counter-clockwise to send 100% of the
input signal to the left channel. Turn this control fully clockwise
to send 100% of the input signal to the right channel.
6. [HIGH] Treble-tone Control Knob --- This knob is used to adjust
the gain for the input signal band centered at 12.5KHz in the
range from -15dB to +15dB.
1
2
3
4
6
5
3 4
On Safety
* Operate only on designated AC power supply (120V AC in North America).
* Should any liquid or solid object fall into the cabinet, unplug the unit and have it checked by
qualified personnel before operating it any further.
* Unplug the unit from the wall outlet or set the Master switch to OFF if it is not to be used for
several days.
* To disconnect the cord, pull it out by the plug. Never pull the cord itself.
On Installation
* Allow adequate air circulation to prevent internal heat build-up. Do not place the unit on
surfaces (rugs, blankets, etc.) or near materials (curtains, draperies) that may block the
ventilation holes.
* Do not install the unit in a location near heat sources such as radiators or air ducts, or in a place
subject to direct sunlight, excessive dust, mechanical vibration or shock.
On Repackaging
Do not throw away the carton and packing materials. They make an ideal container in which to
transport the unit. When shipping the unit to another location, repack it as it was originally
packed at the factory.
 Loading...