3ISO-ARMOR Owner’s Manual
Specifications
Setting Up the ISO-ARMOR
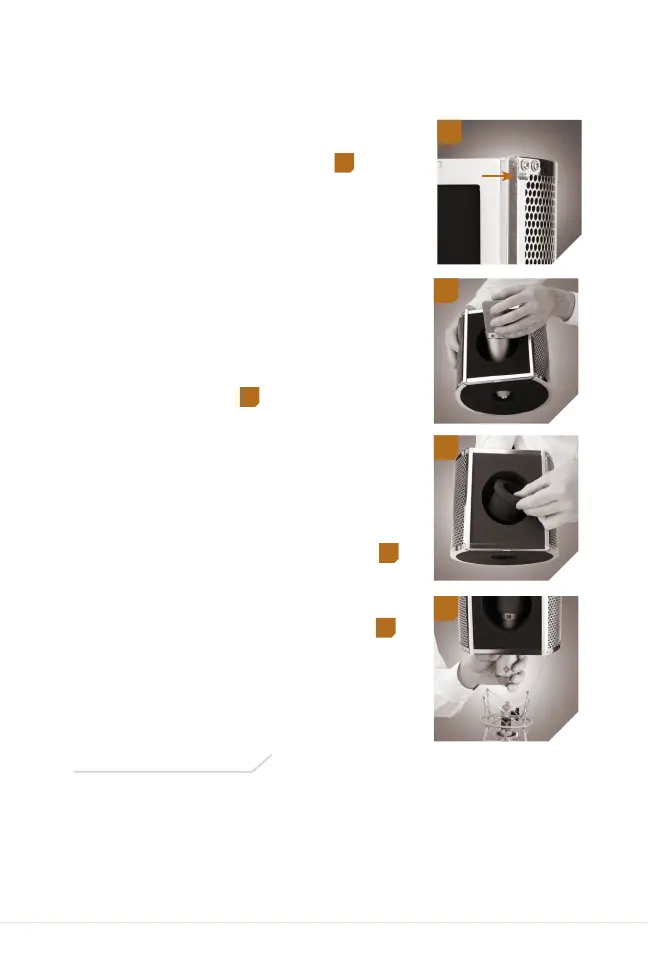
1. Loosen the locking screw, and
remove the pop screen by sliding it
up and out of the bracket.
1
2. Insert the microphone through
the front of the shield, and press
the bottom end of the microphone
through the microphone hole. Make
sure the microphone is facing
forward and that the microphone
capsule is vertically centered. If
your microphone has buttons or
switches, keep them exposed
above the microphone hole for
easy access.
2
2. The microphone should fit snugly
into the hole and should be held
securely in place by the foam.
Note: If the hole is too loose to holdthe
microphone, first insert the foamadapter into
the hole, and then insert the microphone.
3
3. Place the assembly onto your
microphone’s shockmount, and
connect the microphone cable.
4
4. Replace the pop screen, and tighten
the locking screw. You’re ready
to record.
Material: Shield: Aluminum
Interior: High-density open-cell acoustic foam
Dimensions (H × W × D): 7 × 7.9 × 7.5 in. (18.4 × 20.1 × 17.8 cm)
Weight: 1 lb. (454 g)
2
3
4
1