9 GB
Wind gauge assembly:
Choose a suitable location for your wind gauge.
– The wind gauge must be set up outdoors.
– The wind must be able to access the wind
gauge from all sides to enable the wind force
and wind direction to be measured accurately.
– Ensure that the vane and the wind wheel are not
blocked to guarantee accurate measurements.
– The wind gauge must be assembled within the
signal transmission range. Walls reduce the
transmission range. Check the signal reception
on the weather station before final assembly.
Ideally, the wind gauge should be mounted on a
mast or roof of a house, where the wind can act
directly on the wind gauge.
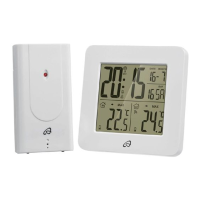
A mast is required with a diameter of approx.
25–31 mm (not included) which stands stable and
vertical. Mount the wind gauge as shown below
with the hexagonal socket head bolt, washers,
mounting screws and nuts provided. After assembly,
ensure that the wind gauge is positioned horizon-
tally with a stable hold.
The wind gauge must be positioned horizontally to
guarantee accurate measurements.
Mounting clamp
Washer
Washer
Nut
Wind
wheel
Hexagonal socket head bolt
Mast
Vane
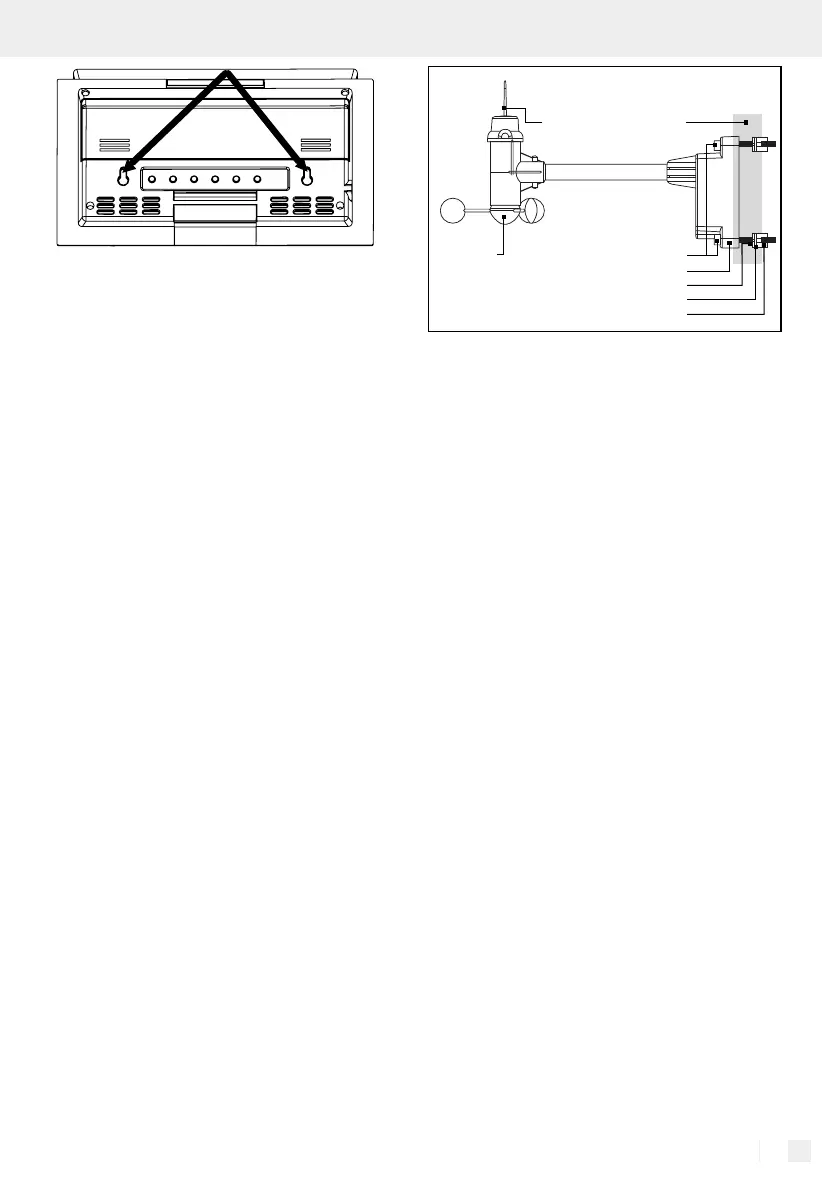
Setting up the rain gauge:
Choose a suitable location for the rain gauge.
– The rain gauge must be positioned outdoors.
The product must not be impaired by objects
and obstructions. Do not position under trees or
next to walls.
– The rain must be able to fall on the rain gauge
without obstructions to achieve an accurate
rainfall measurement.
– Ensure that rain water does not accumulate under
the rain gauge. It must be able to flow off freely.
– The rain gauge must be assembled within the
range of the signal transmission. Walls reduce
the transmission range. Check the signal reception
on the weather station before final assembly.
When you have found a suitable position, ensure
that the surface is completely horizontal to guarantee
accurate rainfall measurement.
The rain gauge can simply be stood in the desired
position or fixed with the screws provided.
1. Mark the drill holes using the rain gauge before
drilling the holes (ø 5 mm), ensure that no elec-
trical cables or water pipes can be damaged.
2. Push the supplied dowel into the drilled hole
until it is flush with the wall.
3. Fix the rain gauge with the screws provided.