Do you have a question about the ausdom AD260 and is the answer not in the manual?
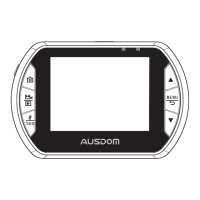
Short press to enter Playback mode.
Used for menu navigation, microphone control, and opening/closing the device.
Accesses/exits setup menus and returns to previous screens.
Audio output for sound recording and voice broadcasting.
Starts/stops recording, confirms selections, and activates parking monitoring.
Locks video, navigates menus, and selects menu items.
Takes pictures in the preview interface.
Indicates the status of picture recording.
Shows the charging status of the device.
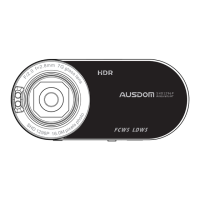
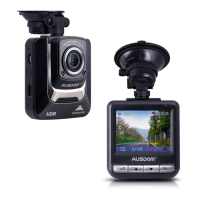
The optical component for capturing images and video.
Mounting point for the suction cup holder.
Resets the device in case of breakdown or operational failure.
Port for connecting USB cable for data transfer or charging.
Slots for TF card storage and HDMI output for TV connection.
Powers the device on/off and controls the LED photo light.
Explains battery power and charging instructions.
Important notes regarding car charger and auto closing.
Options to select video resolution for clearer pictures.
Adjusts video recording time for saving and continuous cycling recording.
Senses object movement to start/stop recording automatically.
Triggers recording upon car collision/shock or manual activation.
Options for setting image definition for clearer pictures.
Controls the opening and closing of sound recording.
Adds date, time, and driver number to video footage.
Detects shaking/collision to protect video recording.
Adjusts white balance for different light conditions and color temperatures.
Adjusts exposure compensation for photo light based on illumination.
Enables Lane Deviation Warning and Forward Collision Warning systems.
Calibrates lane correction lines for accurate warning system operation.
Selects the user interface language from available options.
Sets the current date and time for the device.
Enables or disables sound feedback for button presses.
Sets the time for the camera to automatically close without operation.
Activates screen protection after a period of inactivity.
Displays information on total, used, and remaining TF card capacity.
Enters the car license plate number for printing on video.
Formats the TF card, erasing all contents.
Resets the device to its original factory settings.
Displays current device software version information.
Mutes or unmutes the microphone with a single button press.
Locks the current video recording to prevent deletion.
Automatically repairs damaged video documents after power failure or anomaly.
Backs up video files to a computer via USB connection.
Plays back video documents on a TV using HDMI connection.
Mount the main unit and suction rack securely.
Verify the suction cup and glass are clean for optimal adhesion.
Mount the unit in the optimal location ensuring the sucker is firm.
Professional installation recommended for power source line access.
Read the manual and follow instructions for initial use.
Troubleshooting steps for when the device fails to power on.
Solutions for sudden shutdowns or automatic screen closure.
Addresses issues with videos not being saved to the memory card.
Troubleshooting steps for when the memory card is not recognized or functioning.
Troubleshooting for when the screen remains blank during recording.
Solutions for issues preventing image playback.
Addresses playback issues related to slow data transfer or software.
Fixes overexposed images where license plates are unclear.
Adjusts G-Sensor sensitivity to avoid frequent event recordings on bumpy roads.
Troubleshooting for a frozen device where no buttons function.
| Brand | ausdom |
|---|---|
| Model | AD260 |
| Category | Dash Cameras |
| Language | English |