CONTROLS AND INSTRUMENTS
Ignition and starter switch
The ignition and
starter
are
both
contro
lled by a single switch
operate
d by
a removable key. To switch on
the
ignition
insert
the
key
and
tu
rn
it in a clock-
wise direction until a slight resistance is felt.
Further
movement in
the
same
direction will
opera
te the
starter
motor. Release the key immediately the engine
starts.
If
the engine fails to s
tart
first time wait until it has come to rest before
using the starter again.
Headlight beam dipping switch
The
headlight main beam dipping switch is located on the
toeboard
to the
left
of
the clutch pedal.
It
is
of
the single-acting repeating type, lowering the
be
ams
on
one
application and raising them on the next. A warning light on
the face
of
the speedometer will glow when the beams are in the raised position.
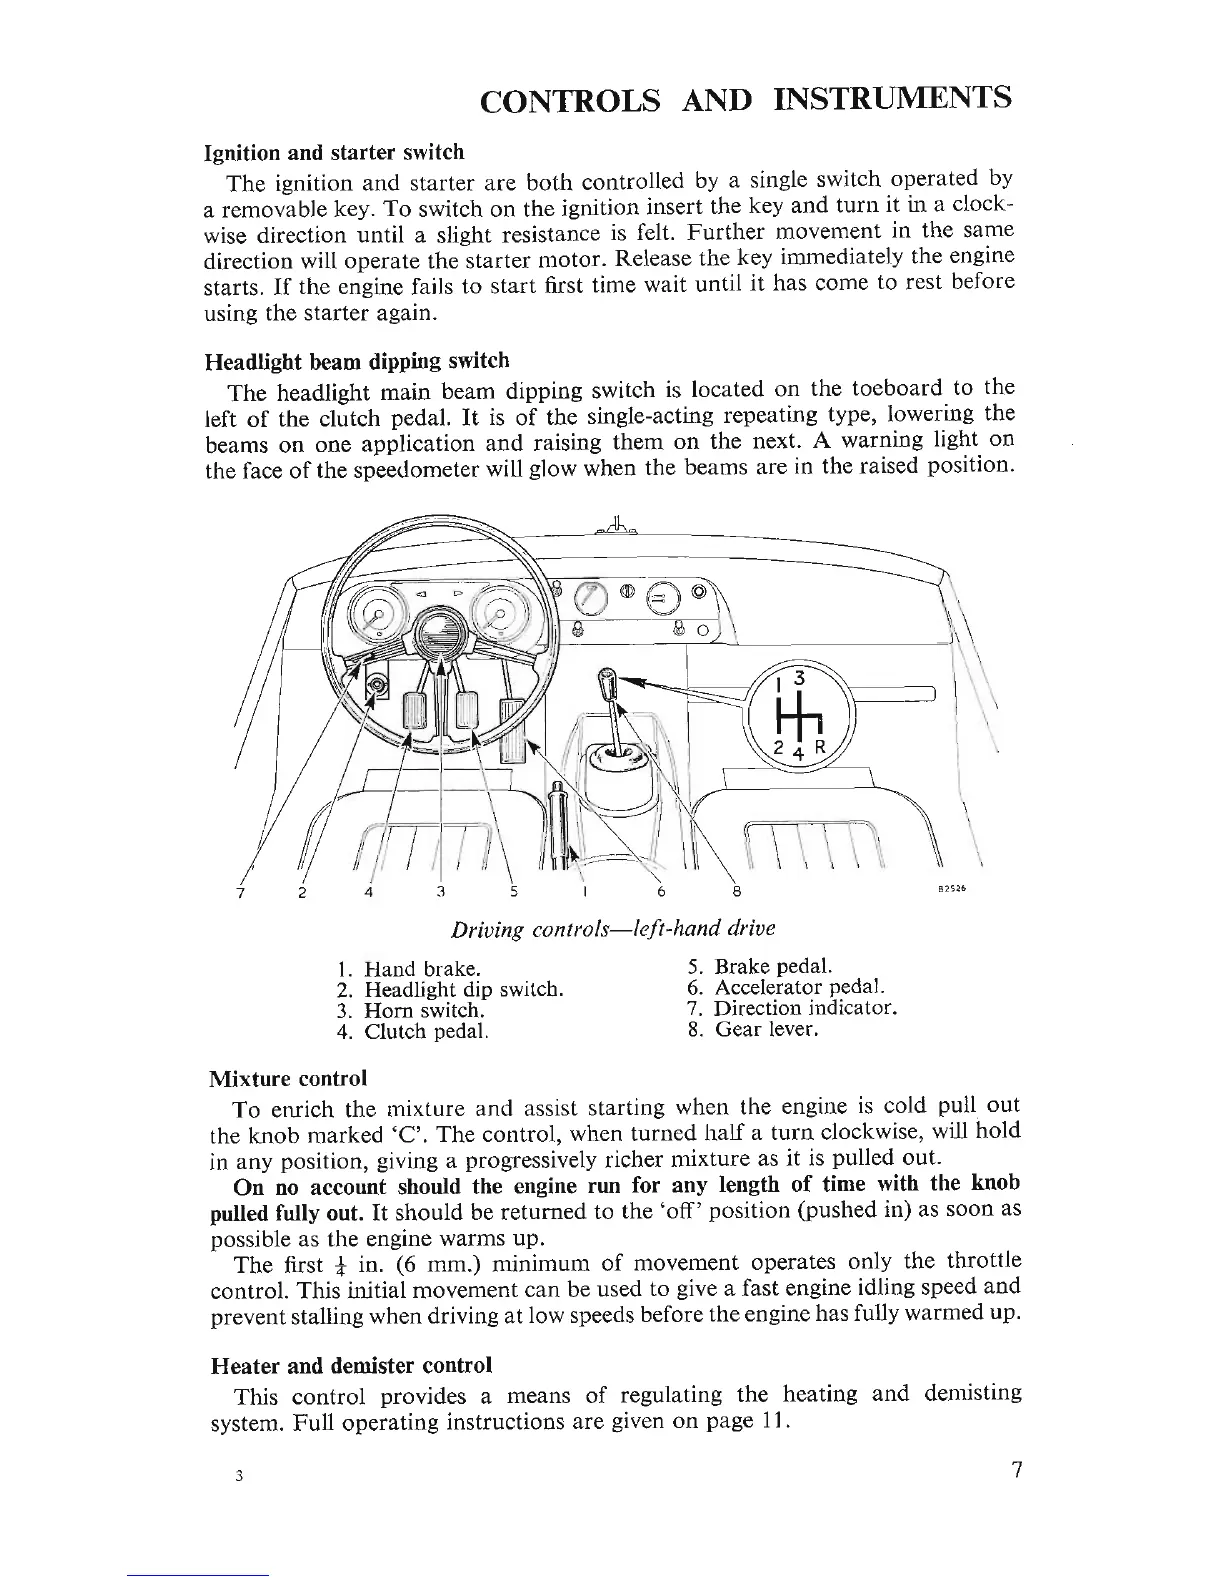
Driving controls- left-hand drive
I. Hand brake. 5. Brake pedal.
2. Headlight dip switch. 6. Accelerator pedal.
3. Hom switch. 7. Direction indicator.
4. Clutch pedal. 8. Gear lever.
Mixture control
To enrich the mixture and assist starting when the engine is cold pull out
the kno b marked 'C'.
Th
e con trol, when t
urne
d half a t
urn
clockwise, will hold
in any position, giving a progressively richer mixt
ure
as it is pulled out.
On no account should the engine run for any length of time with the knob
pulled fully out.
It
should be
returne
d to the 'off' posit ion (pushed in) as soon as
possible as
the
engine warms up.
Th
e fi
rst
tin
. (6
mm
.)
minimum
of
movem
ent
op
era
tes only the
throttl
e
c
ontrol.
This initial mo vement
can
be used to give a fast engine idling speed and
prevent stalling when dr iving at low speeds before the engine has fully warmed up.
Heater
and demister control
Tills
control
pro
vides a m
eans
of
regulating the heating and demisting
system. Full operating instructions are given on page 11.
7
 Loading...