EasyManua.ls Logo

AuthenTrend ATKey.Pro - User Manual

AuthenTrend ATKey.Pro
26 pages
Print Icon
To Next Page IconTo Next Page
Loading...
Quickstart Guide
All manuals and user guides at all-guides.com

Other manuals for AuthenTrend ATKey.Pro

Question and Answer IconNeed help?

Do you have a question about the AuthenTrend ATKey.Pro and is the answer not in the manual?

Summary

Welcome to ATKey.Pro

ATKey.Pro Product Overview

ATKey.Pro LED Indicators

LED Status Meanings

Understand the different LED states, including ON and flashing, and their corresponding functions.

Key Setup: Windows Security Key Manager

Open Windows Settings

Navigate through Windows settings to access the Security Key options.

Set ATKey PIN in Windows

Create a PIN for your security key within Windows settings for secure access.

Add Fingerprint in Windows

Enroll your fingerprint using the Windows security key interface for authentication.

Key Setup: Chrome Security Key Manager

Open Chrome Settings

Access security key management through Chrome's privacy and security settings.

Set PIN and Fingerprints in Chrome

Manage PIN and fingerprints for your ATKey via Chrome's security key manager.

Add Fingerprint in Chrome

Enroll your fingerprint and assign a name within the Chrome interface.

Key Setup: Standalone Enrollment

Enroll Fingerprints (Standalone)

Enroll fingerprints directly via USB without software, following LED and button prompts.

Key Setup: ATKey for Windows App

Download ATKey App

Download and install the ATKey for Windows application for initial setup.

Register and Name ATKey

Register and assign a unique name to your ATKey using the application interface.

Enroll Fingerprints via App

Follow on-screen prompts to enroll your fingerprint using the ATKey application.

Fingerprint Management

Fingerprint Management Options

Access options to add, delete, or calibrate fingerprints for your ATKey.

Add or Remove Fingerprints

Manage fingerprints by adding new ones, deleting existing ones, or calibrating the sensor.

Overview

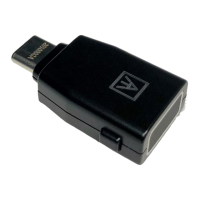
The ATKey.Pro is a FIDO2-certified, side-mounted fingerprint security key designed to provide passwordless authentication quickly and conveniently. It aims to enhance digital security by integrating biometric technology into a compact and portable USB device. The key is available in both Type A and Type C USB forms, making it versatile for various devices.

Function Description

The primary function of the ATKey.Pro is to enable secure, passwordless authentication using fingerprints. It is built on a FIPS140-2 Level 3 certified Broadcom Credential Vault MCU, which includes SecureBoot and SecureXP capabilities, ensuring a high level of security. The device can store up to 10 encrypted fingerprint templates within its secure embedded system. This means that sensitive biometric data is kept on the device itself, rather than being transmitted or stored elsewhere, reducing the risk of data breaches.

A key feature is its standalone enrollment capability. Users can enroll fingerprints directly onto the security key without needing any proprietary application or driver. This simplifies the setup process and makes the device accessible for a wider range of users and systems. The ATKey.Pro integrates an Egis fingerprint sensor, which is designed for increased accuracy and fast recognition speeds, allowing for authentication in less than a second from any angle. This speed and convenience are further enhanced by its compatibility with any Human Interface Device (HID), meaning it can be used across various platforms and applications without complex installations.

The device supports Bio-Safe, a hardware-based password manager built into AuthenTrend's biometric products. This feature allows users to log in to websites more securely and conveniently with a simple touch of their fingerprints, eliminating the need to remember and type complex passwords.

The ATKey.Pro uses a tri-color LED to communicate its status to the user. Different LED states indicate various actions or conditions:

  • Blue LED ON: Indicates the device is powered on.
  • Green LED ON: Signifies successful fingerprint verification.
  • Red LED ON: Indicates a fingerprint verification failure, an erase fingerprint action, or a key reset.
  • Cyan LED ON: Means the device has not yet recognized the key.
  • Blue LED flashes: Prompts the user to verify their fingerprint.
  • Cyan LED flashes: Prompts the user to touch the sensor.
  • White LED flashes (slow to fast): Indicates standalone enrollment is in progress.
  • Green LED flashes: Signifies that fingerprint verification is needed to start standalone enrollment, especially if there are already registered fingerprints.

Usage Features

The ATKey.Pro offers multiple methods for setup and fingerprint management, catering to different operating systems and user preferences.

Windows Built-in Security Key Manager:

For Windows users (version 1903 and above), the ATKey.Pro can be set up through the operating system's built-in Security Key Manager.

  1. Open Windows Settings: Navigate to "Settings" > "Accounts" > "Sign-in options" > "Security Key."
  2. Set the PIN: Users must first add a "Security key PIN." This PIN is written into the ATKey.Pro and is essential for managing the device. The process involves clicking "Manage" under "Security Key," then selecting "Add" for "Security Key PIN," and entering a new PIN, followed by confirmation.
  3. Add Fingerprint: After setting the PIN, users can set up "Security Key Fingerprint." This involves typing in the previously set PIN code and then following on-screen prompts to enroll their fingerprint. The system guides the user to repeatedly lift and rest their finger on the sensor until the enrollment is complete, indicated by an "All Set!" message.

Chrome Built-in Security Key Manager:

For users on ChromeOS, macOS, and Linux core systems with the latest Chrome browser, the ATKey.Pro can be managed through Chrome's built-in security key manager.

  1. Open Chrome Settings: Go to "Settings" > "Privacy and security" > "Manage security keys" or directly navigate to chrome://settings/securityKeys.
  2. Set PIN and Fingerprints: Within this manager, users can manage their PIN, fingerprints, and credentials. The first step is to create a PIN for the security key. Once the PIN is set, users can proceed to add fingerprints. The process involves entering the PIN and then following instructions to touch the security key repeatedly to capture the fingerprint.
  3. Assign Fingerprint Name: After successfully adding a fingerprint, users can assign a name to it for easier identification and management.

Standalone Enrollment:

This feature allows users to enroll fingerprints without needing any device or application download, making it highly convenient. It requires a power supply from any USB port, with a power bank being highly recommended.

  1. Insert ATKey.Pro: Plug the ATKey.Pro into a USB port. The LED will turn blue.
  2. Initiate Enrollment: Press the side button three times quickly. The LED will then turn white.
  3. Enroll Fingerprint: Repeatedly lift and rest the finger on the sensor. The LED will change from slowly flashing to faster flashing as the enrollment progresses.
  4. Completion: Once enrollment is complete, the LED will turn green. If a PIN has already been set using another method, users should enroll fingerprints at the same place. This method is also suitable for adding more fingerprints or if a PIN has not yet been set. To exit standalone enrollment, press the button, and the LED will return to blue. If fingerprints are already enrolled, the LED will flash green first on step 4, prompting verification of an existing fingerprint before enrolling a new one.

ATKey for Windows (App):

An alternative for Windows users is the dedicated "ATKey for Windows" application (version 2.0.57.0 and above).

  1. Download and Launch App: Users need to download the app, plug in their ATKey.Pro, and launch the application.
  2. Register and Name ATKey: Within the app, users can add and register their ATKey. The default name is "ATKey.Pro + S/N," but users can customize it.
  3. Enroll Fingerprints: The app guides users through the fingerprint enrollment process, showing progress (e.g., 0%, 32%, 100%). After enrollment, users verify the enrolled fingerprint by placing their finger on the ATKey.
  4. View Enrolled Fingerprints: Successfully enrolled fingerprints will be listed in the main window of the application.

Maintenance Features

The ATKey.Pro also includes features for managing and maintaining fingerprints and the device itself.

Fingerprint Management:

Through the ATKey for Windows app or Chrome's security key manager, users can access fingerprint management options. These typically include:

  • Add Fingerprint: Allows enrolling new fingerprints, following the same instructions as during initial setup.
  • Delete All Fingerprints: This option enables users to remove all stored fingerprints from the device. For security, this action usually requires a Windows PIN code authorization before proceeding.
  • Calibrate Fingerprint Sensor: The device offers a calibration function to recalibrate the fingerprint sensor. During calibration, it is crucial not to touch the fingerprint sensor. The LED will flash white and then return to blue upon completion. This helps ensure optimal performance and accuracy of the sensor over time.

The ability to add and remove fingerprints, along with sensor calibration, ensures that the ATKey.Pro remains functional and secure throughout its lifespan, adapting to user needs and maintaining high biometric accuracy.

AuthenTrend ATKey.Pro Specifications

General IconGeneral
CategoryLaptop Accessories
TypeSecurity Key
ConnectivityUSB-A, NFC
CompatibilityWindows, macOS, Linux, Android, iOS
Browser SupportChrome, Firefox, Edge, Safari
Weight10g
Security ProtocolsFIDO2, U2F
SecuritySecure Element
Form FactorKeychain

Related product manuals