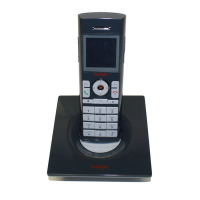
Part B: Avaya 3641/3645 Wireless IP Telephone
50 Avaya Voice Priority Processor, Avaya 3641/3645 Wireless IP Telephone, Handset Administration Tool
4. Avaya 3641/3645 Wireless IP Telephone Configuration
Each Wireless IP Telephone may be configured for site-specific requirements by opening
the Admin menu and selecting options or entering specific information or by using the PC-
based Handset Administration Tool (HAT). Any settings entered in the Admin menu or the
HAT must conform to system settings. Only the Wireless IP Telephone being configured is
affected by the Admin menu settings; therefore each handset must be configured
individually with the identical settings. Configuration is vastly simplified through the use
of the HAT. See Part C in this document for more information.
When WPA2 Enterprise security is used, PAC files for EAP-FAST can be provisioned
wirelessly or by using the HAT. For PEAP, the HAT must be used to enroll certificates. See
section 4.3 for details.
Other settings that must be configured include, but are not limited to, WLAN QoS, DSCP
tagging, DHCP and regulatory domain information. If these are not selected by the
administrator the handset will use the default settings.
The Wireless IP Telephone can be automatically configured for IP address by enabling
DHCP.
The Wireless IP Telephone user may select several usability options from the standby or
Config (configuration) menu, described below in the User-defined Preferences section.
This information is also provided in the end user manual.
4.1 The Admin Menu
The Admin menu contains configuration options that are stored locally (on each Wireless
IP Telephone). Every Wireless IP Telephone is independent and if the default settings are
not desired, the admin options must be set in each Wireless IP Telephone requiring
different settings.
Opening the Admin menu
The handset Admin menu can be accessed in one of two ways:
1. With the Wireless IP Telephone powered OFF, press and hold the START key. While
holding the START key, press and release the END key. When the Admin menu
appears, release the START key.
2. Press and release the END key. Press and hold the START key. When the Admin
menu appears, release the START key.
If an admin password has been set, the display will require the user to enter the
password before opening the Admin menu. The default password is 123456. If
no password is set, the display will proceed directly into the Admin menu.

 Loading...