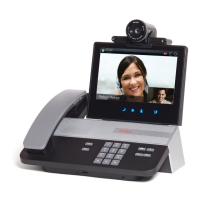
The administrator must provision Avaya CU360 for automatic configuration and send the service
code to users.
Procedure
1. Start Avaya CU360.
Avaya CU360 displays the quick setup wizard.
2. From the list, select your preferred language.
3. (Optional) To configure Wi-Fi, click Wi-Fi, and configure your wireless network settings.
4. Click Next.
5. (Optional) To update the new version, click Install.
• Avaya CU360 displays the System updates status.
• When the installation process is completed, Avaya CU360 restarts automatically.
6. Click With Multiple Meeting Services > Automatic Setup > You have a service code >
DES Enrollment code.
Avaya CU360 displays the window to enter the service code.
7. Enter the enrollment code.
You can enter the enrollment code in the following two formats:
• A full 8-digit or 12-digit Numeric Enrollment Code (NEC): The numbers in this enrollment
code generates randomly. The NEC code has an expiry date.
• A full 12-digit Provisioning Enrollment Code (PEC): The first 8 digits identify the
customer account id, and the subsequent 4 digits identify PIN. You can create a PIN
of your choice. The PEC enrollment code does not have an expiry date.
8. Click Next.
Avaya CU360 prompts you to enter your login credentials.
9. Configure the following fields:
• User Name
• Password
10. Click Next.
Avaya CU360 prompts you to enter your phone details.
11. Enter your phone details, and click Next.
Based on your network configuration, you might have to enter your:
• User Name
• Password
Avaya CU360 prompts you to enter your login credentials.
Configuration of Avaya CU360 basic settings
October 2022 Installing and Administering Avaya Collaboration Unit CU360 47
Comments on this document? infodev@avaya.com

 Loading...


