Setup Tracking Point
Setup a tracking point as a start point of auto tracking. In general, the tracking point is set at the position of
the speaker. When the camera detects a person at the tracking point it will start to track that person. Also,
when tracking is lost, the camera will revert back to the tracking point after a few seconds.
1. Press button on remote control to call out the OSD menu.
2. Go to Network > DHCP > On. Then, go to System > Information to check IP address of the camera.
3. Next, open the browser on your PC/laptop, enter the IP address of the camera and connect to camera
(Default login account and password are admin/admin). User should see the camera Web UI.
4. Select Tracking Settings > Presenter. Use
,
▼
,
,
, and to set the camera position,
then, select to save the tracking point. For more detail setting of tracking, please refer to
user manual.
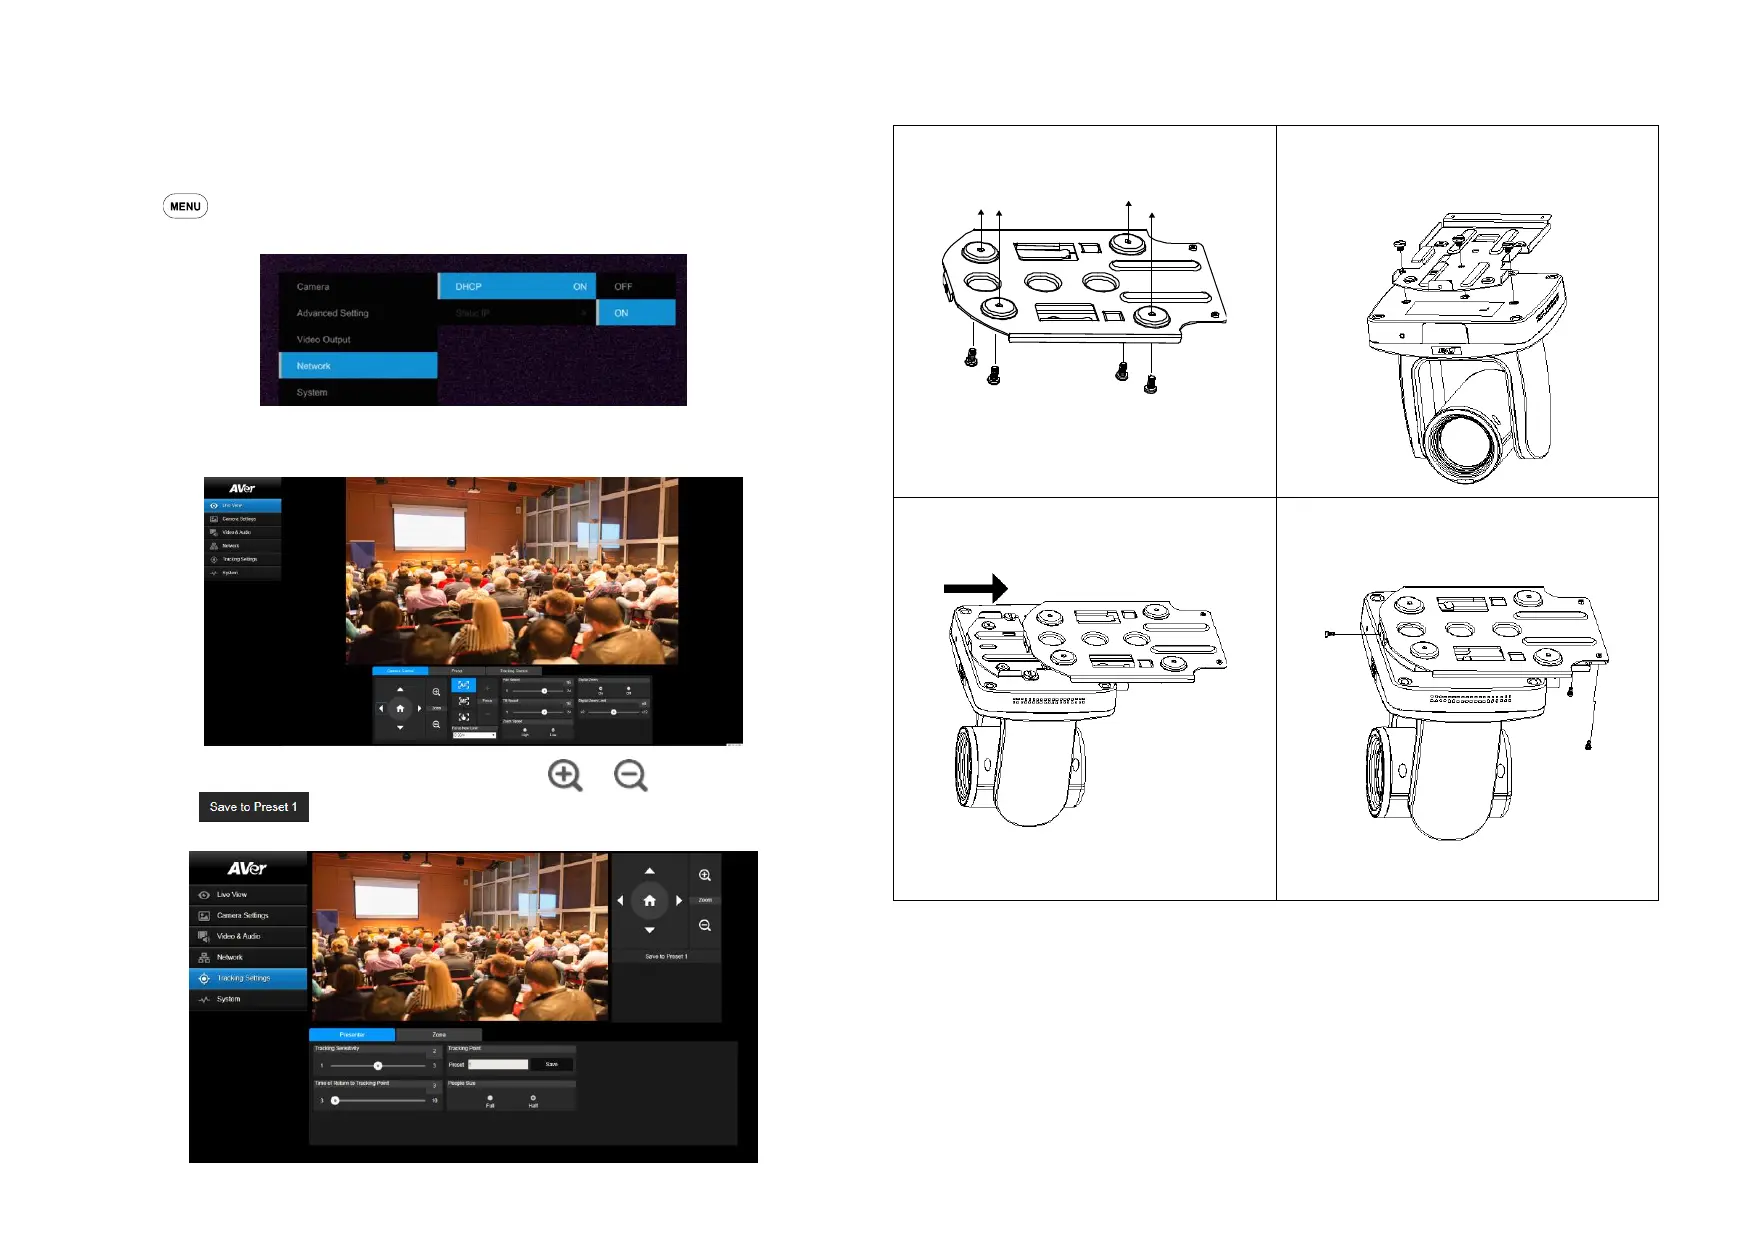
Ceiling installation
1. Secure the mount bracket on the ceiling.
Screw: 4 screws, M4 x 10mm(Not Included in
the package)
2. Install the mount bracket on the camera.
Screw: 3 screw , 1/4"-20 L=6.5mm(Included in
the package)
3. Slide the mount bracket with the camera into
the mount bracket which secured on the
ceiling.
[Note] Connects necessary cables after sliding the
camera into the mount bracket.
4. Secure the camera with screws.
Screw: 3 screws, M3 x 6mm(Included in the
package)
 Loading...