Do you have a question about the AVIRON STRONG Series and is the answer not in the manual?
Detailed specifications for the Aviron Rower, including frame, resistance, belt, seat, dimensions, and weight.
Technical specifications for the Aviron rower's touchscreen, including screen size, processors, memory, storage, OS, Wi-Fi, and more.
Read all instructions before use. Consult physician. Not for children under 10. Avoid faintness or dizziness.
Equipment complies with FCC RF exposure limits, requires 20cm distance from radiator to body.
Assemble and operate on a solid, level surface with 100cm clear space. Avoid outdoors, pools, or high humidity.
The maximum recommended weight capacity for the equipment is 507lbs (230kg).
Connect to a grounded outlet. Disconnect before cleaning or maintenance to prevent shock, fire, or injury.
Inspect equipment before exercising. Ensure all nuts and bolts are tightened. Do not use if unsafe.
Warm-up for 5-10 minutes to prepare the body, increase heart rate, circulation, and blood flow to muscles.
Instructions on how to lower the touchscreen and lift/lower the main frame for storage.
Read instructions completely before assembly for safety and effort. Do not plug in power until fully assembled.
Detailed list of all parts and tools required for assembly, including fasteners.
Attach the Front Leg (D) to the Main Frame (A) using fasteners (F2).
Secure the Handlebar Holder Cover (I) to the Main Frame (A) using fasteners (F3).
Attach the Rail (H) to the Rear Leg (G) using fasteners (F2). Caution: Rail has sharp edges.
Flip the main frame to attach the rail vertically. Ensure seat roller is lowered before installation.
Remove and discard shipping components (XX) and (YY) as they are no longer needed.
Attach the Small Cover (E) to the Main Frame (A) as shown in the diagram.
Remove and discard components (ZZ) as they are no longer needed. Attach part (H).
Attach the Seat (C) to the Rail/Main Frame (H) using pre-attached fasteners.
Attach Slider Side Covers (K and L) to the Main Frame (H) using fasteners (F3).
Assemble the Foot Carriage (J) to the Main Frame (A). Adjust foot width with the hand crank.
Connect the Touchscreen (B) to the rower arm (A) using provided connectors. Ensure arm is in highest position.
Adjust the distance between feet by turning the crank on the right side of the foot carriage.
Connect the rower to a network using an ethernet cable by plugging it into the touchscreen's rear port.
Instructions for connecting the rower to Wi-Fi via System Settings, selecting network and entering password.
Steps to sign in to admin and system settings using user icon, 'SIGN IN', 'admin' email, and machine ID password.
Locate the machine ID for password entry on the screen (Account Information), touchscreen, or its box.
Wipe down equipment and rail with a damp cloth after each workout or day of use.
Inspect drive belt, tighten screws, and vacuum dust from shroud and hard-to-reach areas.
Aviron's commitment to customer satisfaction, interpretation of specs, and policy on equipment improvement.
Limits Aviron's liability for indirect, special, or consequential damages related to equipment use.
Warranty applies to factory/dealer repairs. Equipment registered upon network activation. No substitute provided.
Contact support, arrange shipping prepaid and insured for any equipment or parts needing service.
Device complies with Part 15. Operation subject to conditions preventing harmful interference.
User-corrected interference methods: re-orient antenna, increase separation, change circuit, consult technician.
Changes not approved by the responsible party may void user's authority to operate the equipment.
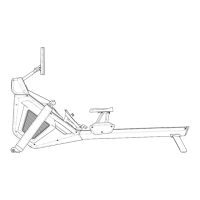
Visual representation of all rower components with numerical identifiers for easy part identification.
Detailed list of all rower parts with section, number, part name, and quantity required for assembly.