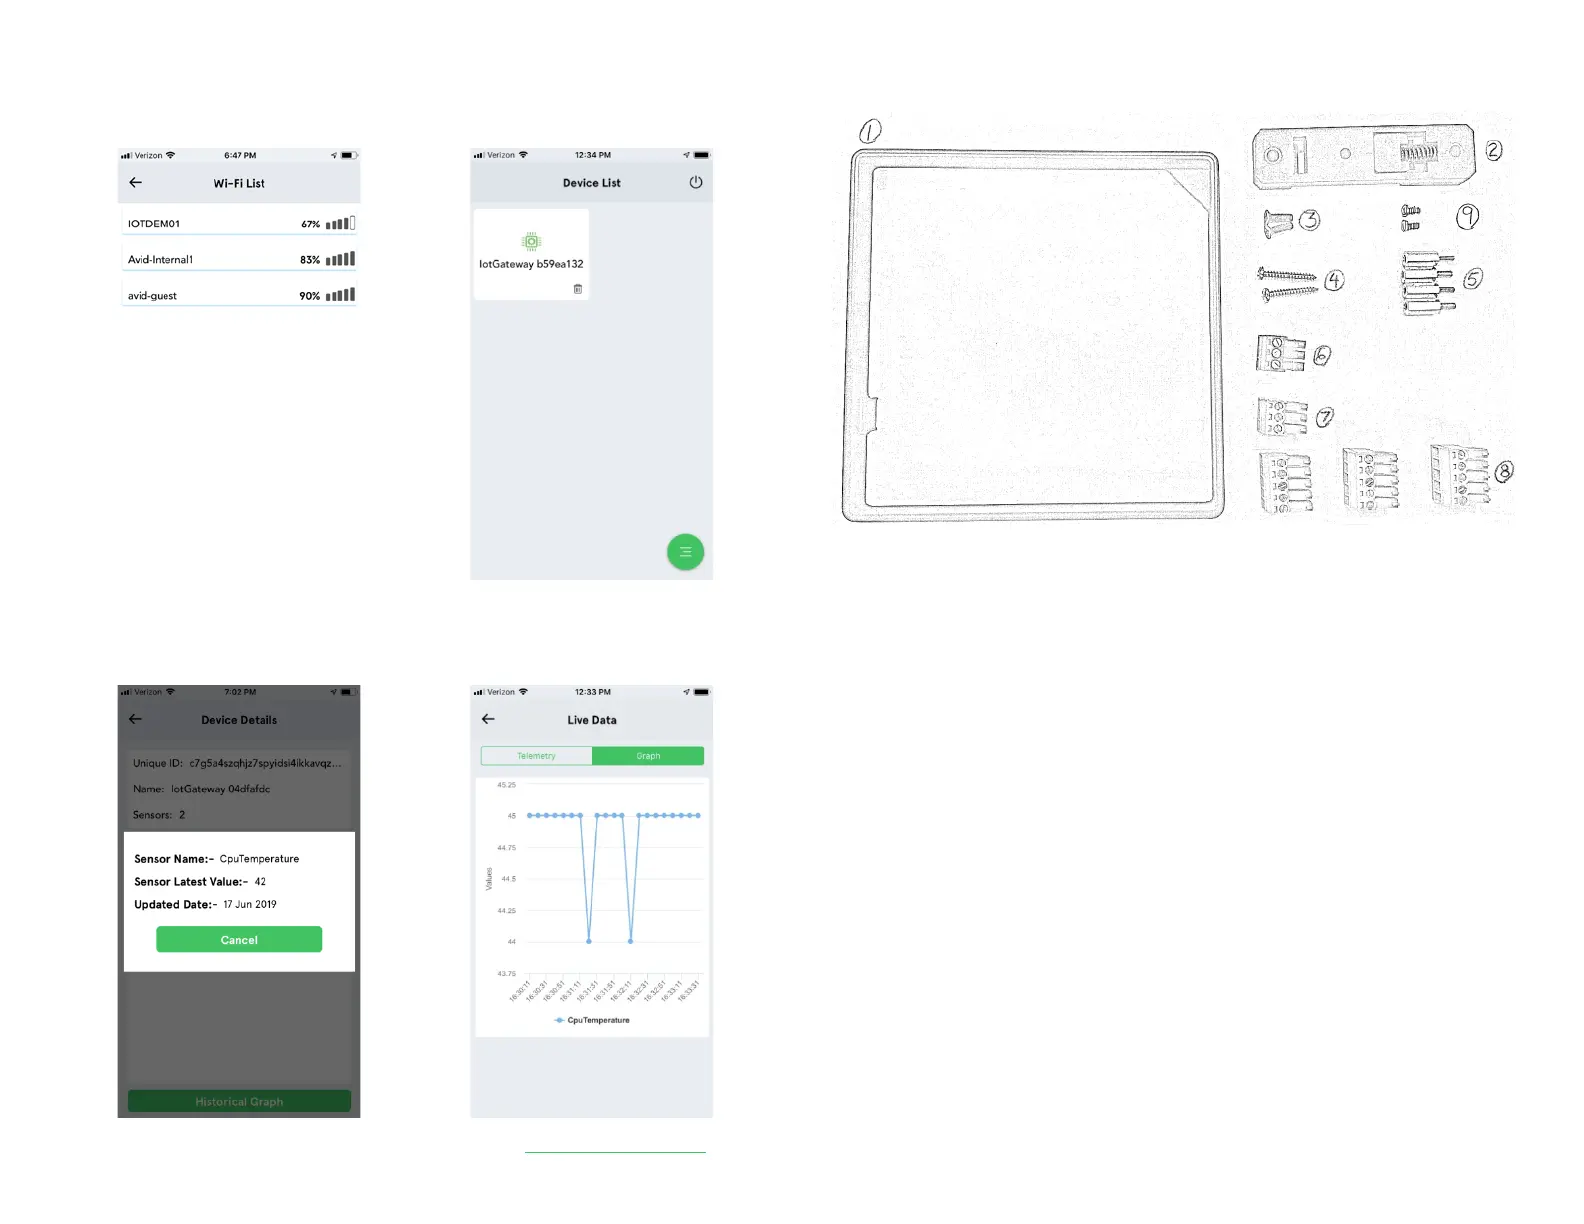
9) Optionally, connect your SmartEdge
Gateway to your local WiFi network
10) After a minute, your device should appear
in the Device List
Tap your device to see the device details
Tap the sensor to view sensor readings
13) View your sensors from the Avnet IoT Connect Web Portal: https://avnet.iotconnect.io
PARTS KIT
A parts kit is included in the box with the following items:
1. Extension ring (1): install to increase height of enclosure for HATs
2. DIN Rail Mount (1): install with flat head screws (2) for DIN rail mounting
3. Flat Head Screws (2): use to secure the DIN rail mount
4. Wall Mount Screws (2): install into wood or metal, placed 97mm apart vertically
5. Standoffs (4): install on top of existing standoffs when using extension ring
6. 3 Position Terminal Block (1), Black: use for DC-IN connection
7. 3 Position Terminal Block (1), Green: use for CANbus connection
8. 5 Position Terminal Block (3), Green: use for Digital I/O and RS485 connection
9. Pan Head Screws (2): use to secure a HAT onto the Gateway
 Loading...