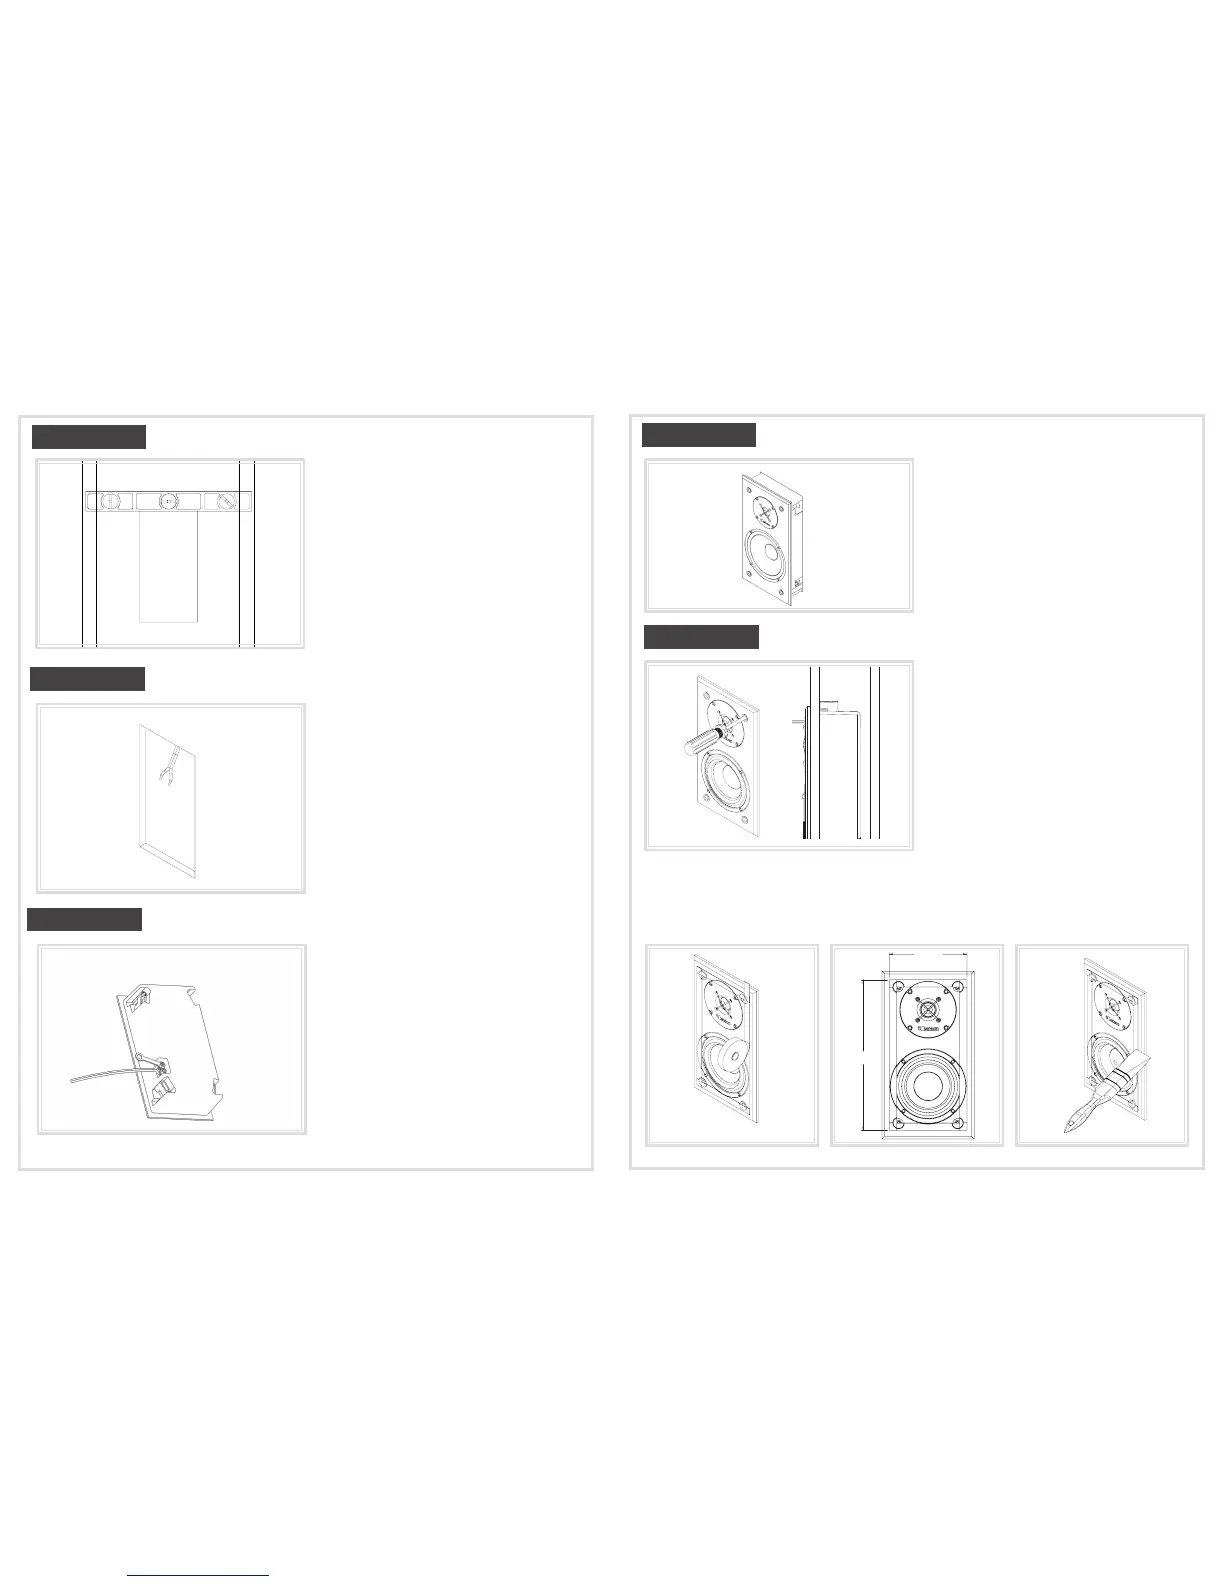
6 5/8in
329.00 mm
12. 15/16 in
Apply painters tape along painted edge while
keeping off the raw material.
Keep painters tape within the
recommended dimensions.
1. 2. 3.
Step 1 / Étape 1:
Step 4 / Étape 4:
Step 5 / Étape 5:
e 1:
Using the supplied template and a level (not included)
mark an outline of the wall cutout to place the M3 In-Wall
Speakers. en carefully cut the selected area using a jigsaw
or handsaw.
Warning: Make sure there aren’t any other wires, pipes, or
other xtures that might be in the wall before cutting.
+++
À l’aide du gabarit inclus et d’un niveau (non-inclus) tracez sur
le mur le contour de l’emplacement du haut-parleur de modèle
“T”. Par la suite, découpez l’endroit marqué à l’aide d’une scie
sauteuse ou à gypse.
Avertissement: Assurez-vous qu’il n’y ait pas de ls, tuyaux ou
autres accessoires qui sont à l’intérieur du mur avant de couper
ce dernier.
Step 2 / Étape 2:
If your speaker wire is not already installed in the wall you
will need to run it down inside your wall to your baseboard
and then around the room to your amplier or receiver.
+++
Si votre l de haut-parleur n’est pas déjà installé à l’intérieur
du mur; il faudra le descendre à l’intérieur du mur jusqu’à la
plinthe et de là, autour de la pièce jusqu’à votre amplicateur
ou récepteur Audio/Vidéo.
Insert the speaker wire into the hole in the binding posts of
the M3 In-Wall Speaker, keeping the red and black (positive
and negative) connections consistent. Use the supplied
wrench to tighten down each nut to hold the wires in place.
+++
Insérez le l d’haut-parleur à l’intérieur de l’orice du bornier
du haut-parleur de modèle “T” en prenant bien soin de
respecter l’uniformité de la polarité rouge et noir (positif et
négatif). À l’aide de la clé fournie, serrez chaque écrou pour
immobiliser les ls en place.
Step 3 / Étape 3:
Slide the speaker into the wall cutout making sure the four
clamps are folded into the speaker.
+++
Insérez le haut-parleur dans la cavité murale en prenant soin
de complètement rétracter les 4 pinces de retenue.
Take the Phillips screw driver and begin screwing in the
four binding screws located in the middle of the grille plugs.
e wall clamps will begin to come out and move inwards
towards the wall. is will rmly lock the speaker securely
to the wall.
If you have any further questions or concerns please contact
one of our audio experts. 1-866-244-8796
+++
Sur la façade du haut-parleur, il y a quatre cavités qui servent
de point de retenu pour la grille. Au fond de chacune de ces
cavités se trouve une vis de pince de retenue. À l’aide de la clé
“Allen” vissez chacune de ces vis. Les pinces de retenue vont se
déployer et, de l’intérieur, se déplacer contre la paroi murale en
façade. Cette opération verrouillera le haut-parleur au mur et
il en résultera une installation sécuritaire.
En cas de doute ou pour d’autres questions, s’il-vous-plaît,
contactez un de nos conseillers Audio au 1-888-249-9143.
Step 2 / Étape 2:
Step 3 / Étape 3:
Apply paint to edge with paint brush.
When dry remove tape.
 Loading...