Axon Fleet 2 Installation Manual
Axon Enterprise, Inc. Page 38 of 39
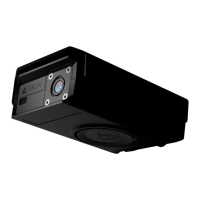
Attaching with VHB Tape
VHB tape is attached to the back of the in-car charging dock mounting flange and can be
used to mount the dock to a flat, rigid surface such as metal or plastic.
1. Prepare the mounting location by cleaning the surface with an alcohol wipe and allow
the surface to dry.
2. Peel the protective layer from the VHB tape and place the dock on the prepared location.
3. Push and hold the dock against the surface for 10 to 20 seconds to ensure adhesion.
4. Connect power to the in-car charging dock
.
Attaching to the Partition
To mount the in-car charging dock on a partition, you drill holes into the partition and use
the four round-head screws and nuts, included in the installation kit.
Tools required for this installation:
• Drill with a No. 16 (.1770”) drill bit
• No. 2 Phillips driver
• 5/16” wrench.
1. Mark the location of the in-car charging dock mounting holes on the partition.
2. Drill the mounting holes using a #16 (.1770”) drill.
3. Use the four round-head screws and 5/16” nuts, provided in the installation kit, to attach
the dock to the partition.
If the dock is mounted to the partition between the front and rear seats, insert the
round-head screws from the rear seat side of the partition and place the nuts on the
front seat side of the partition.
4. Connect power to the in-car charging dock
.
Attaching to a Carpeted Area
The in-car charging dock can be mounted to a carpeted area with sheet metal backing, such
as the transmission tunnel.
Tools required for this installation:
• No. 2 Phillips driver
 Loading...
