Page 5
1
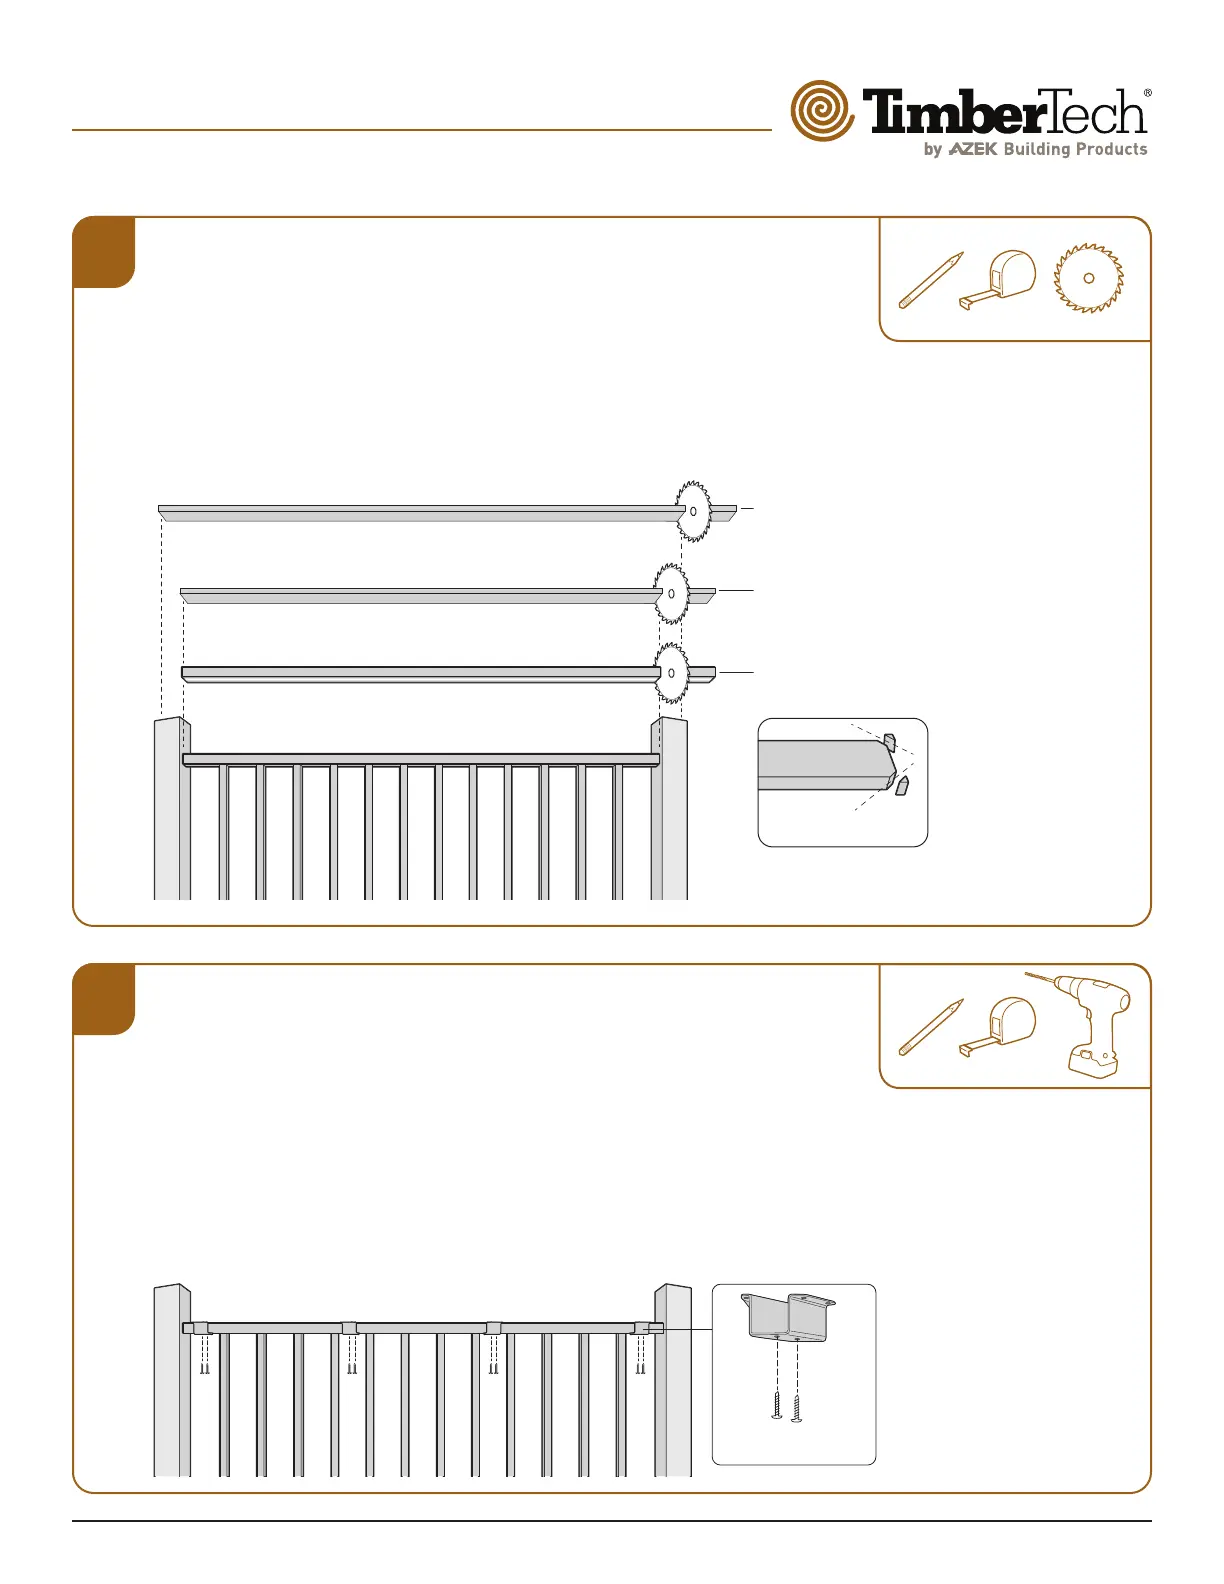
CUT BOTTOM RAIL COVER AND DECK BOARD
Measure, mark and cut the Bottom Rail Cover (inverted, purchased separately) and
deck board to length (Dia. #1A). For Over-the-Post applications, cut deck boards
so that any seams fall at the center of a post (boards up to 16'). Miter the planks at
corner posts.
For Between-the-Post applications if the deck board is wider than posts, if desired,
trim deck board corners for a clean finish (Dia. #1B). If using 3 ½" wide boards, there is
no need to trim corners for composite post applications. Place the Bottom Rail Cover
on the top support rail between the post sleeves.
Drink Rail (deck board)
Between-the-Posts Application –
measure between posts.
Drink Rail (deck board)
Over-the-Posts Application –
measure to posts on center
(boards up to 16').
Bottom Rail Cover
(inverted; purchased separately) –
measure between posts
Trim deck board corners
for a clean finish.
Dia. #1A
Dia. #1B
INSTALLING DRINK RAIL – LEVEL PANELS
FOR IMPRESSION RAIL EXPRESS
®
ATTACH DRINK RAIL CLIPS TO PANEL
Attach drink rail clips every 18" max by running 2 #8 ¾" TEK SS screws (from drink
rail hardware) up through the clip into the rail. (Dia. #2).
• 6' panels require 4 clips, attached within the first baluster on each end and then
spread equally over the length of the panel.
• 8' panels require 6 clips, attached within the first baluster on each end and then
spread equally over the length of the panel.
• For Over-the-Post applications, proceed to Step 3.
• For Between-the-Post applications, skip to Step 4.
2
#8x3/4"
Self-Drilling
Screws
Impression Rail Express
®
Drink Rail Clip Assembly
Dia. #2
 Loading...