Page 9
INSTALLING DRINK RAIL – STAIR PANELS
FOR IMPRESSION RAIL EXPRESS
®
1
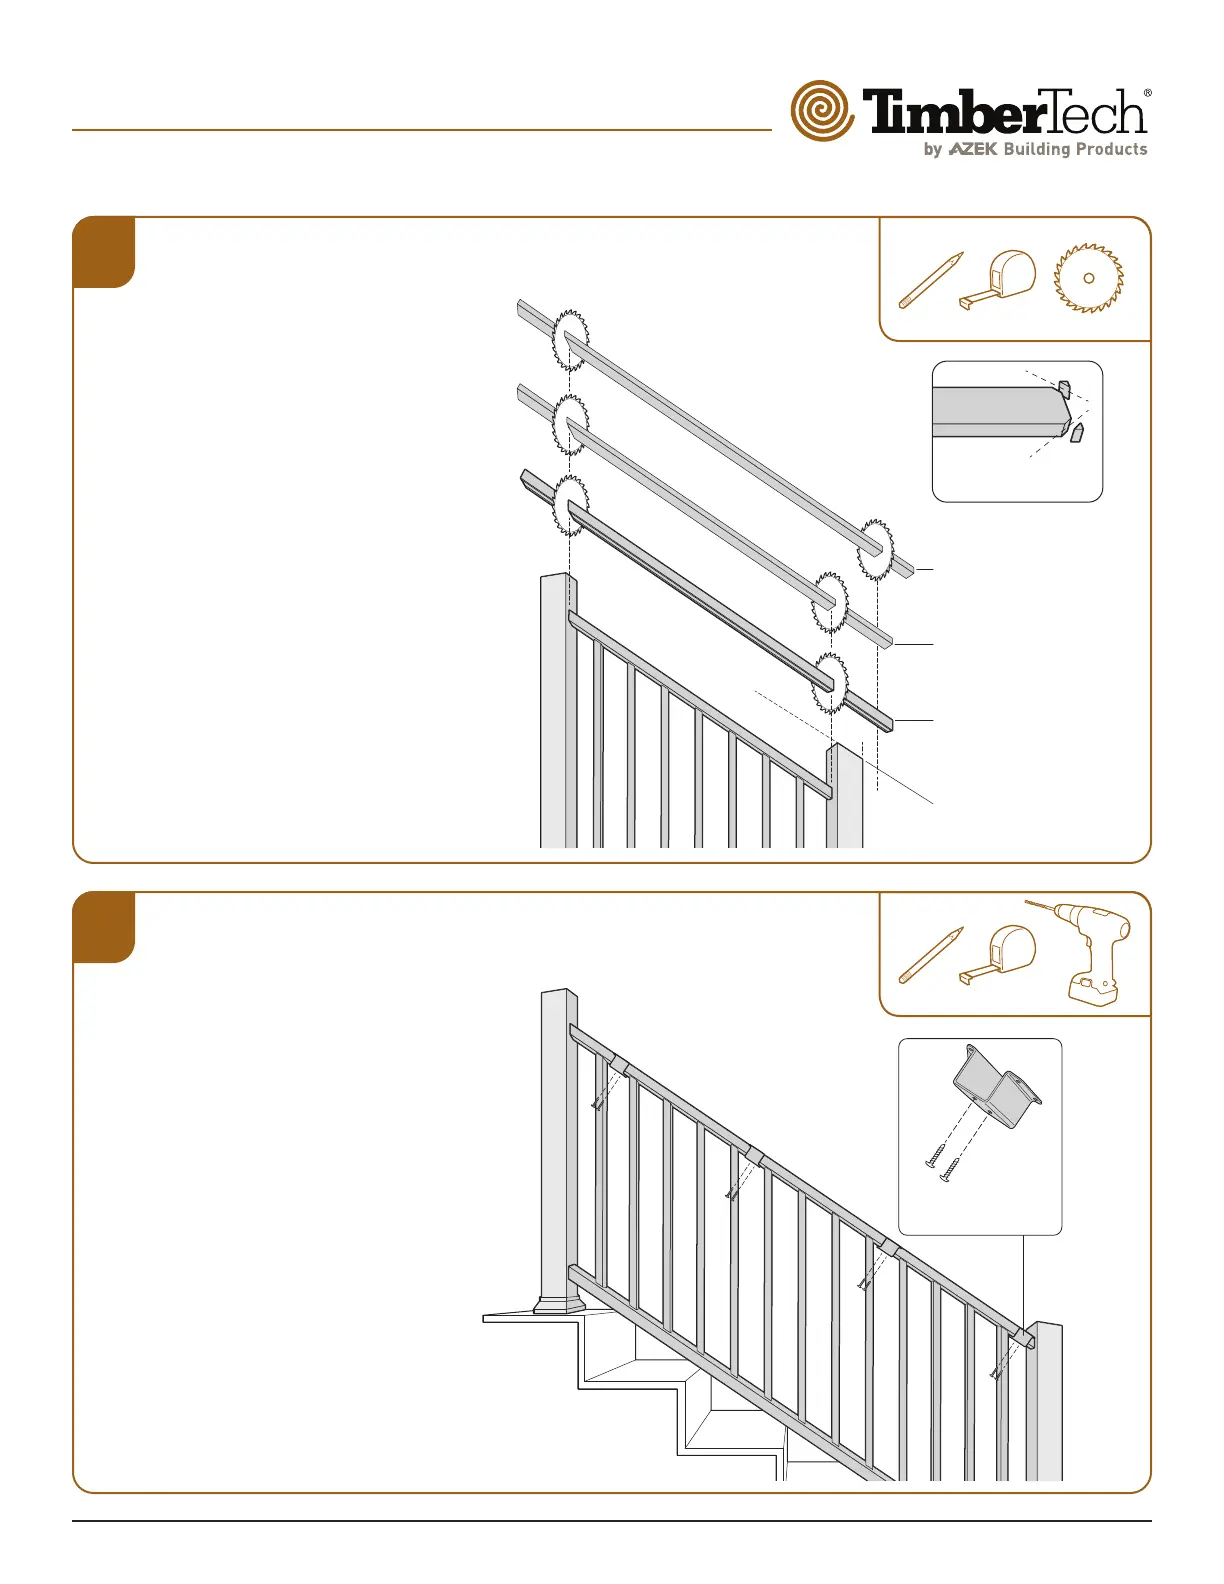
CUT BOTTOM RAIL
COVER AND DECK
BOARD
Measure, mark and cut the Bottom
Rail Cover (inverted bottom rail cover,
purchased separately) and deck board to
length (Dia. #1A). For Over-the-Post
applications, cut deck boards so that
any seams fall at the center of a post
(boards up to 16'). Miter the planks at
corner posts.
For Between-the-Post applications if
the deck board is wider than posts, if
desired, trim deck board corners for
a clean finish (Dia. #1B). Place the
Bottom Rail Cover on the top support
rail between the post sleeves.
ATTACH DRINK RAIL
CLIPS TO PANEL
Attach drink rail clips every 18" max by
running 2 #8 ¾" TEK SS screws (from
drink rail hardware) up through the clip
into the rail. (Dia. #2).
• 6' panels require 4 clips, attached
within the first baluster on each end
and then spread equally over the
length of the panel.
• 8' panels require 6 clips, attached
within the first baluster on each end
and then spread equally over the
length of the panel.
• For Over-the-Post applications,
proceed to Step 3.
• For Between-the-Post applications,
skip to Step 4.
2
Dia. #2
Drink Rail (deck board)
Between-the-Posts Application –
measure between posts.
Drink Rail (deck board)
Over-the-Posts Application –
butt up to top post, and hang over
bottom post approximately 1½".
Bottom Rail Cover (inverted) –
measure between posts
For Over-the-Post applications,
cut post sleeve at same angle
and height as universal rail.
Trim deck board corners
for a clean finish.
Dia. #1A Dia. #1B
#8x3/4" Self-Drilling
Screws
Impression Rail Express
®
Drink Rail Clip Assembly
 Loading...