Do you have a question about the Baby Trend Trend High Chair and is the answer not in the manual?
| Material | Plastic, Metal |
|---|---|
| Recline Positions | 3 |
| Harness Type | 5-point |
| Tray Positions | 3 |
| Foldable | Yes |
| Seat Material | Polyester |
| Frame Material | Steel |
| Adjustable Height | Yes |
| Wheels | Yes |
| Dishwasher Safe Tray | Yes |
| Maximum Weight Recommendation | 40 pounds |
| Tray | Removable |
Instructions must be kept for future reference to prevent serious injury or death.
The tray is not designed to hold the child in the chair; use safety harness at all times.
Secure child in safety belt to prevent serious injury or death from falls or sliding out.
Slide recline fittings onto the ends of the recline mechanism rod as shown.
Place seat base, then join seat back using the seat back hinge rod.
Insert screw into the end of the seat back hinge to prevent loosening.
Snap footrest into place and insert seat brace through base rings and footrest.
Slide height brackets onto seat brace and rotate to lock into seat base.
Secure height brackets to the seat brace with screws.
Insert front tube of upper frame assembly into height bracket and lock.
Insert legs into the front and rear tubes of the upper frame assemblies.
Attach casters to the high chair feet, ensuring they are securely fastened.
Flip over tray to attach the crotch retainer using screws.
Push legs apart until open and locked; push fold levers to ensure frame is locked.
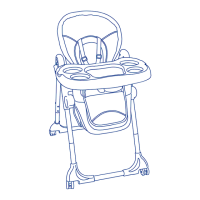
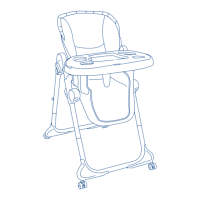
Always check that the high chair is locked in the open position before using.
Line up tray grooves with armrests, squeeze handle, slide on, and adjust position.
Squeeze recline lever to adjust seat to preferred recline or upright position.
Use upright for assisted sitters; always secure child in restraint system.
Place child's arms through loops, insert buckles into center buckle to fasten.
Adjust shoulder and waist straps for comfort and safety, ensuring snug fit.
Squeeze sides of buckles to release the safety belt.
Squeeze height adjustment bracket buttons to adjust position; check locks.
Pull release levers and push rear legs towards front legs to fold.
Do not allow child to play around folded high chair as it may fall.
Push legs apart until fully open and locked; push fold levers to ensure frame is locked.
Always check that the high chair is locked in the open position before using.
Loop flap over seat back, connect elastic loops, and thread belts through pad.
Dishwasher safe food tray; do not use scouring pads.
Clean with mild soap and water; do not submerge tray.
Hand wash with mild detergent, hang dry; do not bleach or machine wash.
Check for loose screws, worn parts, or torn material; replace or repair as needed.
Press toy connector into tray slot and snap bottom over tray lip.