Do you have a question about the Backyard BELMONT 2001039 and is the answer not in the manual?
Details warranty part replacement costs based on product age.
Warning about hot surfaces on play equipment due to sun exposure.
CPSC information on selecting and installing protective playground surfacing.
Schedule for play structure maintenance at start, during, and end of season.
Specific tasks like wood inspection, sealant application, and checking components.
Guidance on product disposal and options for professional assembly services.
Explains wood weathering and how to reduce its effects to maintain the product.
Advice on avoiding protruding bolts and ensuring safe hardware assembly.
Demonstrates correct methods for various hardware connections like T-nuts and barrel nuts.
Recommends organizing wood and hardware parts for efficient assembly.
Explains the meaning of symbols used throughout the manual for assembly guidance.
Illustrates the required safe play zone around the structure for user safety.
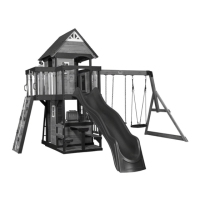
Key details on intended use, weight limits, and occupant recommendations.
Lists and illustrates all wooden parts with their identification numbers and dimensions.
Identifies all necessary hardware, including bolts, screws, washers, and nuts, with quantities.
Details all accessory parts such as slides, seats, grips, and brackets.
Instructions for attaching the slide bed to the slide brace using provided hardware.
Guides on connecting the slide rails to the slide bed and center braces.
Assembling the main components of the swing beam structure.
Connecting swing beam supports and angle braces for structural integrity.
Connecting the main swing beam subassembly with the end subassembly.
Attaching swing hangers to the beam using nuts, washers, and safety components.
Instructions for attaching rock climbing slats to the ladder rails.
Securing the climbing rocks to the assembled ladder slats.
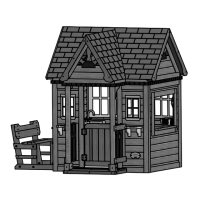
Constructing the initial frame of the fort using uprights, joists, and ground boards.
Installing wall rails and roof cross braces to support the fort structure.
Attaching supports for floors and tarps using lag screws and bolts.
Securing floor joists and angle braces to complete the fort's floor structure.
Attaching the floor boards to the fort's frame using screws.
Installing wall rails to the fort's vertical supports.
Attaching wall slats and L-brackets for structural support and aesthetics.
Continuing the installation of wall slats onto the fort structure.
Fastening more wall slats and brackets to complete the fort's walls.
Installing supports for the picnic and roof tarps.
Attaching picnic supports and cleats to the fort structure.
Securing additional picnic supports and cleats to the fort.
Installing the main tarp supports to the fort.
Attaching the roof tarp to the fort's frame.
Attaching the picnic table tarp to the fort.
Installing the green plastic hand grips for user assistance.
Securing the 4 ft rock ladder to the fort structure.
Instructions for attaching the 8 ft flat pack slide to the fort.
Connecting the pre-assembled swing beam to the fort.
Assembling and attaching swing seats, chains, and trapeze to the swing beam.
Instructions for driving ground stakes to secure the fort and swing beam assembly.
| Brand | Backyard |
|---|---|
| Model | BELMONT 2001039 |
| Category | Play Sets & Playground Equipment |
| Language | English |