Do you have a question about the Baker Hughes Masoneilan 37 and is the answer not in the manual?
Manual content is subject to change and requires written permission for reproduction.
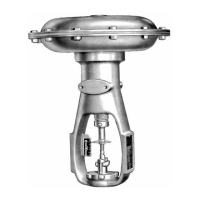
Actuator has an estimated useful life of 25+ years; proper maintenance maximizes it.
Items warranted against defects for one year from shipment, used as recommended.
Mark actuator case positions before disassembly for verification and assembly. Check clamping area.
Inspect contact line using a straight edge, ensuring it is > 7 mm from the bolting hole diameter.
Check gap between diaphragm cases using a 0.6 mm shim to ensure it does not fit.
Ensure actuator case fasteners are in good condition, free from rust, paint, or lubricant.
Visually inspect diaphragm for grease, defects, and ensure manufacturing date is less than 5 years.
Install diaphragm, aligning holes with actuator bolting circle holes; replace if misaligned.
Hand tighten nuts to properly seat the upper diaphragm case before applying torque.
Torque nuts at 15 Nm in opposite pairs per the pattern shown in Figure 7.
Apply final torque of 30 Nm (0/+ 3Nm) in opposite pairs per the pattern shown in Figure 7.
Check the diaphragm is not pulled in after tightening, as illustrated in Figure 6.
Proceed with valve calibration as per manufacturer recommendation.
Do not exceed supply pressure or maximum valve rated stroke (4in or 101.6 mm).
| Type | Pneumatic Controller |
|---|---|
| Accuracy | ±1% of span |
| Materials | Aluminum, stainless steel |
| Manufacturer | Baker Hughes |
| Model | 37 |
| Input Signal | 3-15 psi |
| Output Signal | 3-15 psi (0.2-1.0 bar) |
| Supply Pressure | 20 psi |
| Control Modes | Proportional, Proportional-Integral (PI) |