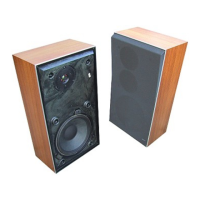
Do you have a question about the Bang & Olufsen Beovox S35 and is the answer not in the manual?
| Sensitivity | 88 dB |
|---|---|
| Power Handling | 50 W |
| Music load | 50 W |
| Crossover frequency | 3 kHz |
| Woofer | 8-inch |
| Tweeter | 1 x 1" |
Details on the recommended power supply for the project, including voltage and wattage.
Specifications for the recommended power plug, including mounting hole diameter.
Link to download the necessary files for 3D printing components.
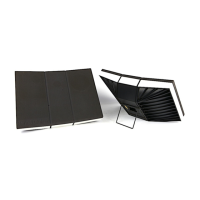
Remove the fabric covers from the front of the speaker.
Unscrew the brackets that secure the woofer to the speaker enclosure.
Carefully remove the internal dampening material from the speaker.
Cut all wires connected to the speaker's crossover component.
Unscrew and remove the existing crossover, saving the screws for later.
Use a dremel tool to remove the original plastic speaker connector.
Screw the power plug into the 3D printed holder.
Strip insulated wires for the power connector, exposing about 1cm of wire.
Solder the prepared wires to the positive and negative power terminals.
Apply glue to the 3D printed holder and attach it to the back plate.
Place the Raspberry Pi onto the BeoCreate 4-Channel Amplifier using spacers.
Strip approximately 1cm of wire from the drivers for connection.
Connect the drivers and power to the amplifier as per the diagram.
Attach the 3D printed frame to the inside of the speaker using existing posts and screws.
Connect the power supply to the upcycled speaker system.
Plug the power supply adapter into a wall socket to power the device.
Verify the red indicator light on the Raspberry Pi is active.
Unplug the power supply from the wall socket to continue the upcycling process.
Insert the SD card with the BeoCreate software into the amplifier.
Press fit the amplifier into the 3D printed frame and place dampening material.
Re-mount the woofer with its brackets and re-attach the fabric cover.