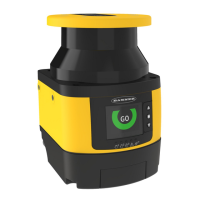
5 Initial Checkout
The initial checkout procedure must be performed by a Qualified Person, and must be performed only after configuring the
System and after connections are made.
Initial checkout is performed on two occasions:
1.
To ensure proper installation when the System is first installed, and
2. To ensure proper System function whenever any maintenance or modification is performed on the System or on the
machinery being guarded by the System.
For the initial checkout, the SX system must be checked without power being available to the guarded machine.
Final interface connections to the guarded machine cannot take place until the SX system has been checked out. This may
require lockout/tagout procedures (refer to OSHA1910.147, ANSI Z244-1, or the appropriate standard for controlling
hazardous energy). These connections will be made after the initial checkout procedure has been successfully completed.
5.1 Apply Initial Power and Configure the SX Scanner System
Verify:
•
Power has been removed from (or is not available to) the guarded machine, its controls, or actuators;
• The machine control circuit or the safety module is not connected to the OSSD outputs at this time (permanent
connections will be made later);
• The ethernet cable (4-pin M12/Euro-style to RJ45 cable) is connected to the SX's 4-pin Ethernet connector (if not
previously accomplished) and connect the RJ45 to the PC ethernet port.
1. On the computer, launch the configuration software.
2. Apply power to the SX system.
3. If not previously completed, configure the SX system as described in Configuration Instructions on p. 67.
The scanner must be powered off during any connection operation. During configuration, the scanner will be working
using its previously saved configuration. Follow all the safety instructions.
4. Optional: Status information can be uploaded (Monitoring) or you can download the configuration to the scanner
(Programming).
5.2 Verify the Optical Field (Initial Verification)
The following is the typical display indication, assuming a Warning Zone is configured.
Status OSSD Output Warning Aux Output
Safety and Warning Zones clear On On
Safety Zone clear, Warning Zone interrupted On Off
Safety and Warning Zones interrupted Off Off
Warning and Safety Zone is clear, waiting for reset Off On
SX Safety Laser Scanner
64 www.bannerengineering.com - Tel: + 1 888 373 6767

 Loading...