English
Diaphragm
Inner Pipe
Retaining
Ring
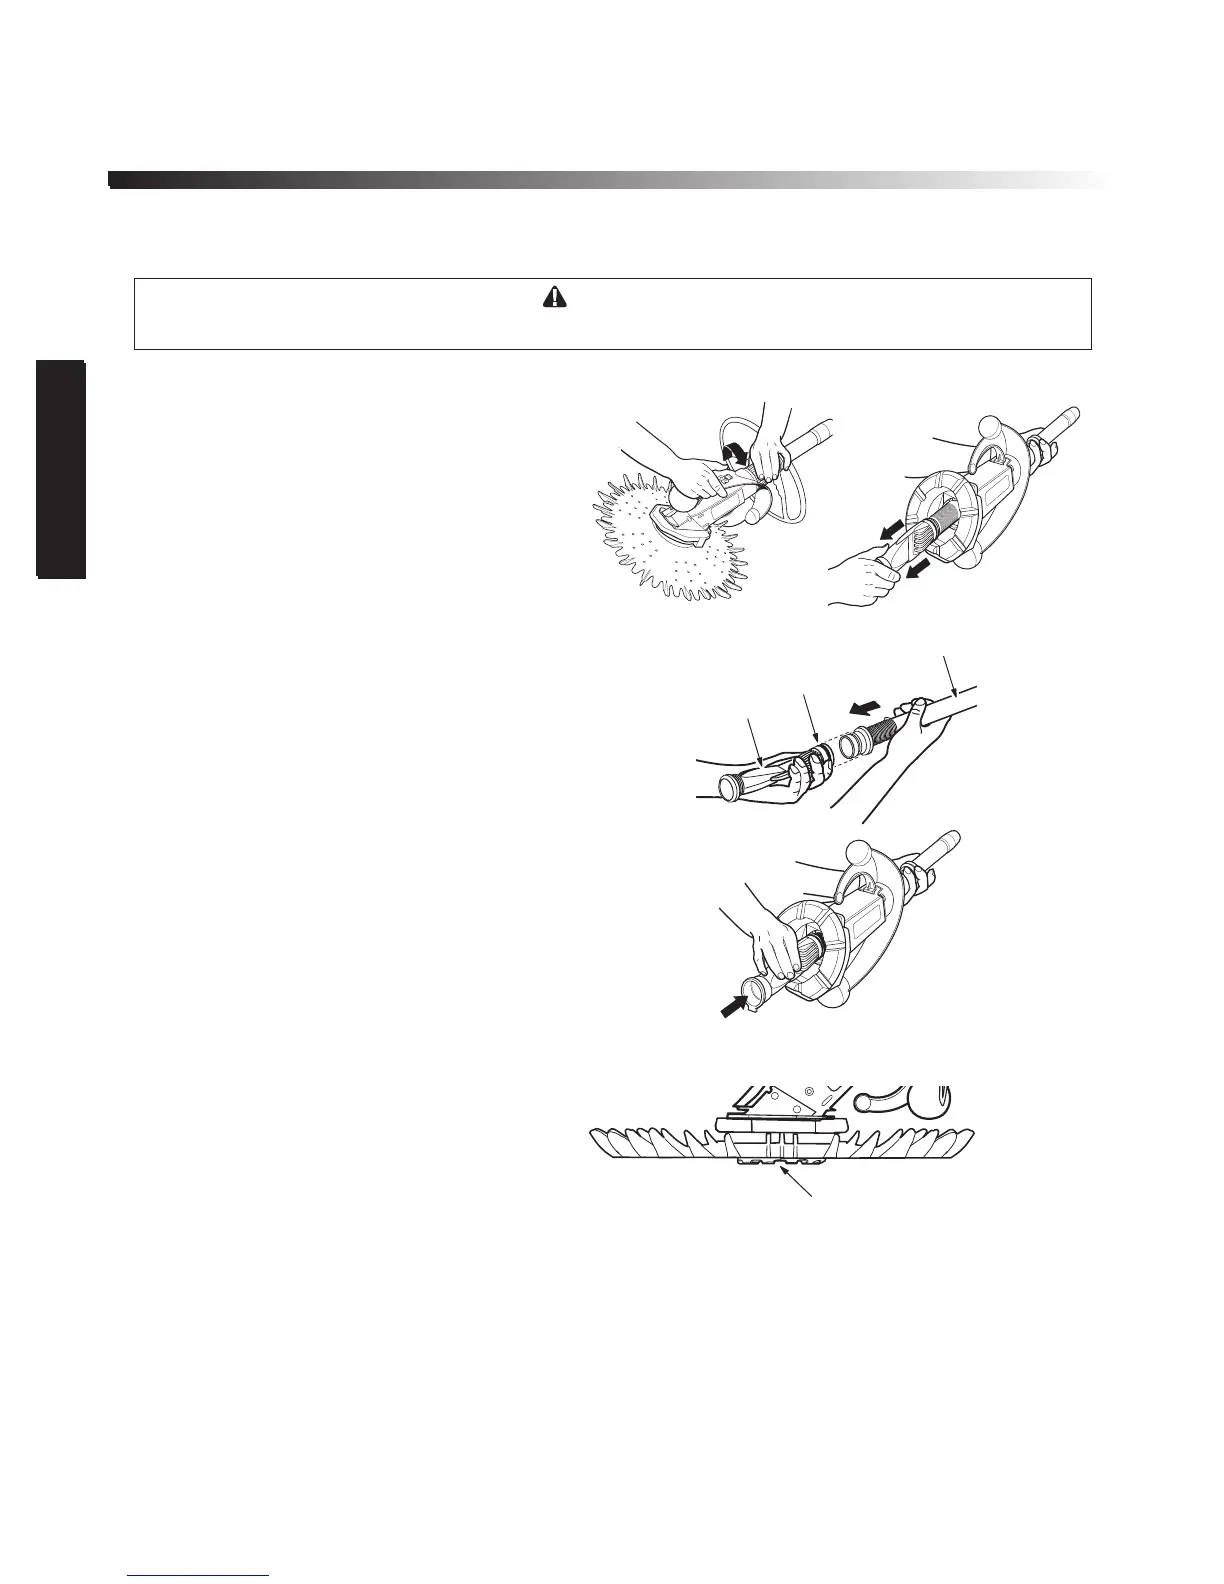
Clearing the Diaphragm
WARNING
To avoid serious injury, turn off the suction pump for the cleaner before performing this step.
Use the easy-access system to quickly clear the
diaphragm or check it for damage.
To remove:
1. Turn handnut counter-clockwise to release
the outer extension pipe. Remove the pipe.
2. Turn the cleaner over. Grasping the dia-
phragm flange, pull out the diaphram and
inner pipe.
3. Pull off the diaphragm.
Inspect it for debris or wear, and rinse it
thoroughly with water. Replace if necessary.
To install:
1. Verify that the retaining ring is on
the diaphragm.
2. Push diaphragm onto inner pipe.
3. Aligning the flange of the diaphragm with the
slot in the cleaner body, push the diaphragm
assembly into the cleaner until it is flush
against the inlet plate.
4. Reinstall outer extension pipe and secure
handnut. Do not over tighten.
Replacing the Foot Pad
The foot pad should be replaced when the
depth of the channels between the treads are
1/8” or less. Contact your Baracuda Dealer for
assistance with replacing this part.
Storage and Winterizing
Never coil the hose. Store the cleaner out of
direct sunlight.
When storing for the winter, drain all water from the cleaner. Remove all connectors and adapters
from the dedicated suction line or skimmer. Store disc flat, and hose sections disconnected,
drained and straight.
English
8
Channel Between Threads