This document describes a 3-movement PLASMA/LCD wall mount, model 43, designed for screens up to 50 inches (127 cm) and with a maximum weight capacity of 132 lbs (60 kg). The mount offers a "Touch & Tilt" feature, allowing for a tilt range of 0° to 20°.
Function Description:
The Barkan wall mount provides a secure and adjustable solution for mounting plasma or LCD screens to various wall types. Its "3 Movement" capability suggests a range of motion beyond simple tilt, likely including swivel and extension, though the specific movements are not fully detailed in the provided pages beyond tilt. The mount is designed to enhance viewing experience through its adjustability and includes features for safety and cable management.
Important Technical Specifications:
- Model: 43
- Screen Size Compatibility: Up to 50 inches (127 cm)
- Weight Capacity: 132 lbs (60 kg)
- Tilt Range: 0° to 20° (Touch & Tilt feature)
- Screen Leveling: ±2.5° (built-in mechanism)
- Wall Plate Dimensions (approximate):
- Height: 18 inches (45.5 cm)
- Width: 31.5 inches (80 cm)
- Arm Assembly Length (approximate): 79.5 cm (31 inches)
Usage Features:
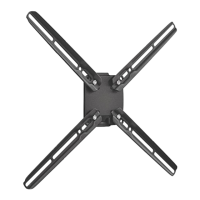
- Bracket Assembly to Screen: The manual illustrates how to attach the screen brackets (parts M and N) to the back of the screen, ensuring the "BACK OF SCREEN" label is correctly oriented. Bolts are provided to secure the screen to the bracket.
- Assemble Bracket in Center: The screen bracket should be assembled in the center of the screen, with an "up" indicator to ensure correct orientation.
- Height Adjustment: The mount allows for height adjustment of the screen to achieve an optimum viewing position. An example shows a user viewing the screen at a 90° angle, with the screen height adjusted relative to the viewer's eye level. The diagram suggests an adjustment range of X cm/inch + 15 cm/6 inches from the center of the screen.
- Wall Mounting Options:
- Concrete, Solid Bricks, or Hollow Concrete Block Walls: Requires drilling holes (3/8" / 10mm diameter, 3" / 8cm depth) and inserting wall anchors (part T) before securing the wall plate (part G) with screws (part AA). The manual emphasizes checking for minimum (2) and maximum (9) anchors.
- Wood Stud Wall: Requires drilling pilot holes (5/32" / 4mm diameter, 3" / 8cm depth) directly into the wood stud, then securing the wall plate (part G) with screws (part AA).
- Arm Assembly: The arm (part H) is assembled to the wall plate (part G) and secured with bolts (part D and AC) and a wrench (part R).
- Tilt Mechanism Assembly: The tilt mechanism (parts K, J, W, Z) is assembled to the arm, allowing for the 0°-20° tilt adjustment.
- Covers Assembly: Decorative covers (parts A1, A2, B, C, F) are installed to conceal the mounting hardware and cables, providing a clean aesthetic.
- Mount Screen to the Wall: The screen, with its attached brackets, is then mounted onto the arm assembly. The "QUICK CONNECT" feature suggests an easy and secure attachment method.
- Left & Right Adjustment: This feature allows for easy screen positioning during installation, enhancing viewing quality.
- Touch & Tilt: A tools-free tilt mechanism allows users to easily adjust the screen's vertical angle between 0° and 20°.
- Screen Leveling: A built-in mechanism allows for fine-tuning the screen's horizontal level, with an adjustment range of ±2.5°.
- Cable Management: The mount is designed to hide cables inside its structure, contributing to a clean, wires-free look.
Maintenance Features:
- Safety Lock Hardware Assembly: The mount includes a "FALL & THEFT PROOF" secure locking system. This system prevents accidental dislodgement and deters theft. The manual shows a padlock (not included) can be used with the locking mechanism (part L) for added security.
- Test: After installation, a test is recommended to ensure the mount can safely hold the screen's weight (132 lbs/60 kg). The diagram shows a "good" and "bad" outcome for the test, implying the need to verify secure attachment.
The manual emphasizes the importance of ensuring all parts are present before beginning assembly. It also highlights safety precautions during drilling, particularly the "DANGER" warning when drilling into walls.