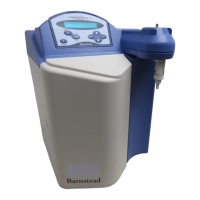
Do you have a question about the Barnstead|Thermolyne NANOpure DIamond Analytical and is the answer not in the manual?
| Type | Water Purification System |
|---|---|
| TOC | < 5 ppb |
| Power Requirements | 100-240 V, 50/60 Hz |
| Model | Diamond Analytical |
| Resistivity | 18.2 MΩ·cm |
| Bacteria | <1 CFU/mL |
| Pyrogens (Endotoxins) | <0.001 EU/mL |
| Feed Water Requirements | Distilled or RO water |
| RNases | Not detected |
| DNases | Not detected |
Explains warning, caution, and note symbols used for safety information.
Provides critical safety warnings related to electrical shock and personal injury.
States the product should only be used for its intended purpose.
Advises on selecting an appropriate location for the unit based on access to water, drain, and electricity.
Instructions for placing and securing the unit on a bench top.
Detailed steps for mounting the unit securely on a wall using a bracket.
Guides on detaching, relocating, and reconnecting the control panel display to the main unit.
Details the process for connecting the incoming water supply to the unit.
Instructions for connecting the drain tubing to an appropriate drain.
Locates and identifies the main power switch on the unit.
Explains the functions of the control panel switches and the status indicated by the LED.
Details the function of each switch on the control panel and the dispense knob.
Step-by-step guide for installing the cartridge packs into the unit's manifold.
Procedures for connecting water, power, and initiating the system's first rinse cycle.
Explains how to dispense water manually or using the dispense switch.
Describes how to set up volumetric or timed dispensing.
Instructions on how to change the brightness level of the control panel display.
Steps to select the desired language for the display.
Procedure for setting the system's date and time.
How to put the unit into standby mode to conserve energy and prevent bacterial growth.
How to program a set point for water quality alerts.
Steps to reset the timer that reminds users to sanitize the unit.
Instructions for performing a short or extended flush of the system.
How to switch between different units for displaying water purity.
Step-by-step procedure for calibrating the unit with the N.I.S.T. module.
Instructions for setting up communication via RS-232 using Hyperterminal.
Steps to connect and power on the printer for use with the unit.
Describes the location and function of the printer's power switch.
Explains how to use the paper feed button and what the indicator lights mean.
Basic instructions for cleaning the exterior of the unit.
Detailed procedure for cleaning the conductivity cell.
Lists possible causes and solutions when the unit shows no power.
Addresses issues with low or no water flow from the dispenser.
Solutions for when the unit displays "Check Inlet" and the pump is off.
Explains why the purity reading might remain on dots and how to fix it.
Addresses issues where the water purity does not reach the set level.
Possible reasons for the cartridge packs having a short lifespan.
How to diagnose and improve the quality of feed water.
Solutions for when the purity display shows "OVERRANGE."
Troubleshooting steps for an "Overpressure Error" message.
Solutions for a "Meter Board Problem" error.
How to fix leaks between the manifold and cartridge pack.
Lists parts that need periodic replacement, like filters and cartridges.
Lists parts considered general maintenance items requiring less specialized installation.
Recommends stocking critical spare parts for uninterrupted operation.
Explains the arrow legend and the general flow of operations.