Do you have a question about the Bayer HealthCare Clinitek 500 and is the answer not in the manual?
| Sample Type | Urine |
|---|---|
| Technology | Reflectance Photometry |
| Display | LCD |
| Power Requirements | 100-240V AC, 50/60 Hz |
| Printer | Optional external printer |
| Test Types | Urine Tests |
| Test Parameters | Glucose, Ketone, Bilirubin, Blood, Nitrite, Leukocytes, Urobilinogen, Specific Gravity |
| Connectivity | RS-232 |
| Weight | Approximately 12 lbs |
| Test Method | Reflectance |
| Wavelengths | Multiple wavelengths |
| Reagent Compatibility | Clinitek test strips |
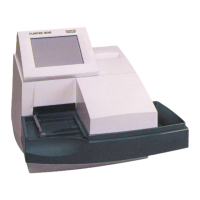
| Type | Automated Urine Chemistry Analyzer |
Describes the CLINITEK 500 Analyzer's function and how it reads reagent strips for urinalysis.
Details the major components of the CLINITEK 500 instrument and their mechanical functions.
Explains the instrument's optical system, including readheads, filters, and how reflectance is measured.
Describes the automated calibration process performed before each Reagent Strip is read.
Lists the technical specifications of the CLINITEK 500 Analyzer, including power, dimensions, and safety standards.
Provides an overview of the installation process and emphasizes careful handling of the instrument.
Details recommended temperature and humidity ranges for stable instrument operation.
Guides the user through the process of unpacking the instrument and its accessories.
Covers initial steps for setting up the instrument, including power connection and serial number recording.
Explains how to connect the CLINITEK 500 Analyzer to an external printer using its parallel port.
Describes how to connect the analyzer to a host computer or LIS via the serial port.
Details the connection of an optional handheld bar code reader via the RJ45 port.
Outlines the procedure for performing an initial check after installation to ensure proper operation.
Introduces interaction via the touch screen and explains common keys like Return, Stop, Help, and Enter.
Explains how to enter the Setup Routine to configure instrument parameters like date, time, and printer.
Describes how to set or bypass password protection for instrument setup options.
Configures computer port parameters, bar code reader options, and data transfer formats.
Allows resetting all features to defaults and performing hardware diagnostic tests.
Guides on saving setup changes and printing the configuration report.
Provides an overview of starting routine operation and general cautions for using the touch screen.
Explains how to prepare the instrument for testing, including screen displays and readiness for sample placement.
Details the procedure for running controls to verify strip and instrument performance.
Describes the standard procedure for running routine specimens, including sample preparation and placement.
Outlines how results are sent to the printer or computer after analysis.
Explains how to retrieve and manage stored patient and control records from memory.
Provides notes on printing, strip jams, calibration reports, thermal print, and waste bin management.
Describes basic exterior cleaning procedures using a damp cloth and mild detergent.
Details daily cleaning steps for instrument parts like the platform, push bar, and moving table.
Outlines steps for disinfecting instrument parts using approved solutions like bleach or Cidex.
Provides instructions on how to replace the printer paper roll and secure the cover.
Lists available reagent strips and control strips, noting compatibility and usage.
Details optional accessories like bar code readers, printers, and waste bin liners.
States that the instrument requires minimal maintenance, with printer replacement and touch screen recalibration.
Provides a step-by-step guide for replacing the instrument's internal printer module.
Explains the simple procedure to recalibrate the touch screen if it becomes unresponsive.
Introduces the troubleshooting section, explaining error messages and remedies for common issues.
A table listing common instrument symptoms, their possible causes, and recommended remedies.
Provides contact information for Bayer Customer Service and lists conditions requiring professional assistance.
A checklist to help diagnose problems before contacting customer service, covering instrument status and operation.
Lists consumables like reagent strips, control strips, and optional equipment.
Details available replacement parts for the CLINITEK 500 Analyzer, including part numbers.
Provides an overview of connecting the analyzer to computers and printers via serial and parallel ports.
Details the pin assignments and hardware handshaking for the serial port interface cable.
Outlines pin assignments for the parallel (Centronics) port used for printer connections.
Outlines the terms, conditions, exceptions, and limitations of the instrument's warranty.
