ENGLISH
1312
light. The distance indicator v tells you, in approximate meters, how
far you must travel (1 meter = 1.1 yards or 3.3 feet). If the number on
the distance indicator is increasing, you are on the same axis as the
victim’s signal, but moving in the opposite direction. Turn 180
degrees, engage the center search light again, and continue your
search in the direction the Tracker is pointing. If you are stationary,
but the distance is significantly changing, you are probably detecting
the signal of another rescuer. Make sure all rescuers are in search
mode before continuing.
The Tracker is very sensitive. Slight
movement in any direction will actuate
a different search light. Rotate it very
slowly so as not to “skip” over the
center search light window.
In special (SP) mode, signals
are only displayed if they fall
within the center three windows.
Direction of
strongest signal
Figure E
Windows
You may find that, while following the directional lights, your route
follows an arc. This is because the Tracker follows the shape of the
electromagnetic signal coming from the transmitting transceiver’s
antenna.The distance displayed is the distance to be traveled along
that flux line, not the straight-line distance from you to the victim.
Fine Search: The fine search is the final part of the transceiver
search, which is performed on foot with the transceiver positioned at
or near the snow surface. The objective of the fine search is to locate
where the signal is strongest and to reduce the area to be probed.
Bracketing: When your distance
indicator reaches 3 meters,
search along a straight line until
you have passed the lowest
distance reading. Return to the
lowest reading and “bracket” in
search of an even lower reading.
Ignore the directional lights while
in the fine search.
Figure F
Fine Search
Operating Instructions
slide, and the number of searchers. Refer to Figures B and C, below,
to establish a signal search pattern. If the slide is less than 40 meters
wide, the signal search path will be directly up or down the center. If
the victim’s last seen area is well defined, the signal search will follow
a direct path along the fall line to or from this point.
Prior to the signal search, be sure that all transceivers are turned to
search mode. Rotate the Tracker slowly in all directions (Figure D)
while moving in the direction as defined by your signal search pattern.
While searching, be aware of other physical clues, such as equipment
or extremities protruding from the snow surface. When no signal is
detected, “SE” will flash in the distance indicator. Once a signal is
detected consistently, mark this spot and begin the coarse search.
Coarse Search: The coarse search is the portion of the search from
where you have detected a steady signal to where you are close to
the victim.
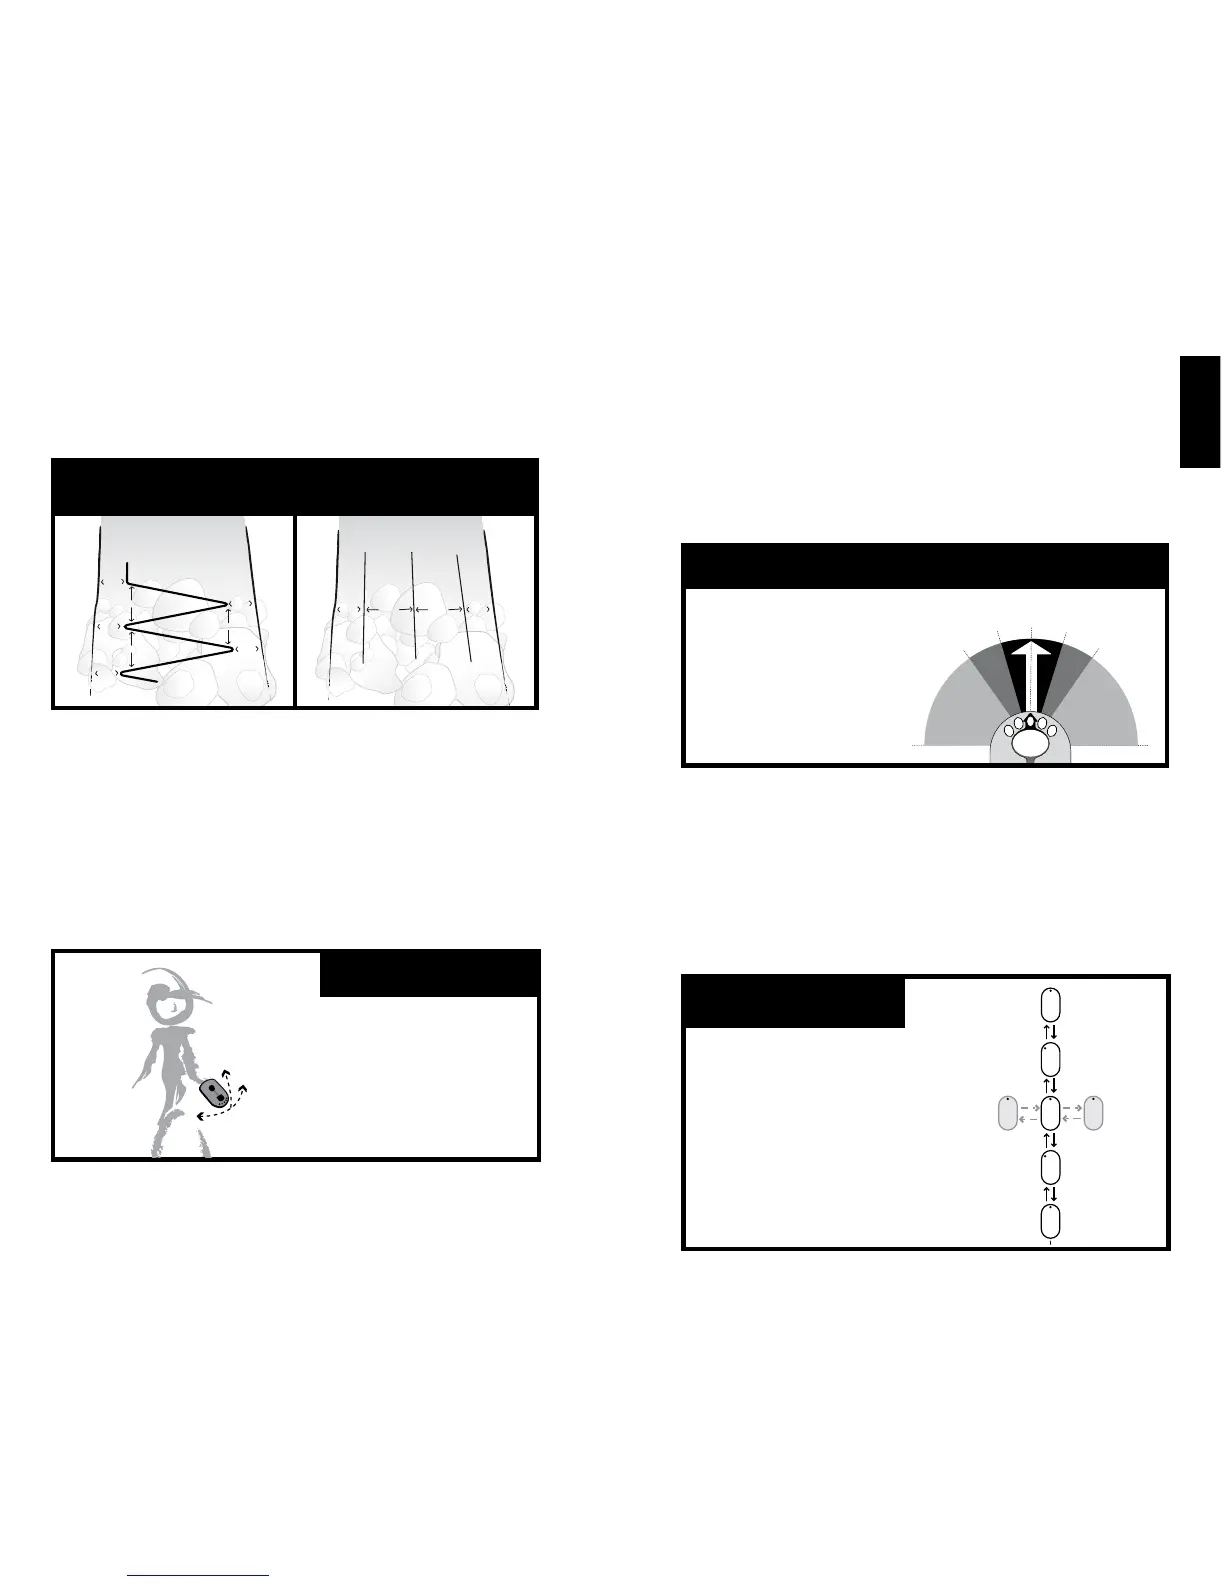
Rotate the Tracker slowly in your
hand, but move rapidly down the
search path. Do not abandon
your search path until you have
captured a strong, steady signal.
Ignore irregular signals, which can
sometimes be caused by electrical
interference.
Figure D
Signal search
Once the signal is consistently detected, rotate the Tracker slowly on
a horizontal plane until the center direction light
{ is blinking. The
Tracker is now pointed in the direction of the strongest signal, or your
direction of travel (Figure E). The four lights
{ on either side of
center tell you which way to rotate the Tracker to engage the center
Operating Instructions
20 m
20 m
20 m
20 m
40m
40m
40m
20 m
avalanche path
20m20m
avalanche path
40m40m
Figure C
Signal Search
multiple searchers/slide wider than 40m
Figure B
Signal Search
one searcher/slide wider than 40m
last seen area last seen area
 Loading...

