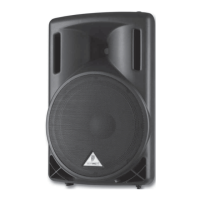
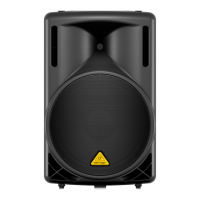
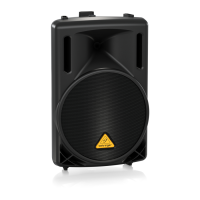
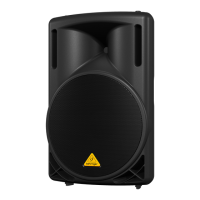
12 13EUROLIV E F1320D Quick Start Guide
EUROLIVE F1320D Controls
(EN) Controls
(1)
(2)
(3)
First group control
(1) The POWER LED lights up when the
loudspeaker is put into operation.
(2) The CLIP LED lights up when signal distortion
occurs. Reduce the volume with the LEVEL
control until the CLIP LED does not light up any
more, or occasionally lights up at signalpeaks.
(3) To set the volume of the LINE or MIC signal,
use the LEVEL control. The left half of the
control range is for attenuating the LINE
signal. The right half is for raising the level of
the MIC signal.
LEVEL ADJUSTING: Turn the LEVEL control
whose signal you want to adjust slowly to
the right until the CLIP LED (2) lights up only
at signal peaks. The LED is not supposed to
glowcontinuously.
(4)
Equalizer
(4) The F1320D features a 3-band sound control.
Each band provides a maximum boost/cut of
15 dB. At center position the equalizer has a
at response.
The upper (EQ HIGH) and the lower band
(EQLOW) are shelving lters that boost
and cut all frequencies above and below
the crossover frequency. The crossover
frequencies of the upper and lower bands are
at 12 kHz and 80 Hz, respectively. Themid
band (EQ MID) is a peak lter the center
frequency of which is at 2.5 kHz.
(5)
(6)
Feedback lter (notch lter)
Feedback may occur at high volume levels
or under dicult stage situations. Use the
FEEDBACK FILTER function ((5), (6))
toreduce feedback. To learn more about the
feedback lter, read section 3.4 “Notch lter.”
(5) This switch turns on the feedback lter.
(6) This control adjusts the center frequency of
the feedback lter.
(7)
(8)
LINK OUTPUT
(7) + (8) The LINK OUTPUT is directly connected
to the inputs of the F1320D and carries the
input signal with no processing applied.
In this way, you can route the signal to
the input of another device (for example,
a second F1320D).
(9)
(10)
MIC/LINE INPUT
(9) Use this ¼" stereo jack to connect a signal
source that has ¼" output.
(10) Use this XLR connector to connect a signal
source that has XLR output.
(11)
(12)
(13)
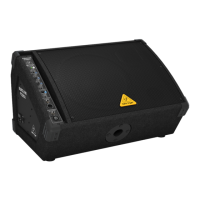
Side panel F1320D
(11) Press POWER to turn on your F1320D.
(12) You can replace fuses at the FUSE SWITCH
of the F1320D. Always replace fuses with the
same type.
(13) The mains connection is established using a
cable with an IEC mains connector. Thiscable
is delivered with the F1320D. To avoid
ground-loop hum, loudspeakers and mixing
consoles should be connected to the same
powercircuit.
Check Out behringer.com for Full Manual
(ES) Controles
(1)
(2)
(3)
Elementos de control, primer grupo
(1) Al encender el altavoz se enciende también el
LED POWER.
(2) Si el nivel de la señal de entrada llegara a ser
muy alto se encenderá el LED CLIP. Reduzcael
nivel con el control LEVEL hasta que el LED
se apague o se encienda solamente de
maneraesporádica.
(3) El control LEVEL le permite regular el nivel
de la señal de entrada, tanto de línea como
demicrófono.
AJUSTE DE NIVEL: estando la señal presente,
gire el control LEVEL lentamente hacia la
derecha hasta que el LED CLIP (2) se encienda
brevemente con picos de nivel. El LED no
deberá permanecer encendido.
(4)
Ecualizador
(4) El F1320D dispone de un ecualizador de
3bandas. El nivel de cada banda se puede
aumentar o atenuar hasta 15 dB; en la
posición central el ecualizador no afecta a
laseñal.
Las bandas superior (EQ HIGH) e inferior
(EQLOW) cuentan con ltros de tipo
“shelving”, es decir, aumentan o atenúan
todas las frecuencias por encima o por debajo
de la frecuencia del ltro. Las frecuencias de
corte de las bandas superior e inferior son
12kHz y 80 Hz, respectivamente. La banda
media (EQ MID) cuenta con un ltro de
campana con frecuencia central en 2,5 kHz.
(5)
(6)
Filtro antirrealimentación (ltro de muesca)
Las realimentaciones pueden producirse
con niveles muy altos y en determinadas
situaciones de escenario. Active la función
FEEDBACK FILTER ((5), (6)) si desea
contrarrestarlas. Para conocer mejor el
funcionamiento del ltro antirrealimentación
vea el apartado 3.4 “Filtro de muesca”.
(5) Utilice este conmutador para activar el ltro
antirrealimentación.
(6) Utilice este control para determinar la
frecuencia central del ltroantirrealimentación.
(7)
(8)
LINK OUTPUT
(7) + (8) La salida de enlace LINK OUTPUT está
conectada directamente con las entradas
del F1320D, y como tal puede retransmitir la
señal de entrada sin alteración alguna, lo que
le permite enviar dicha señal a otros equipos
(para enlazar dos o más F1320D, por ejemplo).
(9)
(10)
MIC/LINE INPUT
(9) Conector jack estéreo de 6,3 mm para fuentes
de sonido con el mismo tipo de conector.
(10) Conector XLR balanceado para fuentes de
señal con salida XLR.
(11)
(12)
(13)
Vista lateral del F1320D
(11) Con el interruptor POWER se enciende
elF1320D.
(12) PORTAFUSIBLES. Al reemplazar el
fusible debe hacerlo por uno que reúna
exactamente las mismas características.
(13) La conexión a red se realiza mediante
una toma de corriente estándar. En el
suministro se incluye un cable de red
adecuado. Para evitar bucles de masa es
recomendable alimentar los altavoces
y la mesa de mezclas de la misma toma
decorriente.
Si quiere acceder al manual de
instrucciones completo, vaya a la página
web behringer.com
 Loading...